Microsoft 365 Log Management (3): Connecting to Azure Data Lake Storage Gen2
In the previous post, I covered the flow of managing logs from MDI → Sentinel → Log Analytics API → PowerShell → CSV → BI.
Previous Post:
While exporting logs using PowerShell, I started to wonder:
As we move toward a more serverless cloud environment, managing logs via scheduled PowerShell scripts means I still need to operate a VM, which increases management overhead.
If you’re only considering cost, scheduling PowerShell scripts on a VM and exporting to SharePoint or OneDrive can be cheaper.
However, from a long-term perspective, I believe it’s time to move away from running scheduled PowerShell scripts on VMs and adopt a serverless approach.
Also, visualizing and managing logs with BI tools can provide valuable insights.
With this in mind, I anticipate that connecting to Microsoft Fabric or similar platforms will eventually become necessary.
In this post, I’ll cover how to export logs to Azure Data Lake Storage (ADLS) Gen2 and connect them to BI.
Youtube : Microsoft 365 Log Management (3): How to connect Sentinel logs to Azure Data Lake Storage Gen 2
Step 1. Create an ADLS Gen2 Storage Account
1. Go to Azure Portal → Search for Storage Accounts

2. Create a Storage Account
In Preferred storage type, select Azure Blob Storage or Azure Data Lake Storage Gen2.

3. Hierarchical Namespace - Check Enable hierarchical namespace.

Data Lake Storage Gen2 is suitable for big data analytics and other data analysis scenarios.
4. Complete the creation and verify the storage account


Step 2. Create an Export Rule
1. Go to Log Analytics Workspace → Settings → Data Export → Create export rule
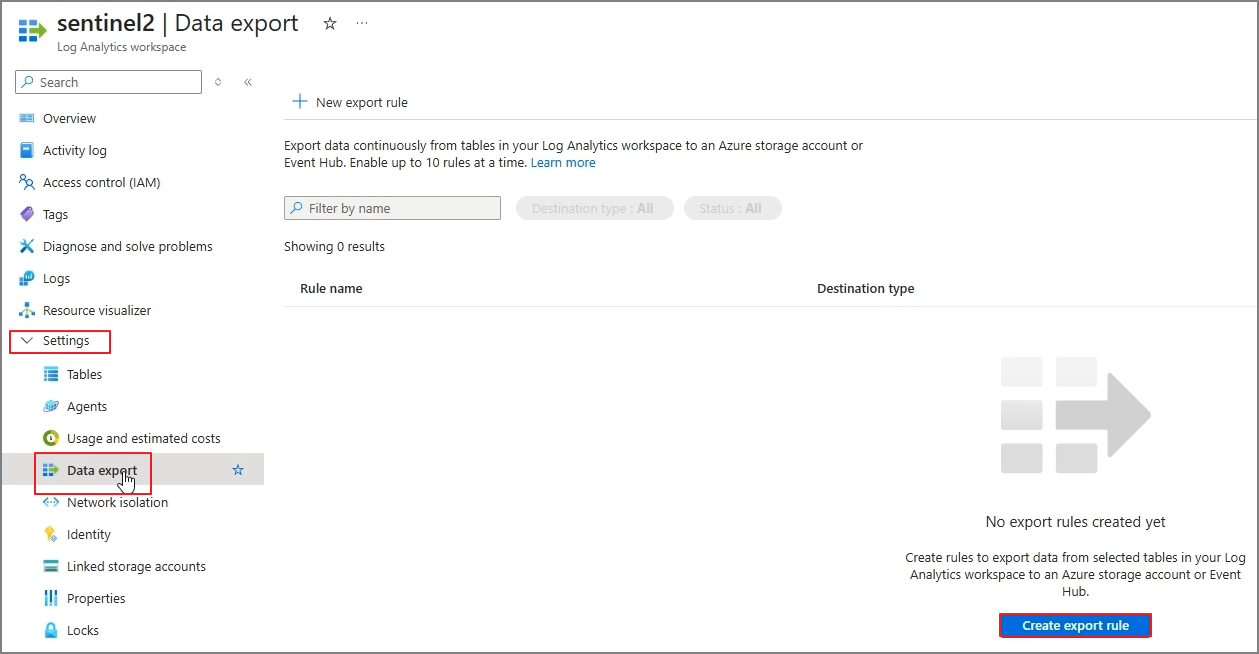
2. Name your rule

3. Select the tables to export
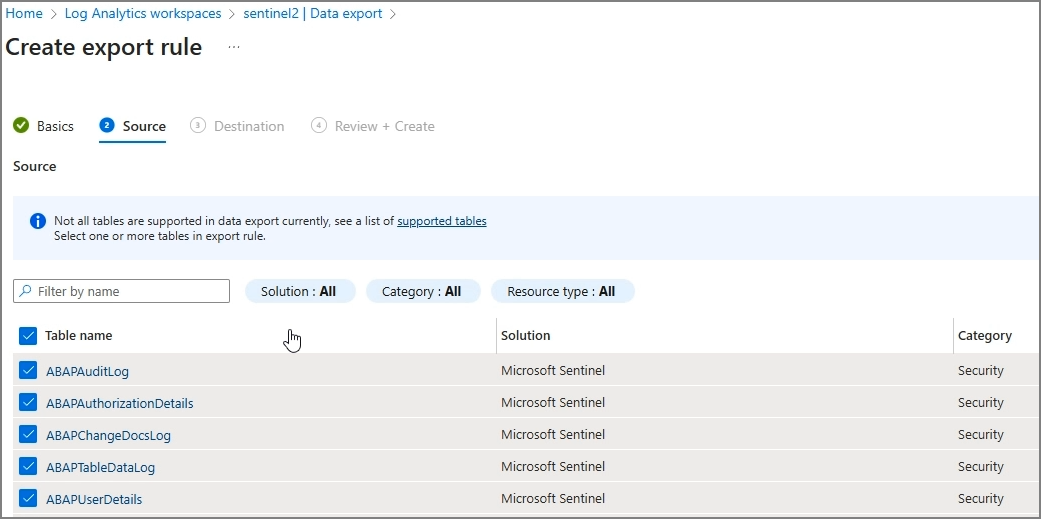
4. Set the destination to the storage account you created
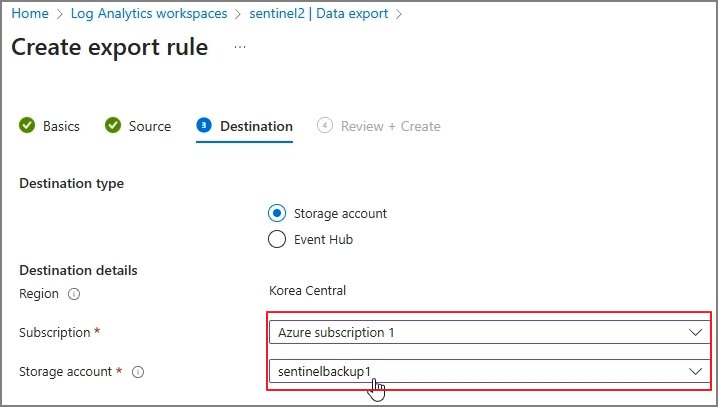
5. Go to Data storage → Containers to check the exported tables

6. Navigate through subfolders to see that exports occur every 5 minutes

Step 3. Connect to Power BI
1. In Power BI Desktop, go to Get data → More

2. Select Azure → Azure Data Lake Storage Gen2

3. You’ll be prompted to enter a URL

4. Find the DFS URL using Azure Storage Explorer
Go to Storage Account → Storage browser → Download and install Azure Storage Explorer

Connect, navigate to the folder path, and open Properties

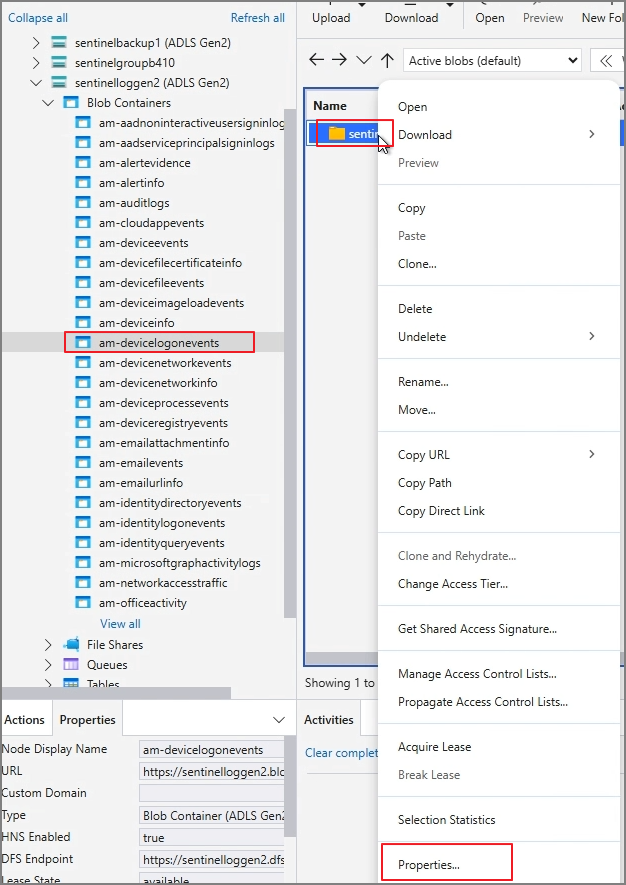
Copy the DFS URL
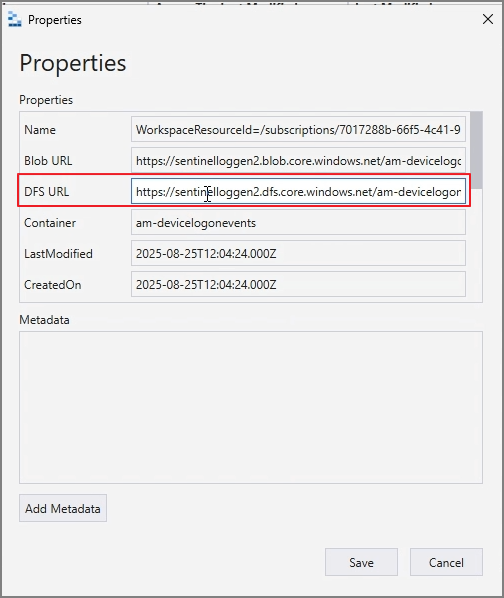
5. Paste the URL into Power BI

6. Enter your credentials (Account Key)
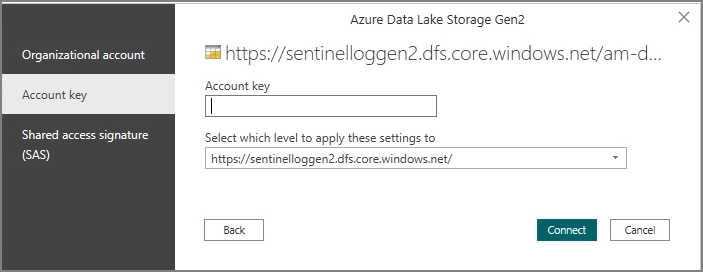
You can find the Account Key under Security + networking → Access keys

7. Connect and then Combine & Transform Data

Unlike saving to SharePoint, where you need to create queries manually, the native connector support makes this process much simpler.

Conclusion
By following these steps, you can export Microsoft 365 logs to Azure Data Lake Storage Gen2 and easily visualize them in Power BI.
If you’re considering a serverless environment and BI integration, this approach offers a more efficient and scalable way to manage your logs in the long run.