Taking advantage of the release of Windows Server 2025, I’m planning to rewrite my previously posted test environment configuration. This time, I’ll pay more attention to creating a YouTube video as well.
Since Windows Server 2016, the methods and UI for configuring a Domain Controller (DC) have remained almost the same. However, engineers who are just starting out often prefer to work with the latest version, and there’s a tendency to assume that if the version numbers differ, the configuration steps might differ too. To address this, I’ve written a configuration guide for Windows Server 2025, even though the content is essentially the same.
This time, I’ll focus on Domain Controller (DC) configuration, and if time permits, I’ll proceed with an Exchange setup as well.
For the virtual machine (VM) specifications, I’ve allocated 4 cores for the CPU and 4GB of RAM. In the past, 2GB used to suffice, but it seems insufficient for recent demands.

Please refer to my previous posts or videos for instructions on installing Windows Server 2025 and performing Sysprep.
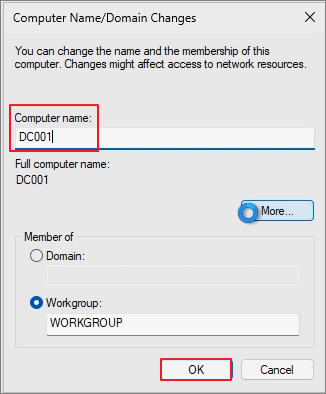
Navigate to Server Manager -> Local Server -> Click on Computer Name.

Change

Change the computer name to something that clearly identifies it as a Domain Controller. -> The system will reboot.
Local Server -> Ethernet

Right-click on Network Adapter -> Select Properties.

Select IPv4.

Enter the IP address according to your environment. Set the DNS to point to the IP address of the Domain Controller itself.

Server Manager -> Dashboard -> Add roles and features

Next

Next

Next

Check Active Directory Domain Services.

Add Features

Next
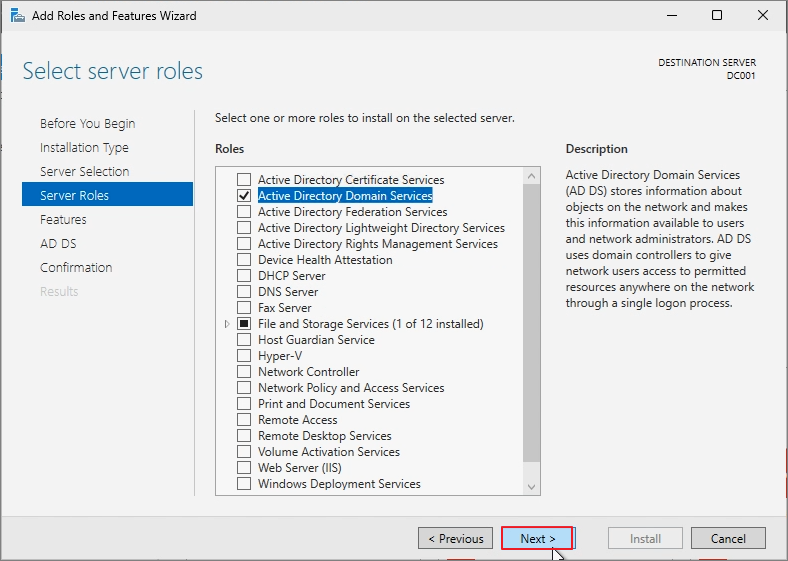
Next

Next

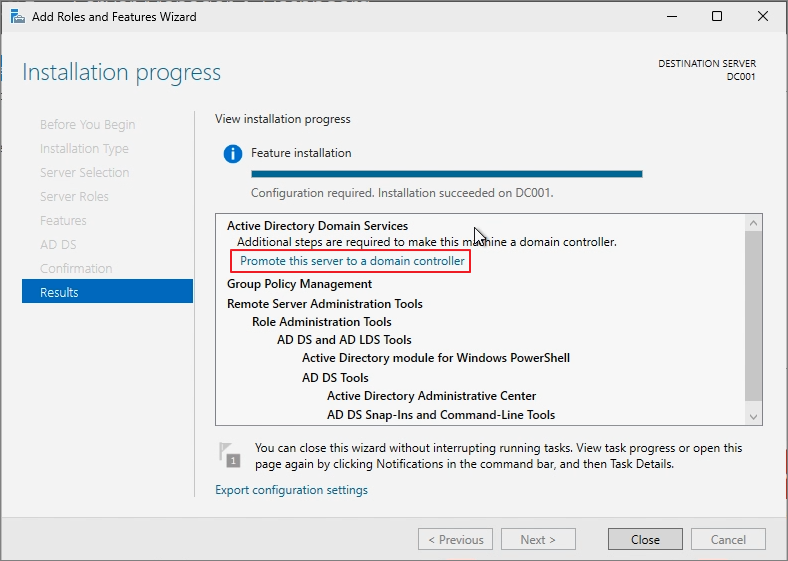
Install

Promote Domain Controller
Add a new forest -> Root domain name 입력 -> Next
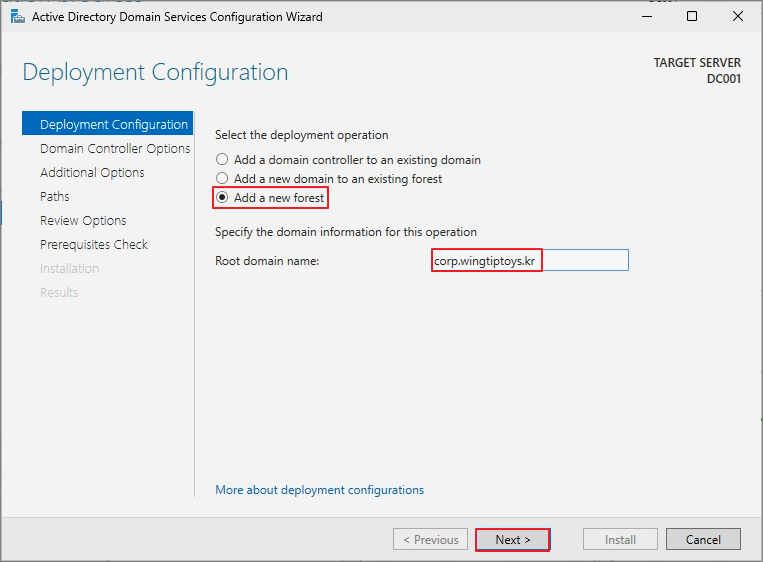
For reference, the reason for adding "Corp" before the domain name is based on Microsoft's Best Practices. From a personal perspective, adding "corp" has the following advantages:
1. It allows for separation of internal and external DNS, as the root domain might serve as the homepage in browsers.
2. Using ".local" in domains like "contoso.local" prevents the use of public certificates.
After creating the DSRM Password, proceed to Next. Until Windows Server 2022, the functional level was set to 2016, but it has now been upgraded to 2025 in Windows Server 2025.
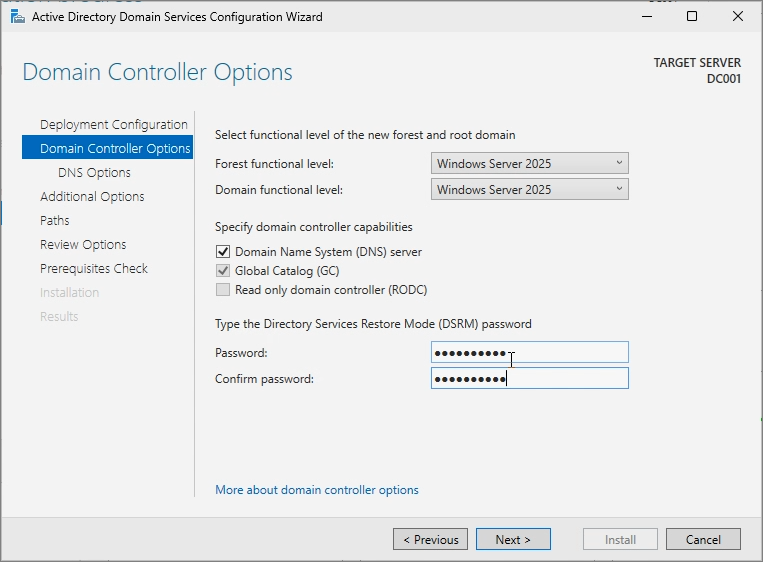
Next
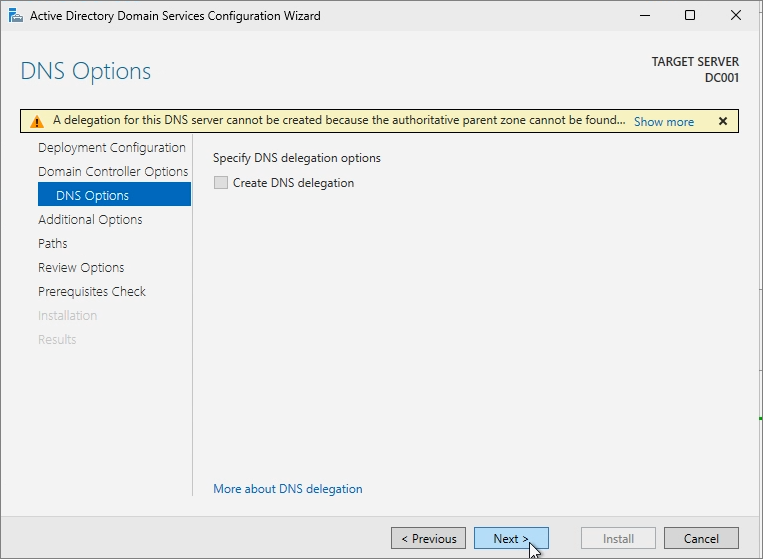
Next

Next

Next
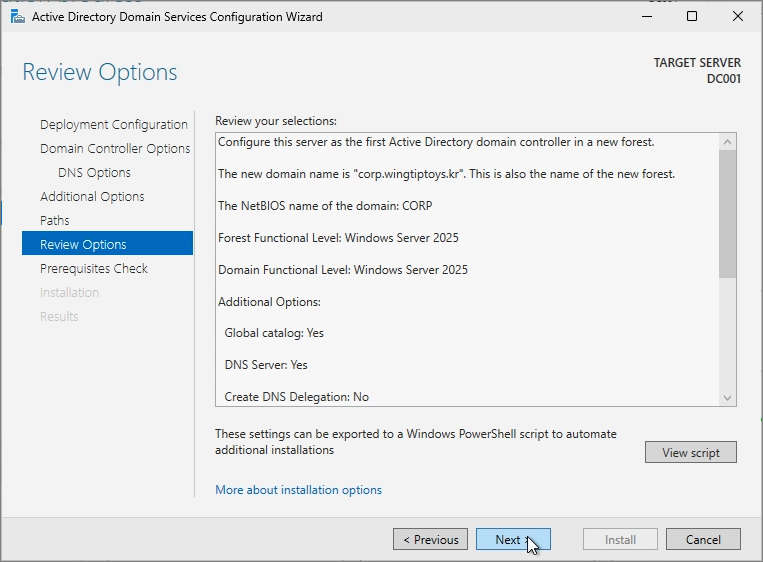
Install
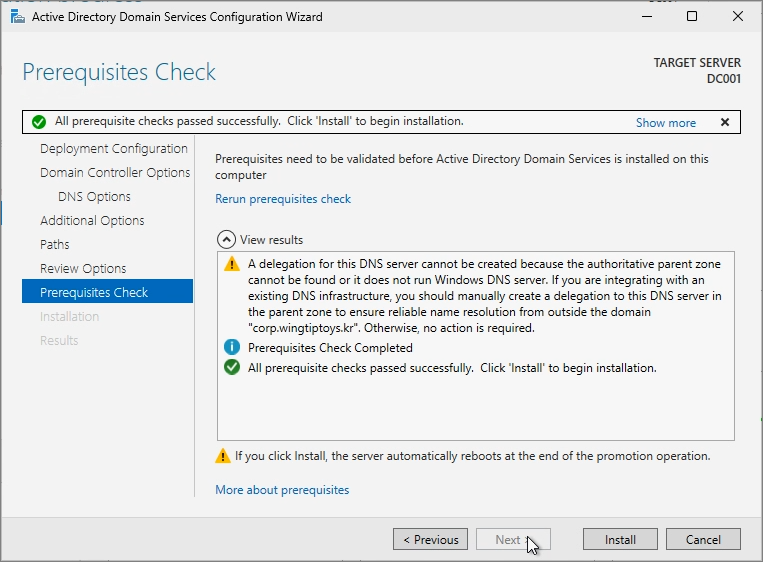
DC configuration is complete.

Click Close, and the system will reboot shortly after.

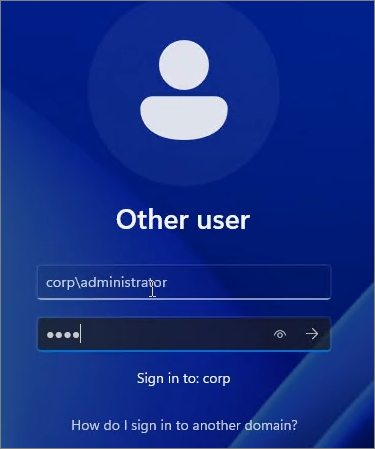
Log in using the Domain account as shown below.
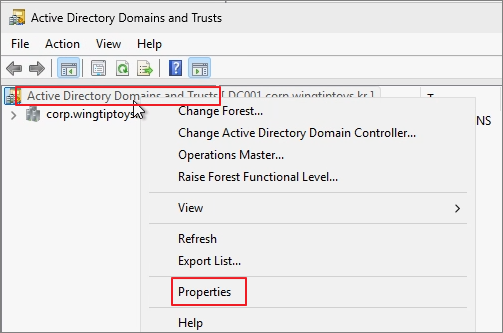
Active Directory Domains and Trusts

Right-click on Active Directory Domains and Trusts -> Select Properties.
Enter the domain to be used for user accounts -> Click Add -> Click OK.

Run Active Directory Users and Computers (ADUC).

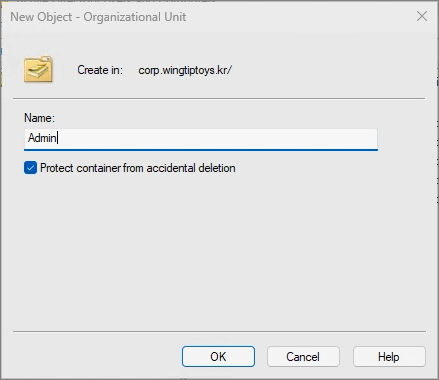
Right-click on the Domain -> Select New -> Choose Organizational Unit (OU).

Create an Organizational Unit (OU) for service accounts.
Right-click on the newly created OU -> Select New -> Choose User.

Create an Admin account to be used on the DC as shown below. (It is recommended not to use the default Administrator account for security purposes.)

Enter the password -> Click Next.

Finish

Right-click on the newly created account -> Select Properties.

Go to the Member Of tab -> Click Add -> Search for and add the following groups:

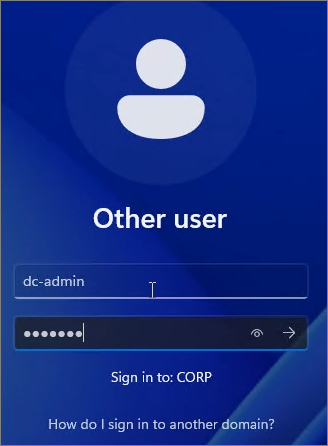
Sign out and verify if you can log in using the newly created account.
Proceed with setting up a Secondary DC. While not mandatory in a test environment, having at least two Domain Controllers is essential in a production environment for redundancy and reliability.

As before, change the Computer Name.

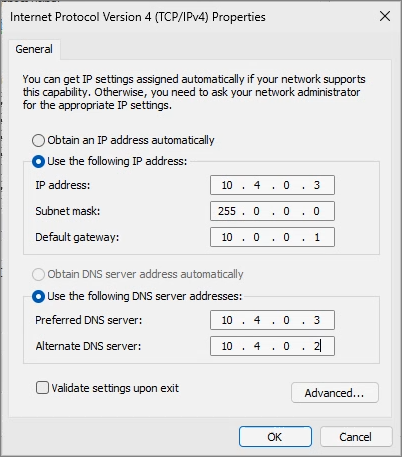
Set the DNS of the Network Adapter to point to the Main DC.

Server Manager -> Local Server -> WORKGROUP
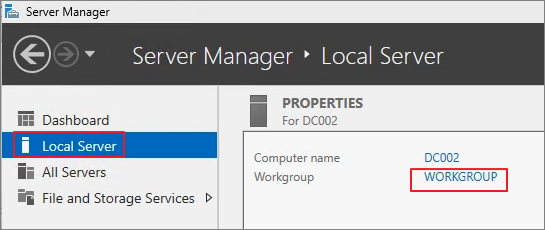
Change

Enter the Domain -> Click OK.

Enter the DC Service Account that was previously created.

Sign in

Add roles and features

Proceed with the installation of Active Directory Domain Services Roles in the same manner as on the Main DC.

Unlike before, select Add a domain controller to an existing domain and proceed with the configuration.

Enter the DSRM Password -> Click Next.
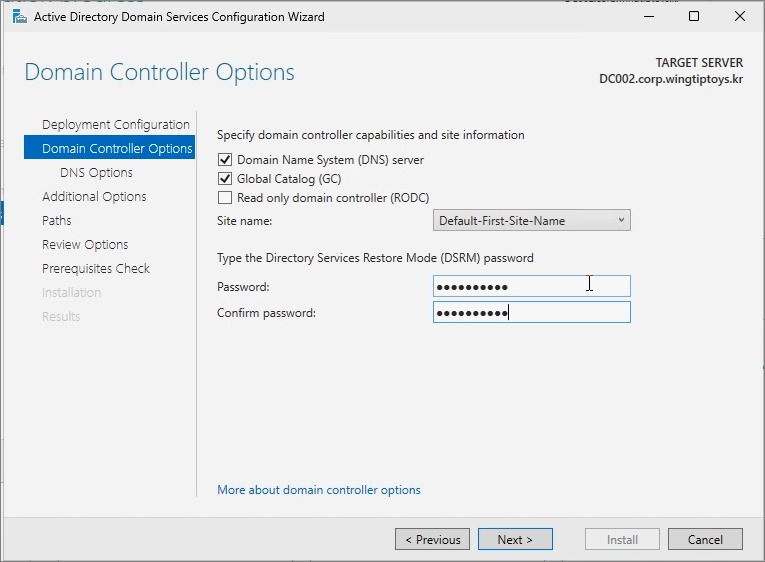
Next

Next

Next

Next
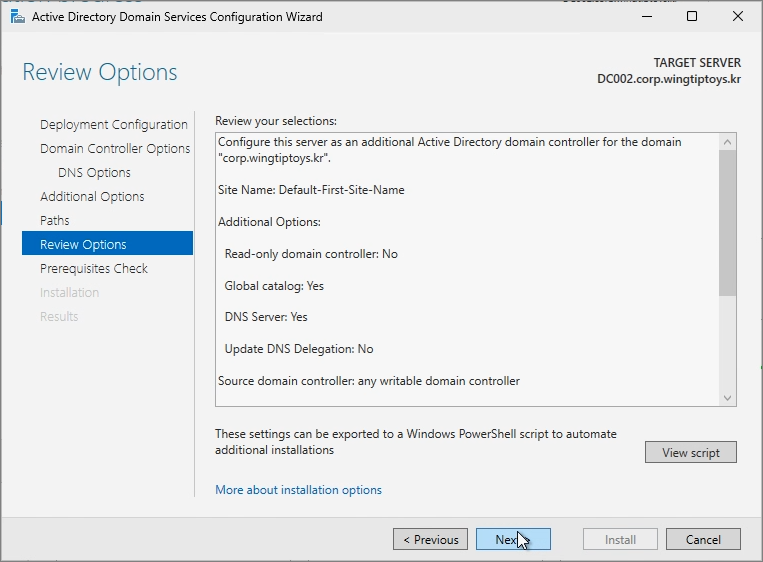
Click Install -> Once the installation is complete, the system will reboot.

For the Secondary DC, update the DNS settings so that the Primary DNS points to itself.
In Active Directory Users and Computers (ADUC), you can verify that both Domain Controllers are listed.

This concludes the post.
'Windows Server' 카테고리의 다른 글
| Activate Windows Server VMs Automatically on Hyper-V (AVMA Explained) (0) | 2026.01.03 |
|---|---|
| ADFS & WAP. Upgrade & Migration From 2022 to 2025 (Ver. Eng) (1) | 2025.07.12 |
| Windows Server 2025. Domain Controller upgrade From 2022 to 2025 (English) (0) | 2024.11.16 |
| Windows Server 2025. Install & Sysprep (0) | 2024.11.09 |