반응형

In this post, we will proceed with enabling and testing the Verified ID feature provided by Microsoft.
 

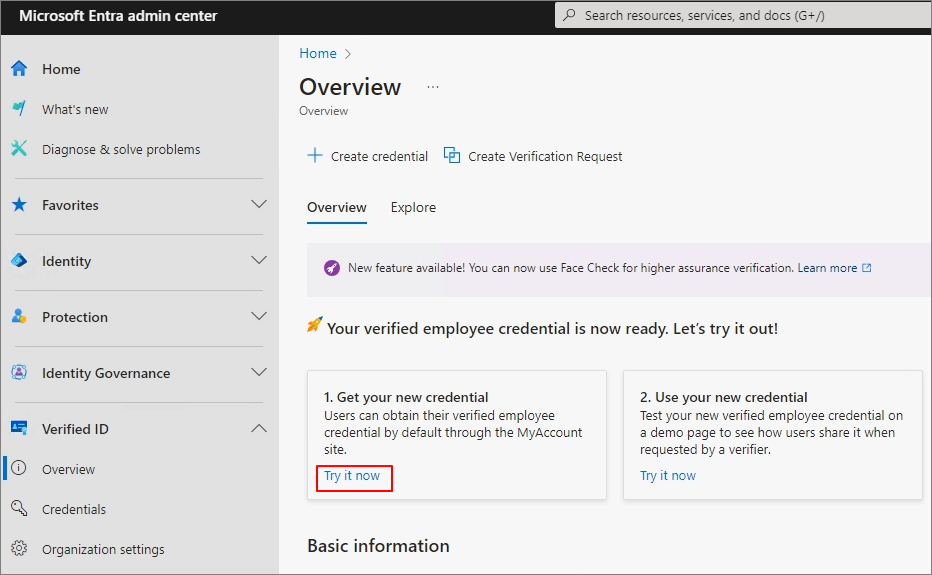
Entra Admin Center - Verified ID -> Overview -> Get Started


Provisioning


1. Get your new credential -> Try it now
 

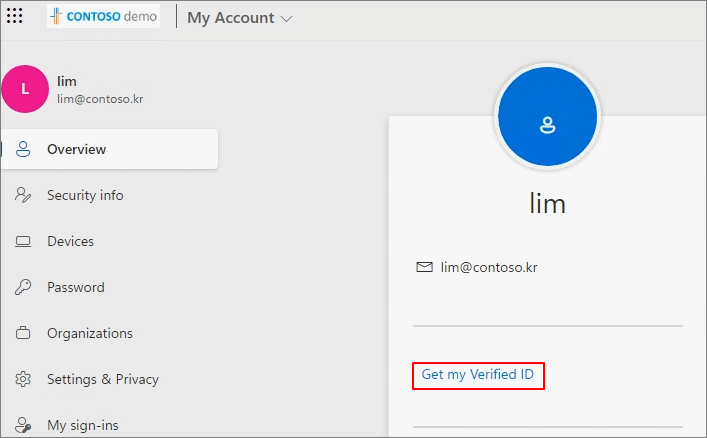
Get my Verified ID


A QR Code is generated.


Run the Authenticator on mobile.


Verified ID -> Scan a QR code


Scan the QR code on the screen.


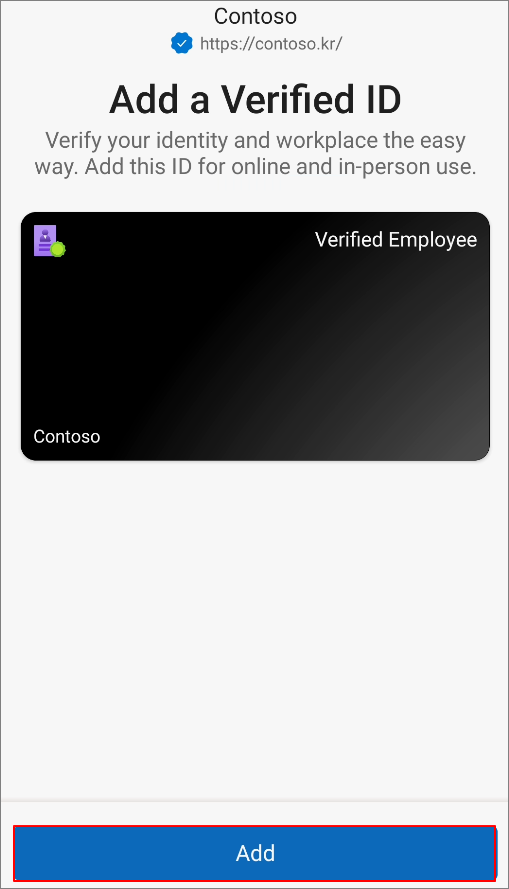
Add


Completed the addition.


You can check the record by clicking the issued ID.


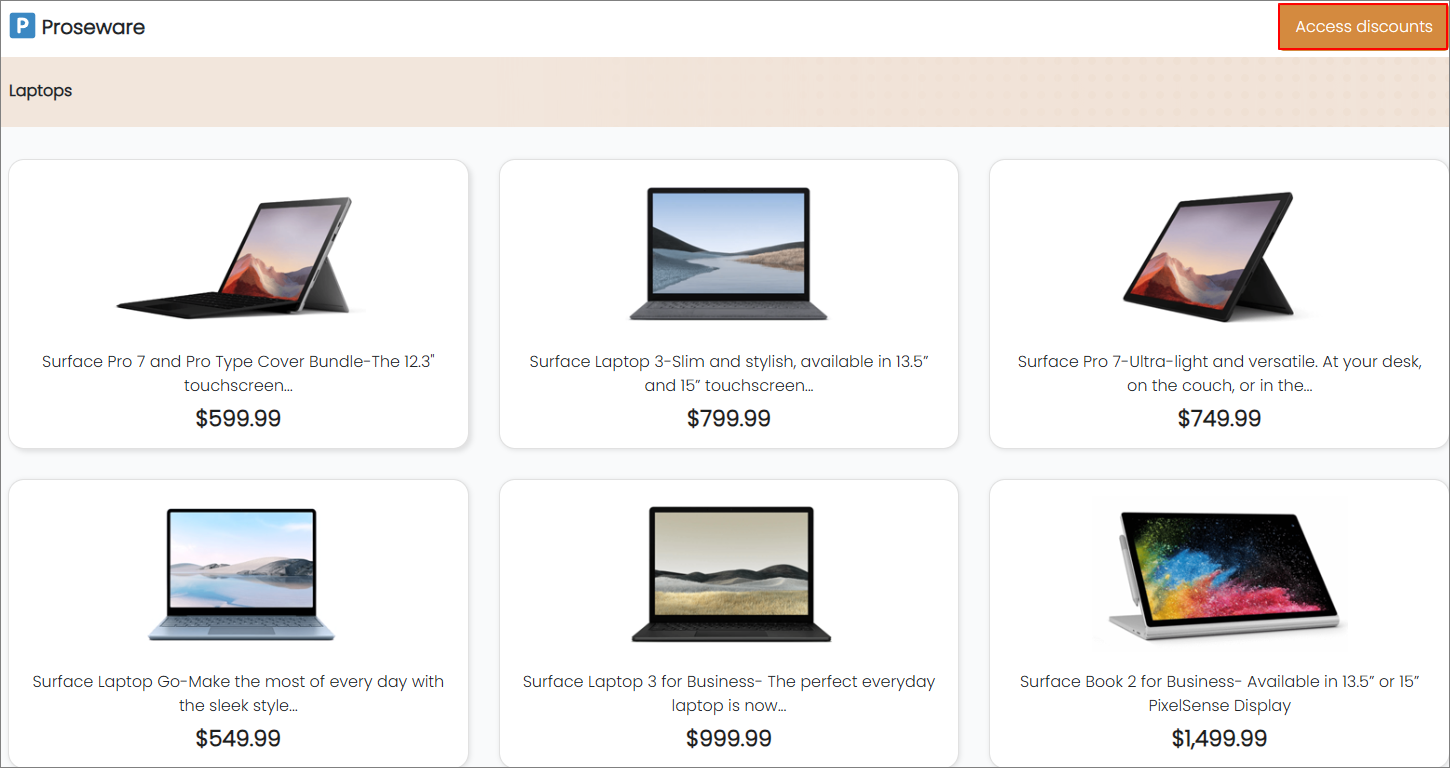
Clicking "2. Use your new credential -> Try it now" will take you to a page where you can test the Verified ID.


Access discounts


You can log in using a DID instead of account information. Verify my Employee Credential.


QR Code


When the camera recognizes the QR code, the Authenticator is launched through the URL.


When the camera recognizes the QR code, the Authenticator is launched through the URL.


Click "Share" to send the ID information.


Verification completed.


In the Activity section, you can check where your ID has been used.


The test page can be verified with a scenario where employee discounts are applied, as shown below.

반응형
반응형

Last post

2024.07.06 - [Microsoft 365/Entra ID] - Microsoft Entra ID. Set up tenant restrictions v2 by GPO (English)


Continuing from the previous post, this time we will proceed with setting tenant restrictions using GSA.


Youtube (English)

https://youtu.be/PIfHu4yPjN4


Step 1 is the same process as in the previous post.

The client PC has already been joined to Entra ID in advance.


Step 1: Configure default tenant restrictions v2

Entra Admin Center > Cross-tenant access settings > cross-tenant access settings > Default settings


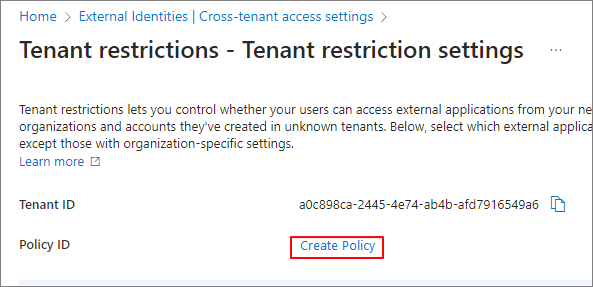
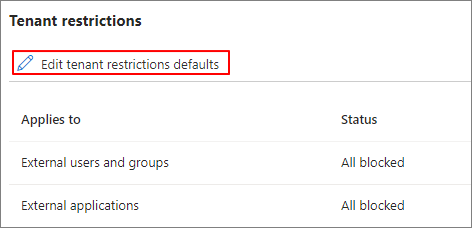
Edit tenant restrictions defaults


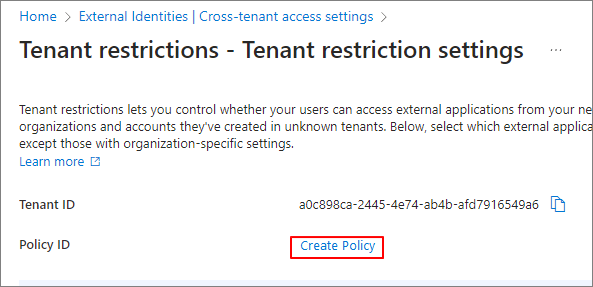
Create Policy


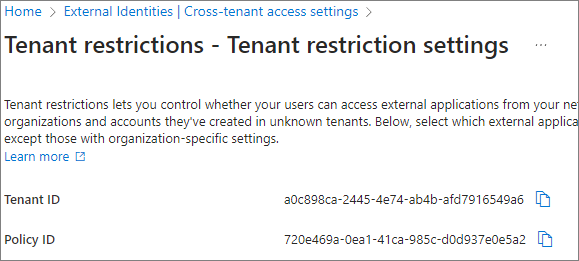
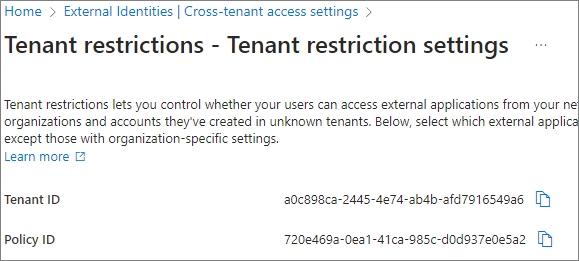
The Policy ID is generated as shown below. Make sure to copy each value and keep them.


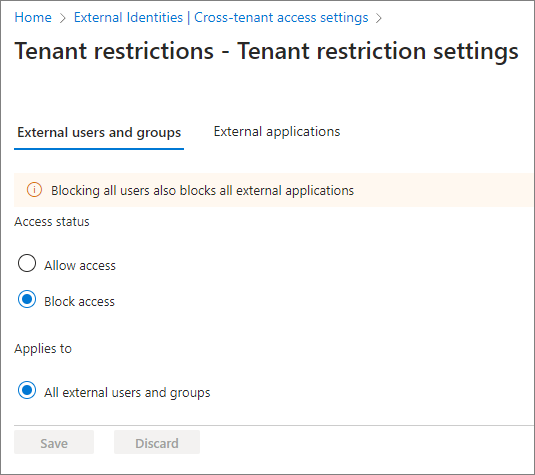
To set up a blocking policy for external accounts, configure it as shown below (default settings).


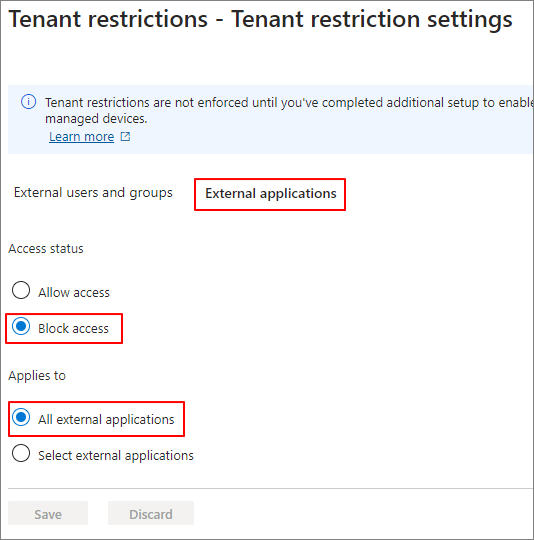
To block all external apps, configure the settings as shown below.


Step 2: Configure GSA

Click on Global Secure Access -> Activate to enable it.


Connect -> Traffic forwarding -> Activate each profile.


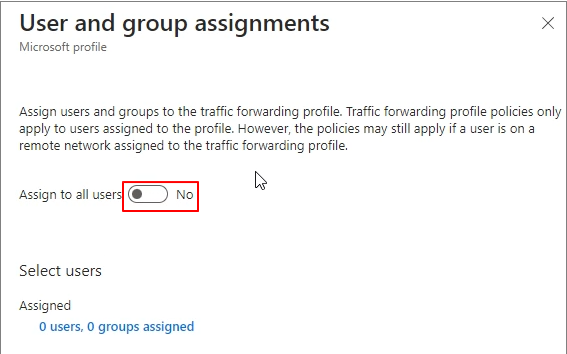
Proceed with assigning users and groups.


Assign to all users -> Yes


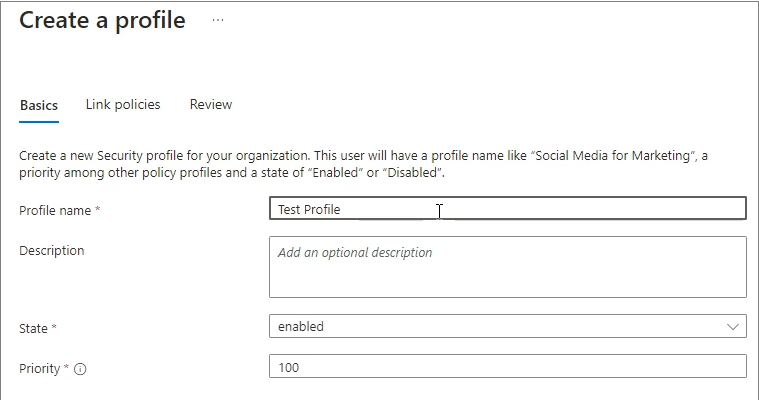
Secure -> Security profiles -> Create profile


Enter the profile name.


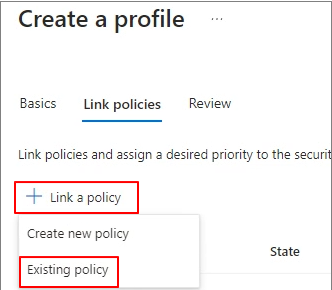
Link policy -> Existing policy


Link the default policy -> Proceed with the profile creation process.


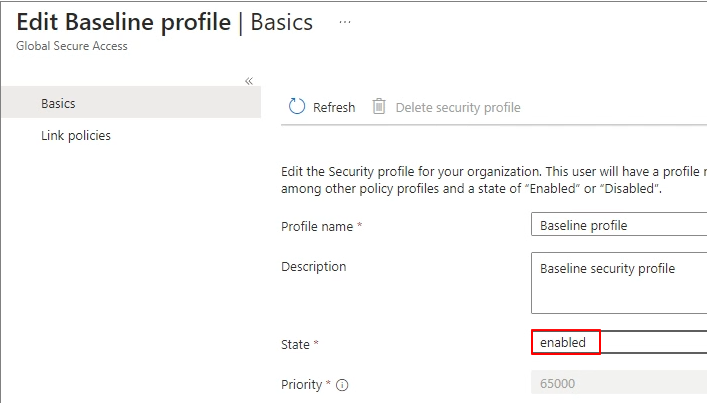
Baseline profile


Change to Enabled status.


Step 3: Install GSA Client

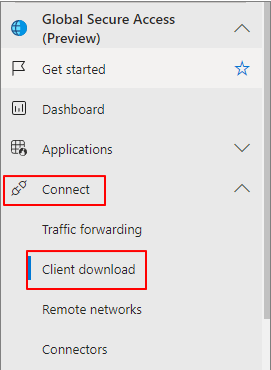
Connect -> Client download


Download client (When deploying to actual users, Intune can be utilized.)


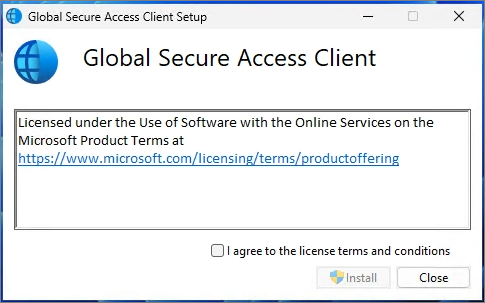
Proceed with the installation process of the GSA Client.


Sign in


Verify the connection status as shown below.


When logging in to a different tenant in Chrome, you can confirm that it is blocked as shown below.


The downside of the preview version is that the client has a Pause button.


Once officially released, it is expected to be built into the Windows service, similar to MDE.


반응형
반응형

I will discuss Tenant restriction settings.

The primary purpose of Conditional Access is to prevent company accounts from being accessed on personal devices. However, Conditional Access cannot prevent other company accounts from being accessed on company devices.

Of course, if a company device can access Naver Mail and Google Drive, it means the company is not very concerned about data leakage, and you may disregard this post.

To use M365, you need to open MS-related URLs such as office.com. Tenant Restriction is a concept used to prevent access with other company or personal accounts (such as outlook.com) during this time.


Youtube (English)

https://youtu.be/z-sVlZoz3y8


Technical article

Configure tenant restrictions - Microsoft Entra ID - Microsoft Entra External ID | Microsoft Learn


There are three main methods:

  1. GSA
  2. Company Proxy Equipment
  3. GPO

The method using GSA requires a prior understanding of GSA.

I will cover that part separately later.

In this post, I will apply tenant restrictions using the third option, GPO.


Step 1: Configure default tenant restrictions v2

Entra Admin Center > Cross-tenant access settings > cross-tenant access settings > Default settings


Edit tenant restrictions defaults


Create Policy


The Policy ID is generated as shown below. Make sure to copy each value and keep them.


To set up a blocking policy for external accounts, configure it as shown below (default settings).


To block all external apps, configure the settings as shown below.


Step 2: Enable tenant restrictions on Windows managed devices (preview)

In the technical documentation, there are guidelines as shown below.

Tenant restrictions V2 on Windows is a partial solution that protects the authentication and data planes for some scenarios. It works on managed Windows devices and does not protect .NET stack, Chrome, or Firefox. The Windows solution provides a temporary solution until general availability of Universal tenant restrictions in Microsoft Entra Global Secure Access (preview).

-> Although the content is difficult to understand, it can be interpreted as indicating that the feature will be provided in a different way in the future. Currently, it is in the preview stage.


Download the ADMX files for the latest Windows GPO policies.

Download Administrative Templates (.admx) for Windows 11 2023 Update (23H2) from Official Microsoft Download Center


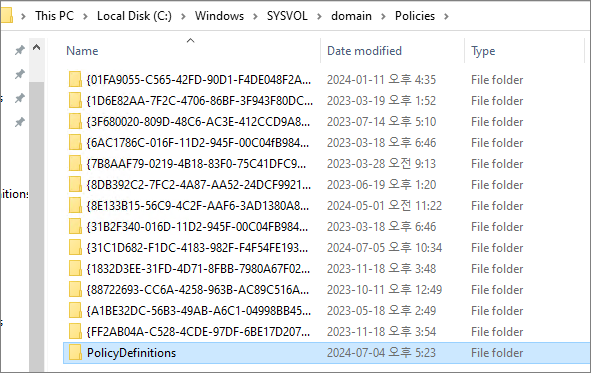
Once installed, the policy files will be saved to the following location.


Depending on the method of policy deployment in AD, copy the PolicyDefinitions folder to the appropriate location with only the necessary languages. (This part of the policy is related to AD, so we will not cover it here.)


Run gpmc.msc on the Domain Controller (DC).


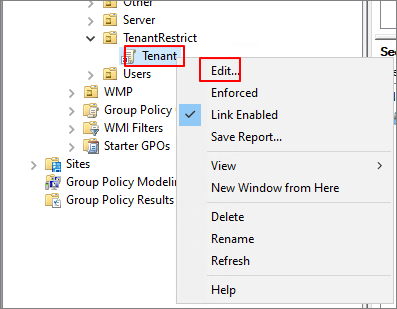
Create a policy in the Organizational Unit (OU) that you will use for testing. Right-click and select "Edit".


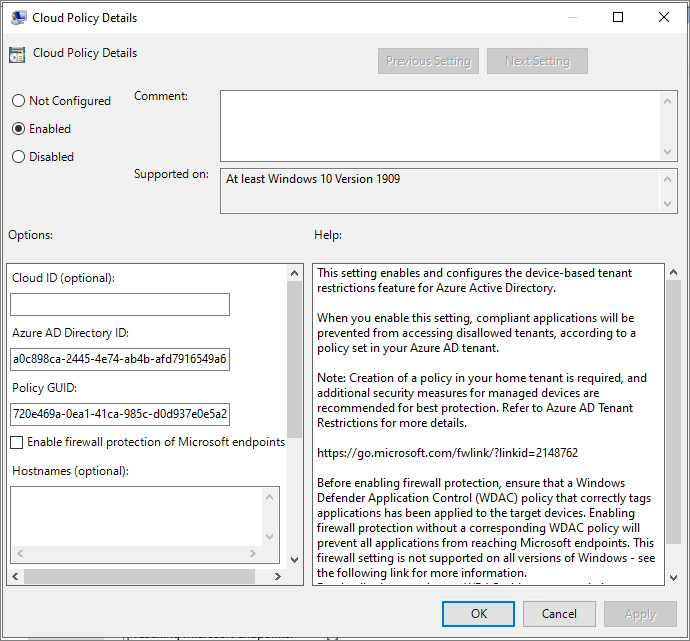
Computer Configuration > Administrative Templates > Windows Components > Tenant Restrictions


Configure the settings as shown below.


Attempt to log in with a personal account on Edge.


Verify that access is blocked as shown below.


You can also see that access is blocked when attempting to log in with another tenant account.

반응형
반응형

There has always been a need to synchronize address books (GAL) between companies in scenarios such as M&A, affiliated companies, or group companies, where using a single tenant is not possible. Traditionally, this was achieved by setting up servers like Microsoft Identity Manager (MIM) on an On-Premise Exchange Server, creating objects between ADs to synchronize address books. Alternatively, it could be implemented through HR integration solutions.


However, adopting MIM or HR integration solutions can be prohibitively expensive and requires specialized knowledge for management, making it very burdensome.


Recently, it has become possible to synchronize address books with Cross-tenant Synchronization. Specifically, this functionality automates the invitation of Guests.


https://youtu.be/-HtT_uuDul0


The following content was written based on the technical documentation below.

Configure cross-tenant synchronization - Microsoft Entra ID | Microsoft Learn


Settings are configured separately for the Source Tenant and the Target Tenant.

Step 1: Plan your provisioning deployment

First, collect the information for the Source Tenant and the Target Tenant.

Source Tenant

Domain: Contoso.kr

Tenant ID: a0c898ca-2445-4e74-ab4b-afd7916549a6


Target Tenant

Domain: fabrikam.kr

Tenant ID: afab079d-1f08-4de3-881e-435e497f923f


Step 2: Enable user synchronization in the target tenant


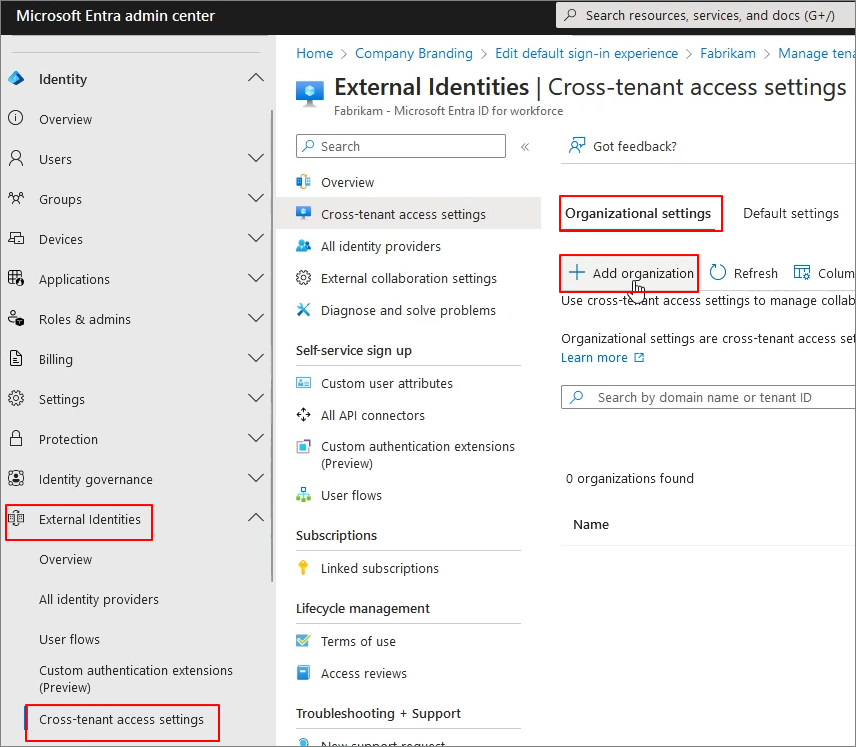
Entra Admin Center > External Identities > Organizational settings > Add organization


Enter the Source Tenant ID information. > Add


Inbound access > Inherited from default


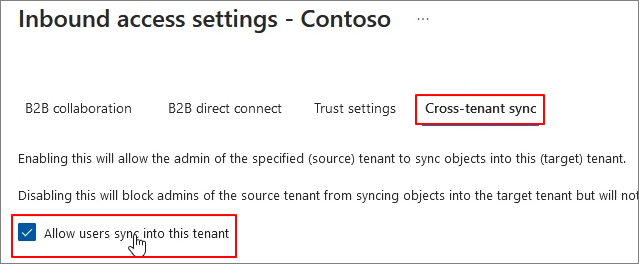
Allow users sync into this tenant > Check


Step 3: Automatically redeem invitations in the target tenant

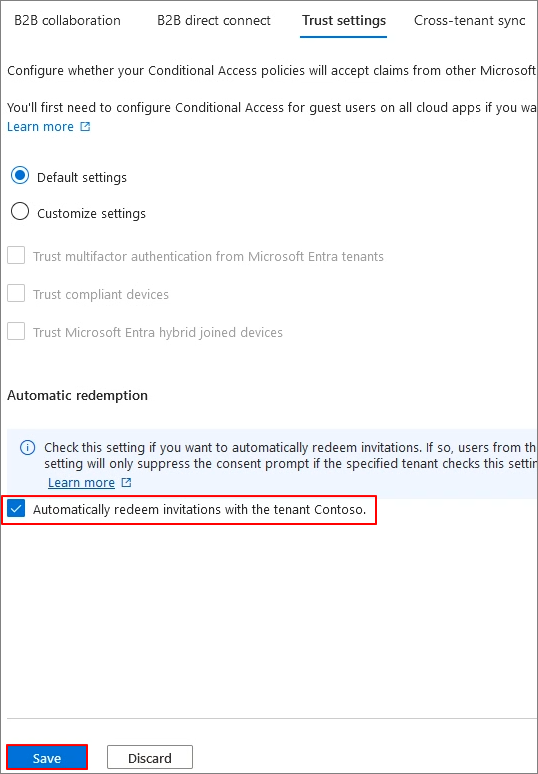
Trust settings > Automatically redeem invitations with the tenant [Tenant Name] > Check > Save


Step 4: Automatically redeem invitations in the source tenant

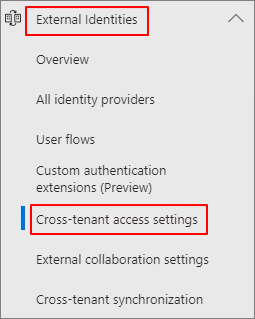
Entra Admin Center > External Identities > Cross-tenant access settings


Add organization


Enter Target Tenant ID > Add


Outbound access > Inherited from default


Trust settings > Automatically redeem invitations with the tenant Fabrikam > Check > Save


Step 5: Create a configuration in the source tenant


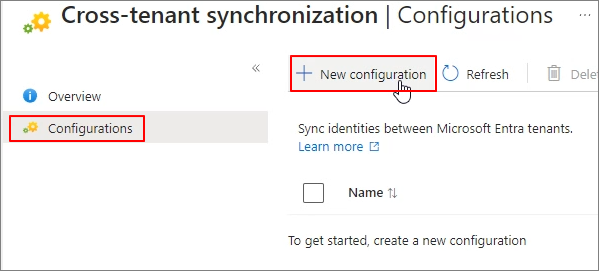
Cross-tenant synchronization


Configurations > New configuration


Specify the configuration name. > Create


Step 6: Test the connection to the target tenant

Get started


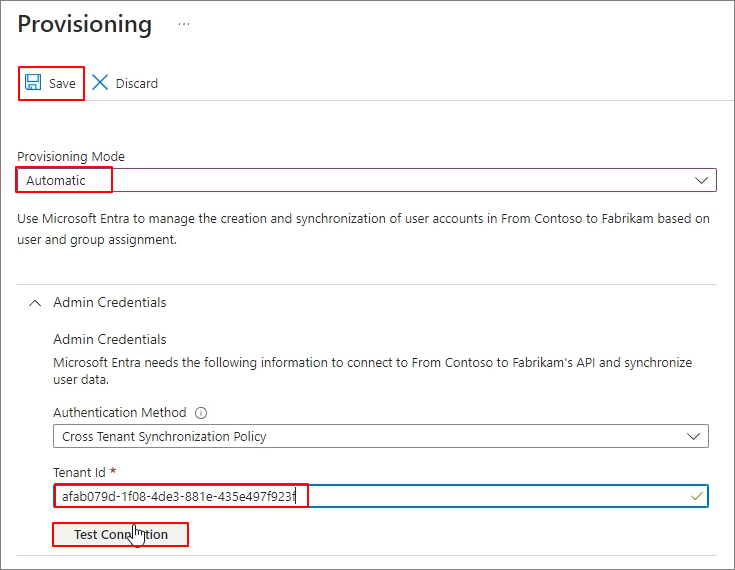
Provisioning Mode: Automatic > Admin Credentials > Tenant Id: Target Tenant ID > Test Connection > Save


Step 7: Define who is in scope for provisioning (Source Tenant)

Provisioning > Settings > Confirm Scope  > Sync only assinged users and groups:

This means specifying only certain users or groups to synchronize.


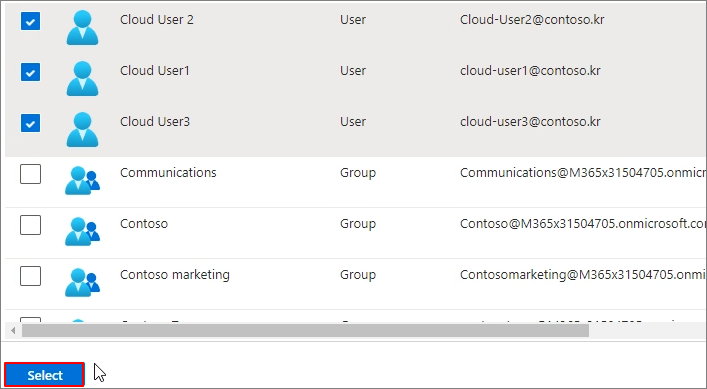
Users and groups  -> Add user/group


None Selected


Specify the target. > Select > Assign


Step 9: Review attribute mappings

If, for various reasons, you do not want to synchronize specific attributes, proceed as follows.


Provisioning > Mappings > Provision Microsoft Entra ID Users


You can remove some items except for the required fields.


Step 10: Start the provisioning job

Start provisioning


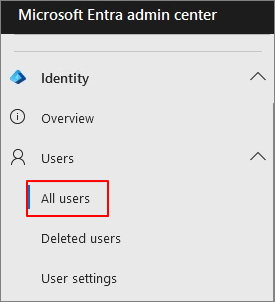
Target Tenant > Entra admin center > Users > All Users


You can verify that they are added as guests as shown below.


You can also verify this in the Exchange Admin Center as shown below.


You can also verify this in the address book as shown below.


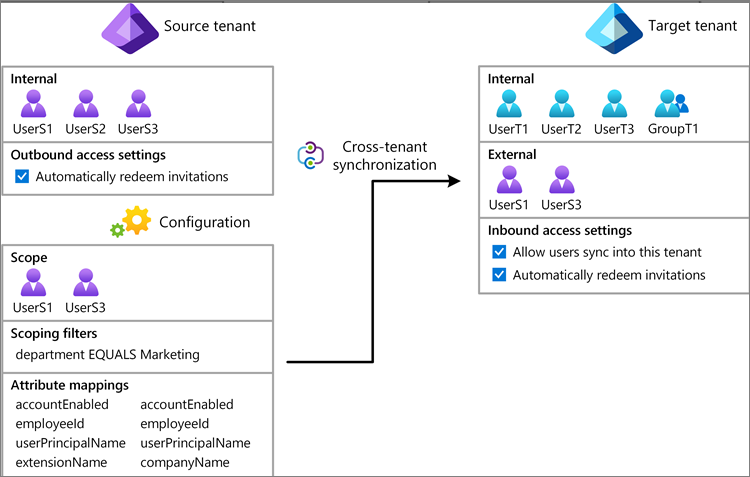
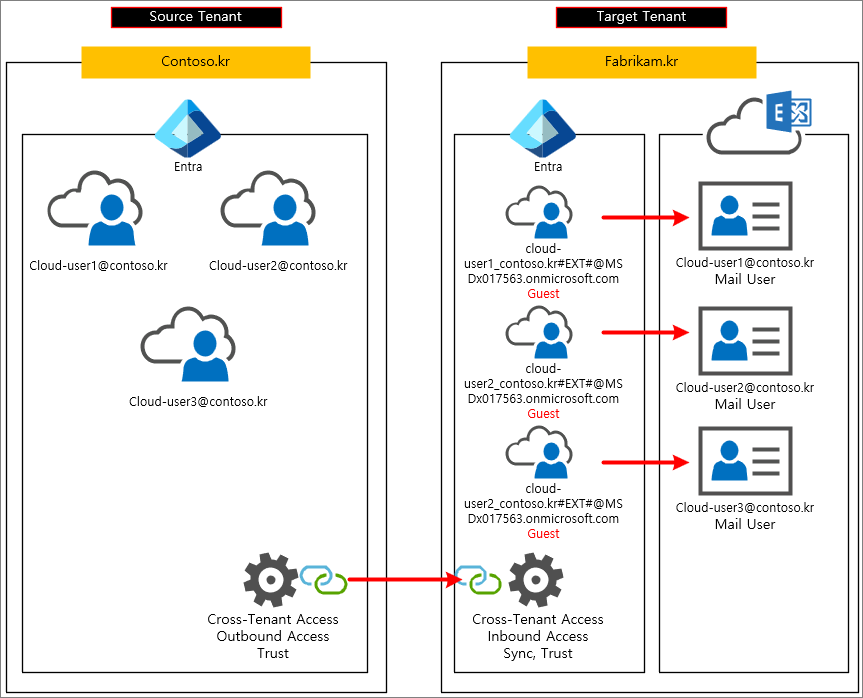
Tenant-to-tenant synchronization settings are configured as follows: In the Source Tenant, set up the Outbound settings, and in the Target Tenant, set up the Inbound settings. This synchronization process results in Guest accounts. Since Guest accounts have Mail User attributes, they can be verified in the address book.

반응형

+ Recent posts