Since both the article and the video required updates, and several new features have recently been added, I decided to rewrite this guide as the 2026 edition.
GSA functionality is broadly divided into three profiles:
Microsoft Traffic
Internet Access
Private Access
Among them, Microsoft Traffic is designed to manage Microsoft service traffic. One of its core capabilities is Tenant Restriction, which helps prevent data leakage through personal accounts or unauthorized external tenants.
Even by using only Microsoft Traffic, organizations can block personal accounts and control access paths to external tenants at the network layer.
The following Microsoft documents were referenced during this configuration:
App Control for Business is still commonly referred to as WDAC in the field. It's frequently compared with AppLocker. Here's how they differ:
App Control for Business vs. AppLocker
Item App Control for Business (WDAC) AppLocker
App Control for Business (WDAC)
AppLocker
Introduced
Windows 10+
Windows 7+
Enforcement layer
Kernel / boot stage
User mode
Bypass difficulty
Very high
Relatively low
Controlled objects
EXE, DLL, scripts, drivers, etc.
EXE, DLL, scripts
Trust criteria
Signature, hash, path, ISG
Signature, hash, path
Managed Installer
Supported
Not supported
ISG
Supported
Not supported
Management tools
Intune, SCCM, PowerShell, etc.
GPO-centric
Microsoft recommendation
Preferred for new deployments
Secondary use
Key Difference
While AppLocker operates as a user-mode policy, WDAC supports kernel-level enforcement based on Code Integrity. That's the most significant distinction.
2. Creating a Policy
WDAC requires you to create policies in XML format. Microsoft provides a dedicated tool for this.
Installing the App Control Policy Wizard
You can download the Microsoft App Control Wizard
and use the Policy Creator to build XML-based policies.
Operationally, the workflow is: deploy a Base Policy → supplement it with Supplemental Policies.
Note that Supplemental Policies can only add Allow rules — they cannot lift blocks defined in the Base Policy, nor can they add new deny rules.
Operational Structure
The typical flow is:
Deploy Base Policy ↓ Add exceptions via Supplemental Policy
Notes on Supplemental Policies
Can add Allow rules
Cannot remove existing Block rules
Cannot add new Deny rules
In other words, all blocking (Deny) must be designed at the Base Policy level.
This post does not cover Supplemental Policy deployment.
2.1 The Three Base Templates
The wizard provides three templates out of the box:
Template Allowed scope Security Flexibility
Templates
Boundaries
Security
Flexible
DefaultWindows
Only essential Windows binaries
High
Low
AllowMicrosoft
+ All Microsoft-signed apps
Medium
Medium
SignedAndReputable (ISG)
+ Reputable third-party apps
Lower
High
Think of these three as a spectrum — stricter on the left (DefaultWindows), more flexible on the right (SignedAndReputable). Pick the balance that fits your organization's security requirements and operational flexibility.
You can compare the folder contents before and after application.
BeforeAfter
Testing
Try launching Chrome.
Result: Blocked.
Checking Policies via PowerShell
CiTool.exe -lp
You can also verify the applied policies using this PowerShell command.
5. Designing a Real-World Policy
In practice, most enterprise environments start with AllowMicrosoft or SignedAndReputable as the Base Policy, then layer in Allow rules for LOB applications and Deny rules for risky binaries as needed.
DefaultWindows is theoretically the most secure, but the exception-management overhead is usually too high for general office environments. It tends to be reserved for regulated industries or fixed-function devices.
5.1 Designing an AllowMicrosoft Policy
Template Creation
Select Allow Microsoft Mode.
Confirming Chrome Is Blocked
Out of the box, Chrome execution is blocked.
Checking the Event Log
You can review enforcement events at:
Applications and Services Logs → Microsoft → Windows → CodeIntegrity → Operational
The log will show that chrome.exe failed to meet the conditions required by the applied Policy ID and was therefore blocked.
For whitelist operation, I chose not to modify the template itself — instead, I added only the necessary exception paths. Below is an example of how I configured those exceptions.
Adding Whitelisted Path Exceptions
Use Add Custom.
Rather than creating rules path-by-path, I registered the main exception paths using wildcards (*) for broader coverage. This dramatically reduces maintenance overhead — you don't need to update the policy every time a subfolder or new file is added.
That said, overly permissive wildcards can become bypass points for malware, so it's essential to limit wildcards to the narrowest scope actually needed.
Once the Allow rules are complete, deploy the policy.
Result
Chrome now launches successfully.
Any files outside the allowed paths are still blocked. For example, running a Chrome installer from the desktop will be blocked. This effectively prevents users from installing arbitrary applications. If needed, you can add paths like Downloads to the Allow rules to permit installation.
You can confirm in the event log that execution was blocked by policy.
What This Achieves
This structure delivers:
Prevention of arbitrary application installation
Execution limited to approved paths only
5.2 Designing a SignedAndReputable Policy
Finally, let's look at Signed and Reputable Mode.
Template Selection
Select Signed and Reputable Mode.
Confirming Policy Application
Check the applied policy files and review the event log.
Testing Chrome Execution
Chrome runs successfully — allowed based on ISG reputation.
6. ISG (Intelligent Security Graph)
ISG is a reputation-based allow mechanism that leverages Microsoft's global security signals to determine whether an application can be trusted.
For organizations with no prior experience running whitelist-based policies, starting with this template is usually the most realistic option.
Most IT environments operate on the principle of "allow broadly by default, block only specific problematic applications" — and the SignedAndReputable mode fits this pattern best.
7. SignedAndReputable Operational Design Flow
Step 1
Deploy the SignedAndReputable Base Policy.
Step 2
Enable Managed Installer — this automatically trusts applications deployed via Intune.
Step 3
Add Allow rules for key execution paths.
Step 4
Add Deny rules for specific risky applications (for example, WinRAR).
Result
Chrome → Allowed
WinRAR → Denied
Important
Deny rules take precedence over Allow rules.
Monitoring via Advanced Hunting
If your devices are onboarded, you can monitor enforcement events through Advanced Hunting:
DeviceEvents
| where ActionType in ("AppControlCodeIntegrityPolicyAudited",
                       "AppControlCodeIntegrityPolicyBlocked")
| summarize
    AuditCount = countif(ActionType endswith "Audited"),
    BlockCount = countif(ActionType endswith "Blocked"),
    LastSeen = max(Timestamp)
    by DeviceName, FileName, FolderPath
| sort by AuditCount + BlockCount desc
Final Thoughts
In my opinion, the most practical starting point is the combination:
SignedAndReputable + Allow rules for key execution paths + Deny rules for specific risky applications
This strikes the best balance between security and operational feasibility for most enterprise environments.
In this post, we will walk through how to configure a Shared PC (Shared Device) using Microsoft Intune.
Shared PCs are commonly used in environments such as:
Meeting rooms
Training centers
Lobby kiosks
Factory floor terminals
Because multiple users access the same device, credential management and data persistence prevention are critical.
For example:
User A finishes work but forgets to sign out.
User B logs in next and unintentionally gains access to User A’s session or data.
This scenario can create serious risks from a privacy and compliance perspective.
To mitigate this risk, Intune provides the Shared multi-user device policy, which allows you to automatically delete user profiles when users sign out.
While doing a self-study to compare Endpoint DLP logs against Microsoft Defender for Endpoint (MDE) logs, I ran into a practical issue: in Power BI, reorganizing column order can be surprisingly annoying when you just want to quickly compare a few fields side by side.
After digging in, I found a very handy trick:
✅ You can take the M Query exported from Sentinel/Log Analytics and paste it directly into Excel Power Query—and it works.
If you do analysis primarily in Excel (filters, quick comparisons, pivot tables), this approach is super practical.
In Sentinel / Log Analytics, export your query using Export to Power BI (as an M query).
In Excel, open Power Query (Blank Query) and paste the M Query into the Advanced Editor.
Authenticate using Organizational account, then Close & Load to load it into a worksheet table.
From then on, just hit Refresh to update logs—no more re-running the same query in the portal.
Step 1) Export the M Query from Sentinel / Log Analytics
In the Azure Portal, navigate to either:
Microsoft Sentinel > Logs
Log Analytics Workspace > Logs
Write or select the query for the table > Setting Time range > Share > Export to Power BI (as an M query)
Step 2) Connect to Log Analytics Using M Query in Excel
2-1) Create a Blank Query
In Excel:
Data > Get Data > From Other Sources > Blank Query
2-2) Paste the M Query into Advanced Editor
In the Power Query Editor:
Open Advanced Editor
Paste the entire M Query you downloaded in Step 1 as-is
A typical exported M Query includes things like:
The target table
The query time range
✅ Pro tip: If you need to connect multiple tables, just duplicate the query and update only the table name and time span section. It’s the fastest way to scale your workbook.
2-3) Configure Credentials (Authentication)
On first connection, you may see Edit Credentials.
Organizational account → sign in → Connect
2-4) Load to Excel and Refresh Anytime
Before loading:
Rename the query to something meaningful
Then choose Close & Load to load into an Excel worksheet table
Use filters, sorting, pivots, conditional formatting, side-by-side comparisons… all the Excel stuff that’s great for fast investigation.
And the best part:
✅ Refresh updates the dataset without re-running the whole process in the portal.
Step 3) Bonus: Analyze Logs with Copilot (Excel + OneDrive/SharePoint)
After loading logs into Excel:
Save the workbook to OneDrive or SharePoint
Ask Copilot to analyze the data
If Copilot recognizes your tables (for example, MDE-related tables), it can quickly do things like:
Summaries
Trend analysis
Outlier/anomaly detection
Quick insights and narrative explanations
Wrap-up
Using M Query Export from Sentinel/Log Analytics isn’t just for Power BI—you can connect it directly to Excel and build a refreshable log analysis workbook.
If your workflow is centered on:
Fast comparison
Column reordering
Filtering
Pivot-based analysis
…then Excel can be the more efficient tool. And once the dataset is in OneDrive/SharePoint, Copilot becomes an extra boost for rapid investigation.
M365 Log Management (4): Building a Windows Update Dashboard from Update History (Intune + Log Analytics + Power BI)
Recently, I’ve been getting more and more interested in visualizing operational logs and device records in a Power BI dashboard. In the Microsoft ecosystem, one of the biggest advantages is that the reporting and data pipelines are designed by the same vendor that built the platform, which often makes the integration more efficient than many third‑party approaches.
At first, I considered pulling everything with PowerShell, but I found that Intune policies + Log Analytics can load the relevant Windows Update signals with far less friction—and then you can build a dashboard on top of them quickly.
This post walks through how to create a Windows Update dashboard using Windows Update for Business reports, Azure Log Analytics, and a Power BI template.
High-Level Flow (How the Data Gets to Your Dashboard)
At a high level, the process looks like this:
Intune policy enables required diagnostic/telemetry settings on devices
Windows Update for Business reports is enabled and connected to your Log Analytics workspace
Devices upload update status signals → stored in Log Analytics tables (e.g., tables prefixed with UC*)
A Power BI template queries the Log Analytics workspace and visualizes update health
Step 1) Configure Intune Devices for Windows Update for Business Reports
This step ensures that devices can send the required diagnostic data (including device name, if needed for reporting clarity). I followed the Microsoft Learn guidance and created a configuration policy using the Settings catalog. 1.%20Windows%20Update%20%EA%B8%B0%EB%A1%9D%EC%9D%84%20%ED%86%B5%ED%95%9C%20%EB%8C%80%EC%8B%9C%EB%B3%B4%EB%93%9C%20%EB%A7%8C%EB%93%A4%EA%B8%B0.loop)
1. Create a Configuration Profile
In Intune admin center:
Devices → Windows
Configuration → Policies → New policy
Platform: Windows 10 and later | Profile type:Settings catalog
Create the profile and give it a name (example used: AllowDeviceNameInDiagnosticData)
2. Add Required Settings
In the Settings catalog, search and add the following:
Allow Telemetry
Category: System
Value: Basic
Configure Telemetry Opt In Settings UX
Value: Disabled
Configure Telemetry Opt In Change Notification
Value: Disabled
Allow device name to be sent in Windows diagnostic data
Value: Allowed
3. Assign and Monitor the Policy
Assign the profile to the target users/devices
Complete Review + create
Monitor the deployment status in Intune to confirm devices are checking in successfully
Step 2) Enable Windows Update for Business Reports and Connect Log Analytics
Once devices are ready, you need to enable Windows Update for Business reports and link it to your Azure subscription and Log Analytics workspace.
1. Open the Built-In Workbook in Azure
In Azure Portal:
Go to Monitor
Select Workbooks > Choose Windows Update for Business reports
Select your Azure subscription & Log Analytics workspace > Save settings
During this flow, you can see that configuration is handled through Microsoft Graph (the UI surfaces the Graph endpoint being called).
3. Wait for Data to Populate
The UI mentions it may take up to 24 hours, but in my case it took 48+ hours before data appeared.
4. Confirm Data in Log Analytics
In Log Analytics, the data lands in tables that start with UC (for example, multiple UC* tables will appear once ingestion begins).
5. Understand Collection / Upload Frequency
Microsoft documentation also lists data types and upload frequency/latency. Practically speaking, you should expect some tables/events to arrive on different cadences (some daily, some per update event, and with latency that can span hours to a day or more).
Step 3) Tailor the Reports with Power BI
Once data is available in Log Analytics, the easiest path to a polished dashboard is to use the official Power BI template published for Windows Update for Business reports.
1. Download the Power BI Template
From the Tech Community / Windows IT Pro blog post, download the Power BI template referenced in the guide.
When Power BI prompts for access to the Log Analytics endpoint:
Choose Organizational account
Click Connect
5. View Your Windows Update Dashboard
After authentication completes and data is loaded, the dashboard visuals populate and you can begin customizing pages, KPIs, filters, and device group views.
Wrap-Up
With just Intune, Log Analytics, and the Power BI template, you can build a practical Windows Update dashboard without writing custom scripts or maintaining a separate data pipeline. The key is getting device diagnostics configured correctly, enabling WUfB reports, and allowing enough time for ingestion to stabilize.
While exporting logs using PowerShell, I started to wonder: As we move toward a more serverless cloud environment, managing logs via scheduled PowerShell scripts means I still need to operate a VM, which increases management overhead.
If you’re only considering cost, scheduling PowerShell scripts on a VM and exporting to SharePoint or OneDrive can be cheaper. However, from a long-term perspective, I believe it’s time to move away from running scheduled PowerShell scripts on VMs and adopt a serverless approach.
Also, visualizing and managing logs with BI tools can provide valuable insights. With this in mind, I anticipate that connecting to Microsoft Fabric or similar platforms will eventually become necessary.
In this post, I’ll cover how to export logs to Azure Data Lake Storage (ADLS) Gen2 and connect them to BI.
Data Lake Storage Gen2 is suitable for big data analytics and other data analysis scenarios.
4. Complete the creation and verify the storage account
Step 2. Create an Export Rule
1. Go to Log Analytics Workspace → Settings → Data Export → Create export rule
2. Name your rule
3. Select the tables to export
4. Set the destination to the storage account you created
5. Go to Data storage → Containers to check the exported tables
6. Navigate through subfolders to see that exports occur every 5 minutes
Step 3. Connect to Power BI
1. In Power BI Desktop, go to Get data → More
2. Select Azure → Azure Data Lake Storage Gen2
3. You’ll be prompted to enter a URL
4. Find the DFS URL using Azure Storage Explorer
Go to Storage Account → Storage browser → Download and install Azure Storage Explorer
Connect, navigate to the folder path, and open Properties
Copy the DFS URL
5. Paste the URL into Power BI
6. Enter your credentials (Account Key)
You can find the Account Key under Security + networking → Access keys
7. Connect and then Combine & Transform Data
Unlike saving to SharePoint, where you need to create queries manually, the native connector support makes this process much simpler.
Conclusion
By following these steps, you can export Microsoft 365 logs to Azure Data Lake Storage Gen2 and easily visualize them in Power BI. If you’re considering a serverless environment and BI integration, this approach offers a more efficient and scalable way to manage your logs in the long run.
One of the biggest challenges I faced while managing Microsoft 365 was log management. Initially, message trace and audit logs were enough. But as I started incorporating security solutions like Microsoft Defender, the amount of data skyrocketed.
How We Used to Do It
Previously, I relied on PowerShell scripts to extract logs, store them in a separate repository, and later manage them via SQL Server for analysis. While this worked, it had several drawbacks:
Required a dedicated VM for log collection
Credential management was cumbersome and posed security risks
Didn’t align well with the SaaS-first approach
Frequent schema changes and new log types increased maintenance overhead
In short, the process became increasingly labor-intensive.
Why I Chose Microsoft Sentinel
To solve these issues, I turned to Microsoft Sentinel. Although Sentinel is primarily a SIEM solution, my initial goal is centralized log management. Here’s why Sentinel stood out:
Native integration with Microsoft 365
Automated log collection and schema updates
Easy integration with Defender, Entra, Intune, and more
The Role of AI
Thanks to AI, the barrier to entry for these technologies has dropped significantly. With Copilot, I can leverage the data stored in Sentinel more intelligently. Once logs are ingested into Sentinel, it’s like having a database ready for advanced analytics—and AI can answer questions based on that data.
This marks the beginning of a shift from manual log management to a more automated and intelligent approach.
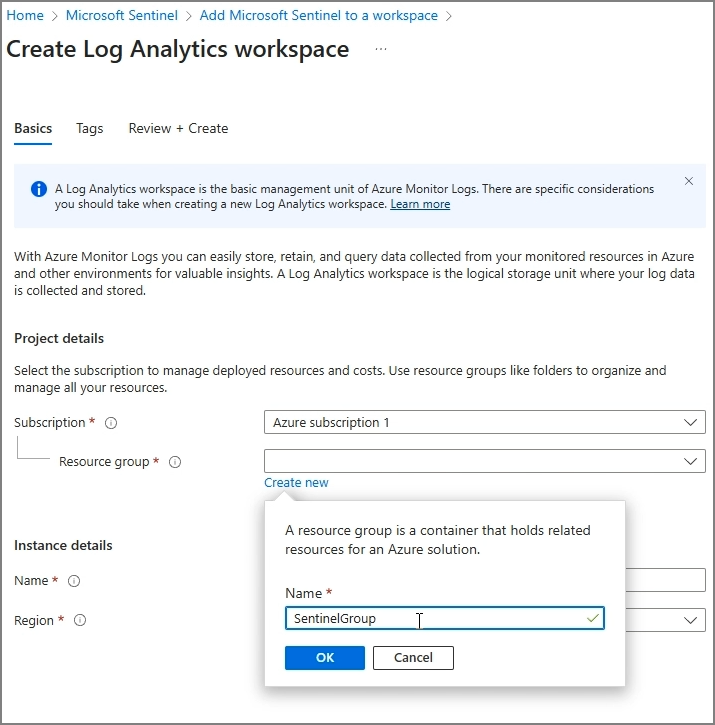
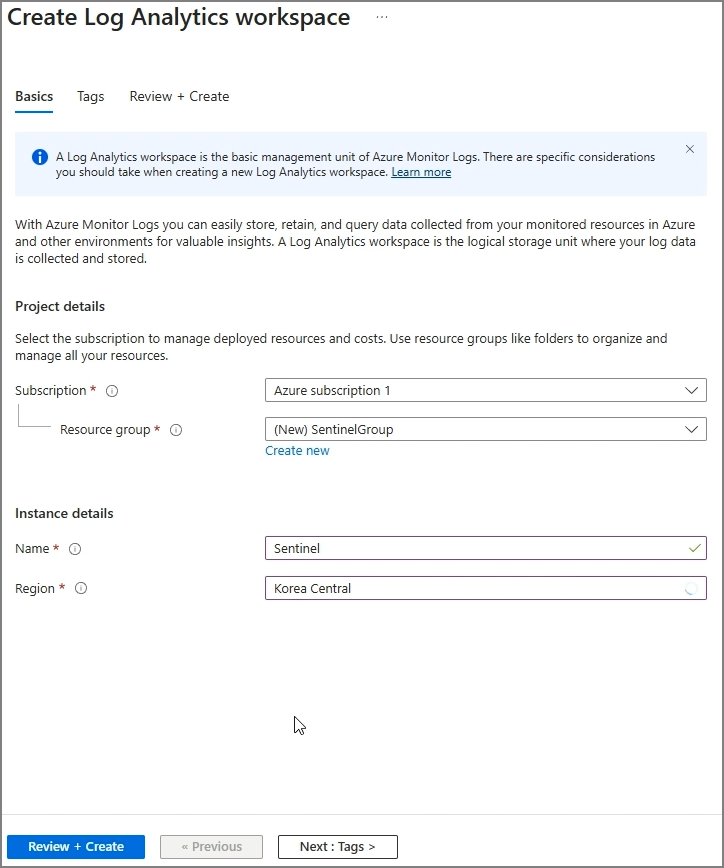
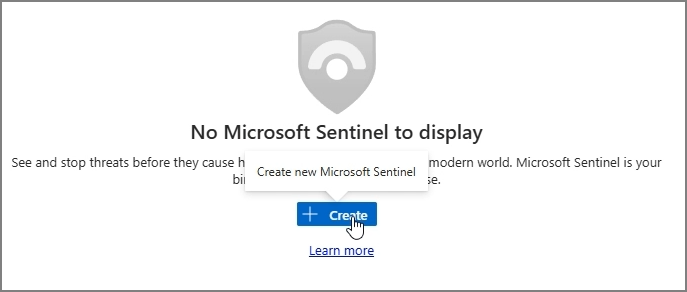
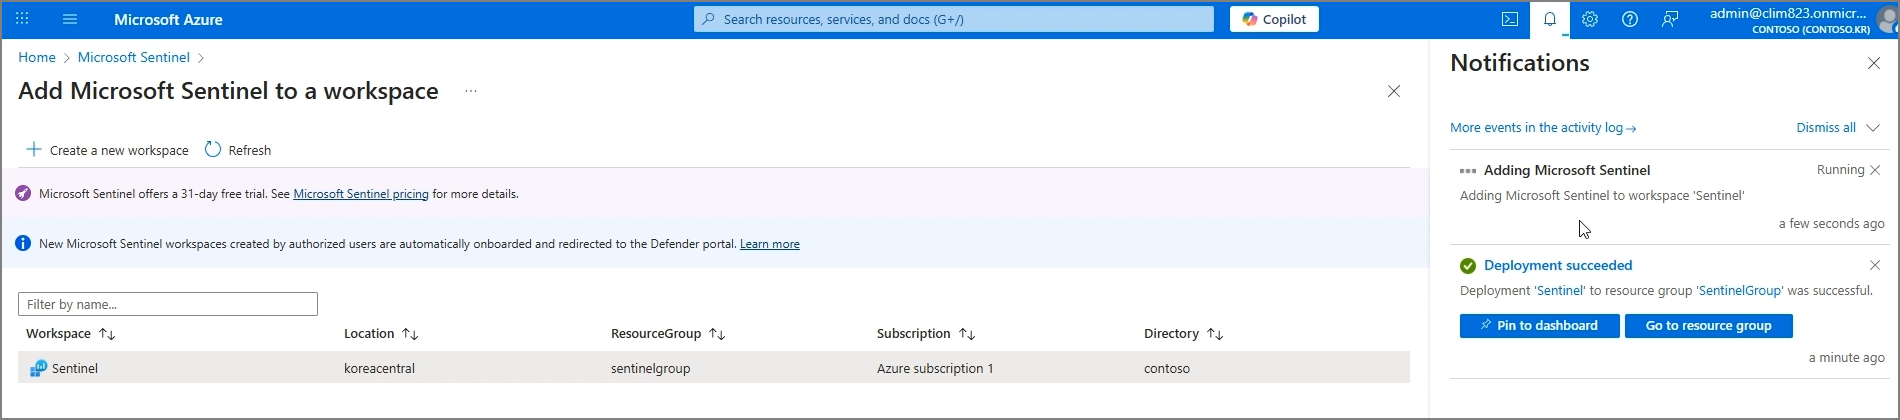
What is Microsoft Sentinel?
Microsoft Sentinel is a cloud-native SIEM (Security Information and Event Management) solution that collects and analyzes security logs and events from multiple sources. It supports threat detection, automated response, and security operations efficiency.
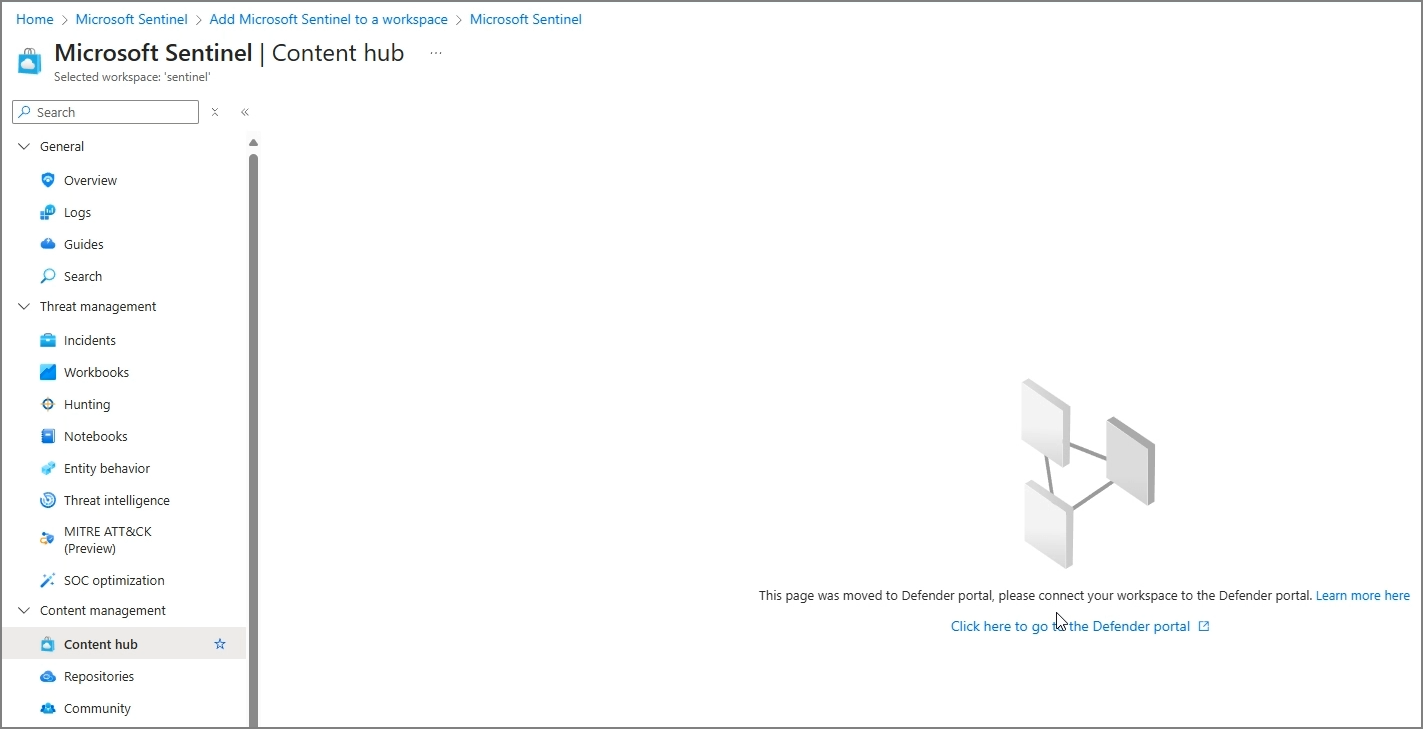
3. Add Microsoft 365 Data Connectors - Go to Content Hub
Currently, Sentinel is being integrated with the Defender page. If you go to Defender (Security.microsoft.com) and click on Microsoft Sentinel, you can confirm that it is being provisioned.
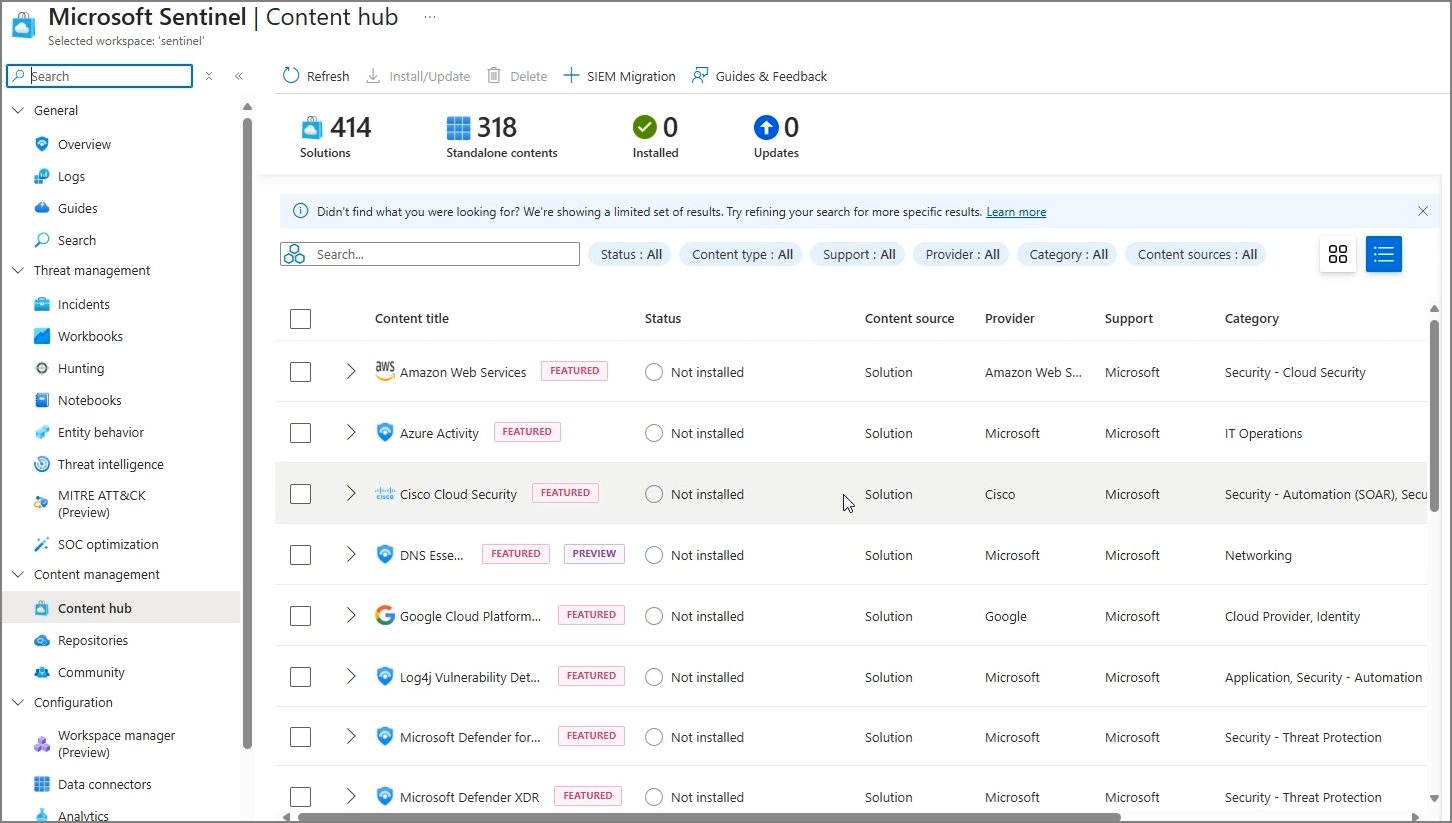
If you refresh in the Content hub within Sentinel on Azure, you will see the available Content that can be added as shown below.
For a simple connection test, search for Microsoft Entra ID and proceed with the installation.
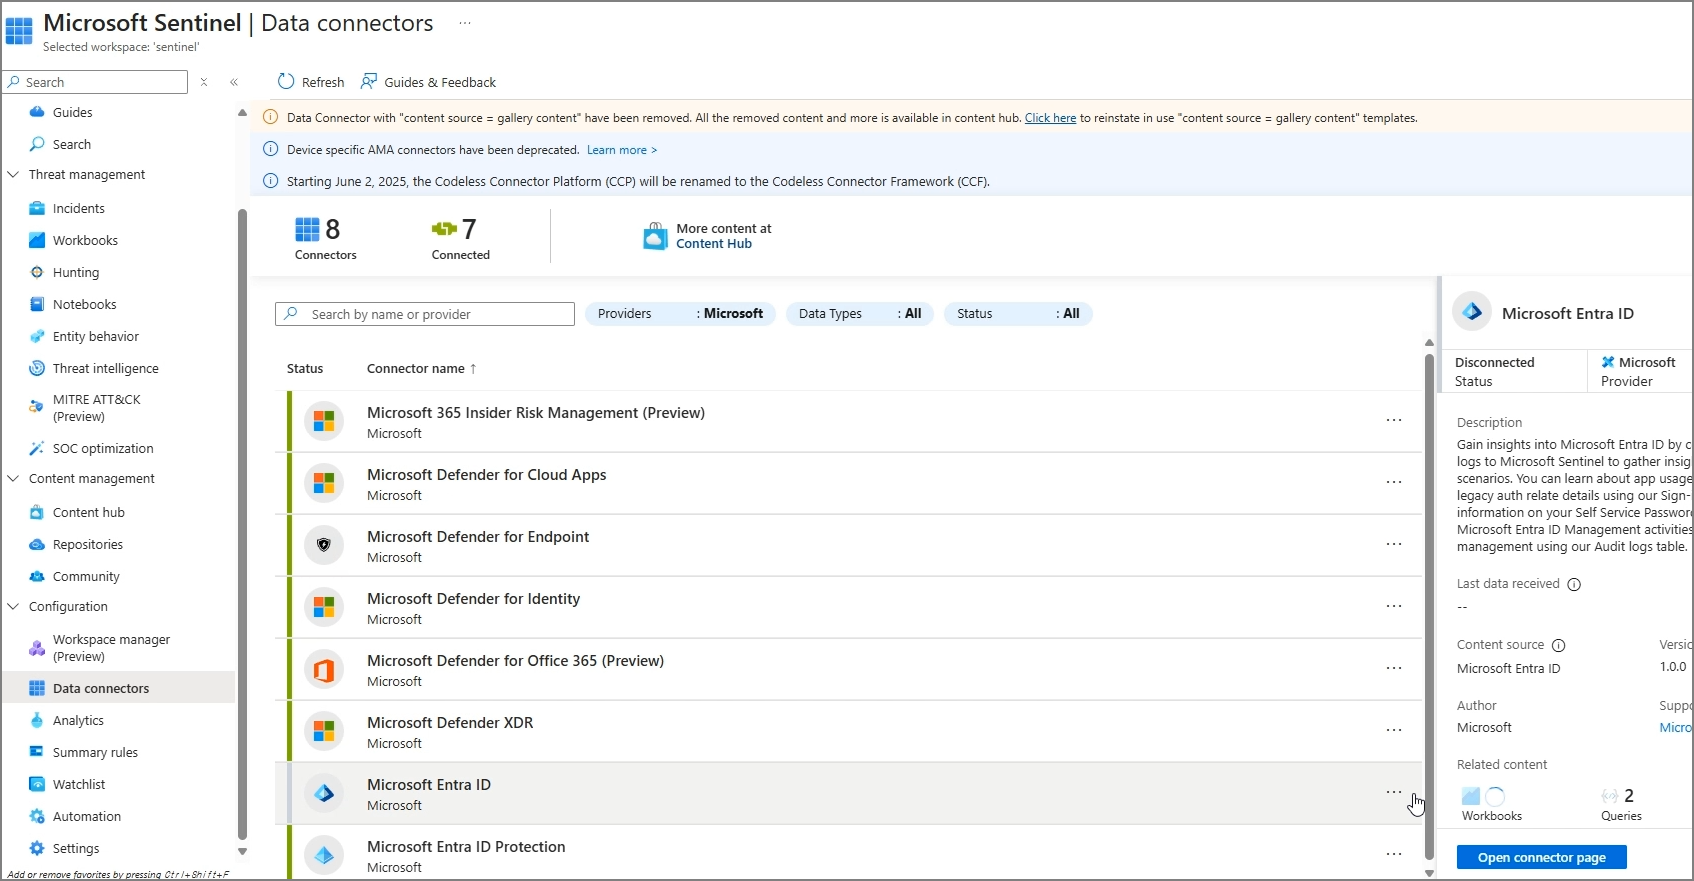
Data Connectors → Microsoft Entra ID → Open connector page
Select the logs to import and apply changes.
4. Verify Log Collection - Wait for logs to populate
- Use KQL mode to query and validate data ingestion
What’s Next?
In the next post, I’ll cover enabling specific Microsoft 365 logs and, if needed, the E5 onboarding process.
Tip: If you’re planning to integrate Sentinel with Microsoft 365, start small—enable core connectors first, then expand gradually.
Continuing from the previous post, this time we will implement the functionality to compose and send emails using the Mail.Send permission of the Graph API.
We'll continue using the project created in the previous post.
The process pattern is somewhat established at this point:
Step 1: Add Mail.Send permission
Step 2: Create a ViewModel for sending emails
Step 3: Create a View for composing and sending emails
Step 4: Add the Action Method for sending emails
Step 1. Add Mail.Send permission
Appsettings.json
Add Mail.Send permission.
Step 2. Create a View Model for Sending Emails
Create the EmailSendViewModel to hold the data needed for sending emails. This model will include fields like recipient address, email subject, and email body.
Create the EmailSendViewModel class
public class EmailSendViewModel
{
        public string To { get; set; } = string.Empty;
        public string Subject { get; set; } = string.Empty;
        public string Body { get; set; } = string.Empty;
}
Step 3. Create a View for Sending Emails
Create a view (SendEmail.cshtml) in the Views/Home directory, where users can compose and send emails. This view will use the EmailSendViewModel as its model.
Add the SendEmail action method to the HomeController. This method accepts EmailSendViewModel as a parameter and sends an email using the Microsoft Graph API.
Modify HomeController.cs.
Add the following content.
// GET action method to display the email sending form
[HttpGet]
public IActionResult SendEmail()
{
    return View(new EmailSendViewModel()); // Pass an empty model to the view
}

// Sendemail
[HttpPost]
[AuthorizeForScopes(ScopeKeySection = "MicrosoftGraph:Scopes")]
public async Task<IActionResult> SendEmail(EmailSendViewModel model)
{
    var message = new Message
    {
        Subject = model.Subject,
        Body = new ItemBody
        {
            ContentType = BodyType.Text,
            Content = model.Body
        },
        ToRecipients = new List<Recipient>()
        {
            new Recipient
            {
                EmailAddress = new EmailAddress
                {
                    Address = model.To
                }
            }
        }
    };

    await _graphServiceClient.Me.SendMail(message, null).Request().PostAsync();

    return RedirectToAction("Index");
}
Continuing from the previous post, this time we will use the Mail.Read permission in the Graph API to retrieve mail folders, subject lines, and content, and publish them on IIS.
We will continue using the project created in the previous post.
Add the //Email Titles section to the existing code as shown below.
using Identity.Models;
using Microsoft.AspNetCore.Authorization;
using Microsoft.AspNetCore.Mvc;
using System.Diagnostics;
using Microsoft.Graph;
using Microsoft.Identity.Web;

namespace Identity.Controllers
{
    [Authorize]
    public class HomeController : Controller
    {
        private readonly GraphServiceClient _graphServiceClient;
        private readonly ILogger<HomeController> _logger;

        public HomeController(ILogger<HomeController> logger, GraphServiceClient graphServiceClient)
        {
            _logger = logger;
            _graphServiceClient = graphServiceClient;
        }

        [AuthorizeForScopes(ScopeKeySection = "MicrosoftGraph:Scopes")]
        public async Task<IActionResult> Index()
        {
            var user = await _graphServiceClient.Me.Request().GetAsync();
            ViewData["GraphApiResult"] = user.DisplayName;
            return View();
        }

        // Email Titles
        [AuthorizeForScopes(ScopeKeySection = "MicrosoftGraph:Scopes")]
        public async Task<IActionResult> EmailTitles()
        {
            var messages = await _graphServiceClient.Me.Messages
                .Request()
                .Select(m => new { m.Subject })
                .GetAsync();

            var titles = messages.Select(m => m.Subject).ToList();
            return View(titles);
        }

        public IActionResult Privacy()
        {
            return View();
        }

        [AllowAnonymous]
        [ResponseCache(Duration = 0, Location = ResponseCacheLocation.None, NoStore = true)]
        public IActionResult Error()
        {
            return View(new ErrorViewModel { RequestId = Activity.Current?.Id ?? HttpContext.TraceIdentifier });
        }
    }
}
Create the View.
Views -> Home -> Add -> View
Razor View -> Empty -> Add
EmailTitles.cshtml -> Add
It will be generated as shown below.
Modify the content as follows.
@model List<string>

<h2>Email Titles</h2>
<ul>
@foreach (var title in Model)
{
    <li>@title</li>
}
</ul>
Start Debuging -> Log in -> Verify permissions and click Accept.
When you navigate to the Home/emailtitles URL, it will be displayed as shown below.
When compared with OWA (Outlook Web App), you can see that only the email subjects have been retrieved.
This time, let's create a page that retrieves and displays emails in the following structure: Folder -> Subject -> Body.
Step2. Action Method
Action Methods in the controller handle HTTP requests and retrieve data by calling the Microsoft Graph API. We will implement Action Methods such as MailFolders, EmailTitles, and EmailDetails to fetch the list of mail folders, the list of emails in a specific folder, and the detailed content of an email, respectively.
Modify the HomeController.cs file
Remove the existing Email Titles code.
Insert the code for Mail Folders, Titles, and Details respectively.
//MailFolders
public async Task<IActionResult> MailFolders()
{
    var mailFolders = await _graphServiceClient.Me.MailFolders
        .Request()
        .GetAsync();

    return View(mailFolders.CurrentPage.Select(f => new MailFolderViewModel { Id = f.Id, DisplayName = f.DisplayName }).ToList());
}

//EmailTitles
public async Task<IActionResult> EmailTitles(string folderId)
{
    var messages = await _graphServiceClient.Me.MailFolders[folderId].Messages
        .Request()
        .Select(m => new { m.Subject, m.Id })
        .GetAsync();

    var titles = messages.CurrentPage.Select(m => new EmailViewModel { Id = m.Id, Subject = m.Subject }).ToList();
    return View(titles);
}

//EmailDetails
public async Task<IActionResult> EmailDetails(string messageId)
{
    var message = await _graphServiceClient.Me.Messages[messageId]
        .Request()
        .Select(m => new { m.Subject, m.Body })
        .GetAsync();

    var model = new EmailDetailsViewModel
    {
        Subject = message.Subject,
        BodyContent = message.Body.Content
    };

    return View(model);
}
Step3. View model
A View Model is a model used to pass data to the View and is used to define the data retrieved from the Action Method. For example, the EmailViewModel includes the email's ID and subject. This allows the data needed in the view to be structured and managed efficiently.
Right-Click on the Models folder -> Add -> Class
MailFolderViewModel.cs -> Add
It will be generated as shown below.
Modify it as shown below.
namespace Identity.Models
{
    public class MailFolderViewModel
    {
        public string Id { get; set; }
        public string DisplayName { get; set; }
    }
}
Similarly, go to Models -> Add -> Class.
EmailViewModel.cs -> Next
Modify it as shown below -> Save.
namespace Identity.Models
{
    public class EmailViewModel
    {
        public string Id { get; set; }
        public string Subject { get; set; }
    }
}
Add EmailDetailsViewModel.cs in the same way.
Modify it as shown below -> Save.
public class EmailDetailsViewModel
{
    public string Subject { get; set; }
    public string BodyContent { get; set; }
}
Step 4. View
Finally, the View constructs the user interface and displays the data received from the View Model. Create corresponding view files for each action in the Views/Home directory.
Authentication type -> Microsoft identity platform -> Create
Next
Sign in -> Microsoft
Log in with the administrator account.
Create new
A browser window pops up. Log in with the administrator account.
Authentication complete.
Specify the Display name. -> Register
Confirm that the creation is successful.-> Next
Add Microsoft Graph permissions -> Next
Save the Client secret value in a notepad.-> Next
Finish
Close
Close
Service is registered, and verify that Secrets.json (Local) has been created.
Double-click on the Appsettings.json file.
The information for the created app is displayed.
The same information is confirmed in Entra ID.
Start Debugging
After accessing localhost, you're redirected directly to the login page -> Log in with the administrator account.
Upon first access, the permissions are displayed as shown below -> Click Accept. -> Accept
Display the logged-in account information.
When you sign out, the following message is displayed.
When you log in with a different account, it displays the information of that account.
Build -> Identity
Web Server (IIS) -> Next
Web Deploy Package -> Next
Specify the location to export the package -> Set the Site Name -> Click Finish.
Close
Publish
Once completed, copy the package file to the IIS Server.
As done in the previous post, after extracting the files, copy the essential folders and files, such as wwwroot, to the root directory as shown below.
Launch IIS Manager
Righ-Click on Sites -> Add Website
Specify the settings as shown below.
When testing on localhost, an Error 500 occurs as shown below. The cause is that the ClientSecret value is not included during publishing, which leads to this issue.
Open the Appsettings.json file using Notepad.
Add the previously saved Secret Value in the following format -> Save the file:
IISRESET
Confirm the login process.
Proceed with testing by accessing the published URL.
A Redirect URI error has occurred.
Entra ID Admin center -> Applications -> App registration -> Authentication -> Add the following to Redirect URIs as shown below.