One of the biggest challenges I faced while managing Microsoft 365 was log management. Initially, message trace and audit logs were enough. But as I started incorporating security solutions like Microsoft Defender, the amount of data skyrocketed.
How We Used to Do It
Previously, I relied on PowerShell scripts to extract logs, store them in a separate repository, and later manage them via SQL Server for analysis. While this worked, it had several drawbacks:
Required a dedicated VM for log collection
Credential management was cumbersome and posed security risks
Didn’t align well with the SaaS-first approach
Frequent schema changes and new log types increased maintenance overhead
In short, the process became increasingly labor-intensive.
Why I Chose Microsoft Sentinel
To solve these issues, I turned to Microsoft Sentinel. Although Sentinel is primarily a SIEM solution, my initial goal is centralized log management. Here’s why Sentinel stood out:
Native integration with Microsoft 365
Automated log collection and schema updates
Easy integration with Defender, Entra, Intune, and more
The Role of AI
Thanks to AI, the barrier to entry for these technologies has dropped significantly. With Copilot, I can leverage the data stored in Sentinel more intelligently. Once logs are ingested into Sentinel, it’s like having a database ready for advanced analytics—and AI can answer questions based on that data.
This marks the beginning of a shift from manual log management to a more automated and intelligent approach.
What is Microsoft Sentinel?
Microsoft Sentinel is a cloud-native SIEM (Security Information and Event Management) solution that collects and analyzes security logs and events from multiple sources. It supports threat detection, automated response, and security operations efficiency.
3. Add Microsoft 365 Data Connectors - Go to Content Hub
Currently, Sentinel is being integrated with the Defender page. If you go to Defender (Security.microsoft.com) and click on Microsoft Sentinel, you can confirm that it is being provisioned.
If you refresh in the Content hub within Sentinel on Azure, you will see the available Content that can be added as shown below.
For a simple connection test, search for Microsoft Entra ID and proceed with the installation.
Data Connectors → Microsoft Entra ID → Open connector page
Select the logs to import and apply changes.
4. Verify Log Collection - Wait for logs to populate
- Use KQL mode to query and validate data ingestion
What’s Next?
In the next post, I’ll cover enabling specific Microsoft 365 logs and, if needed, the E5 onboarding process.
Tip: If you’re planning to integrate Sentinel with Microsoft 365, start small—enable core connectors first, then expand gradually.
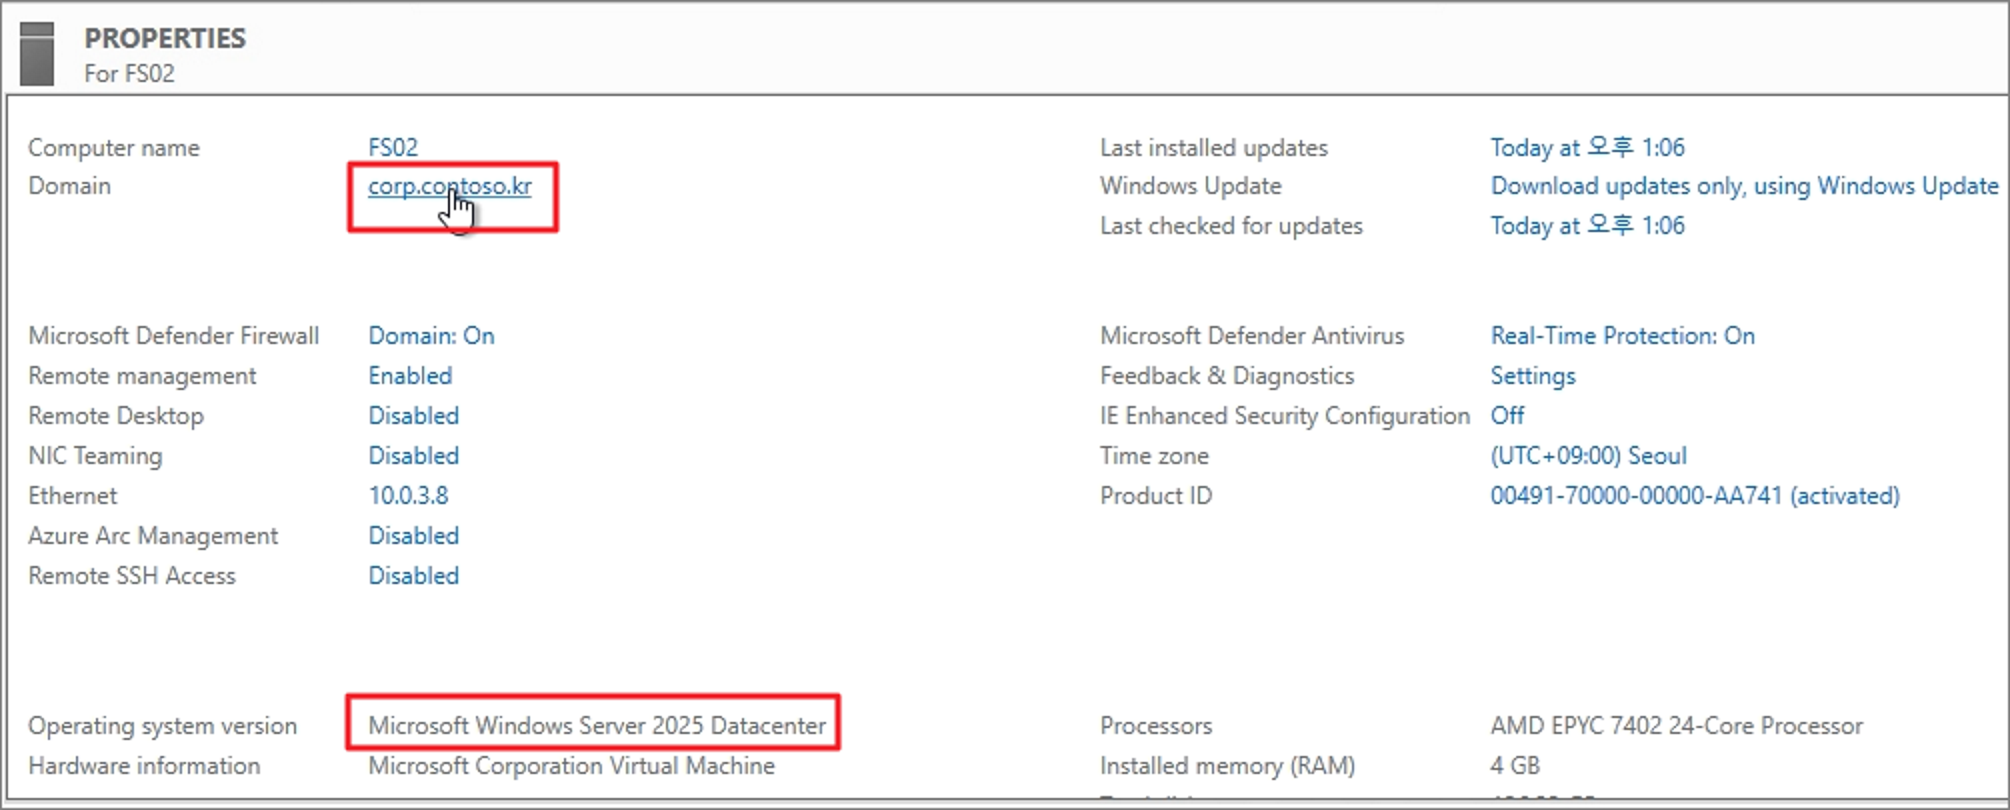
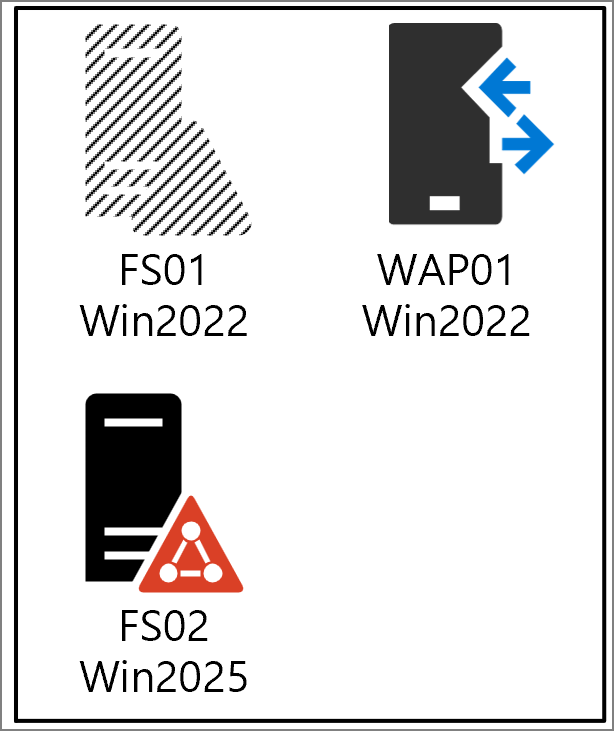
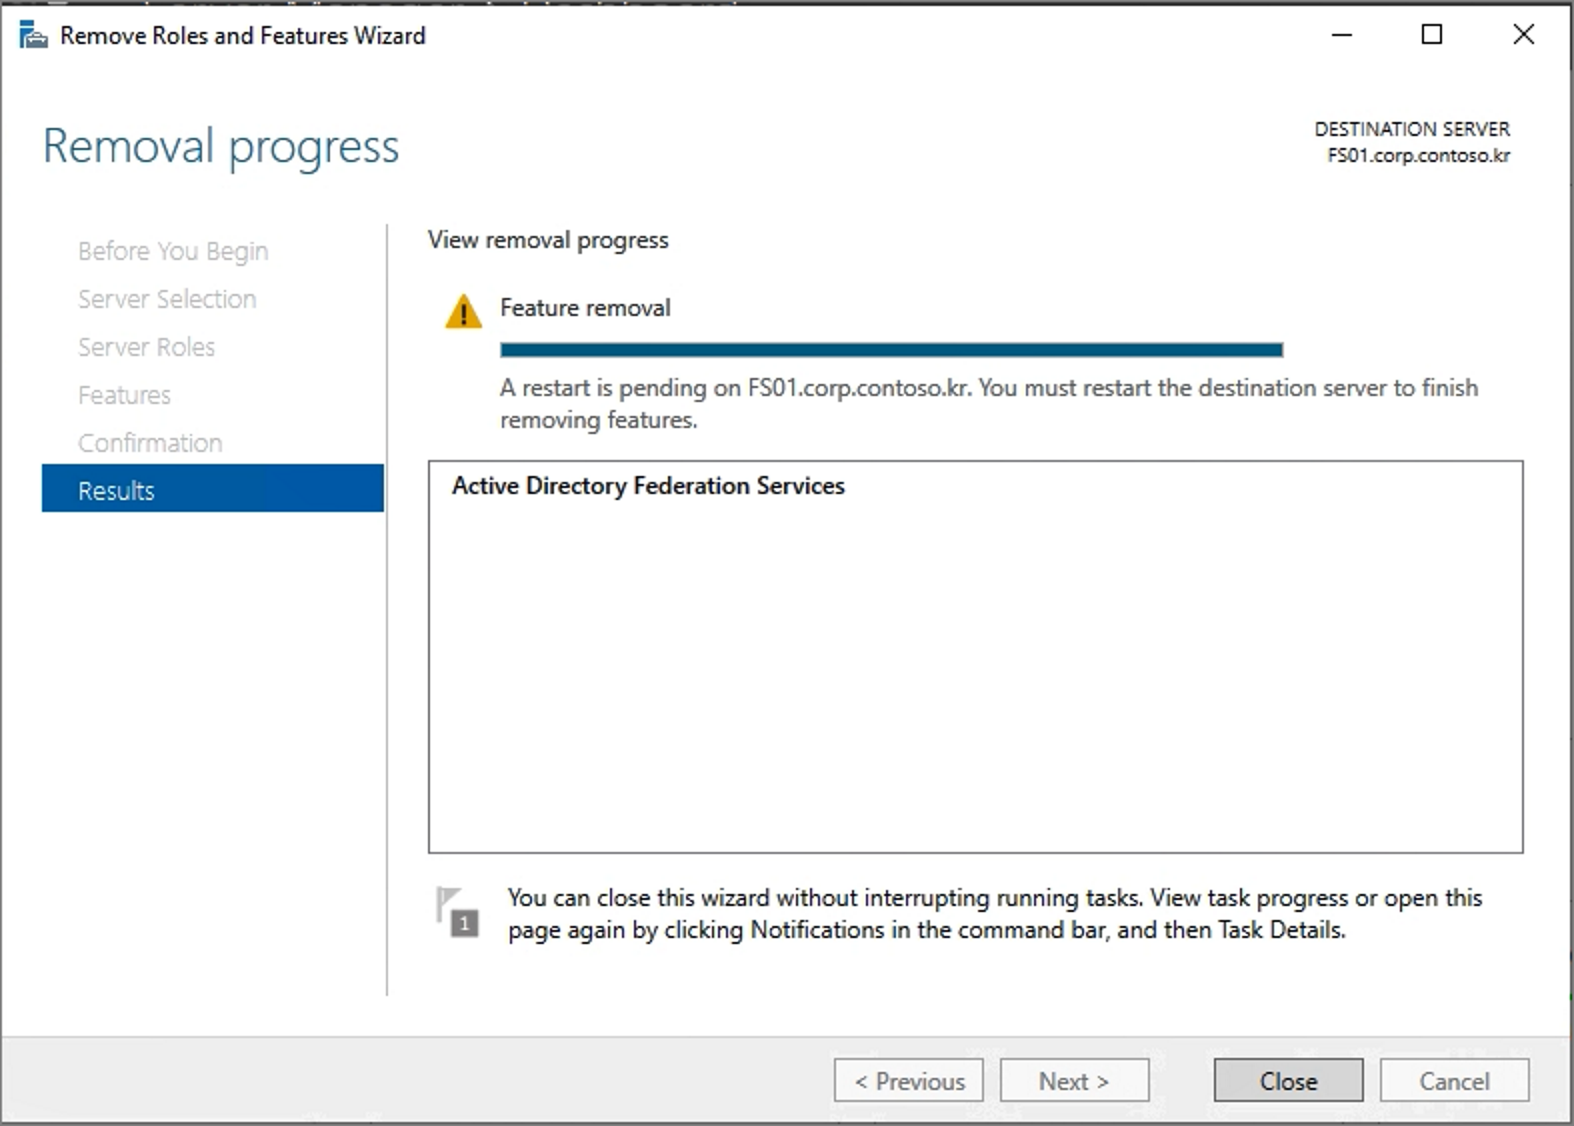
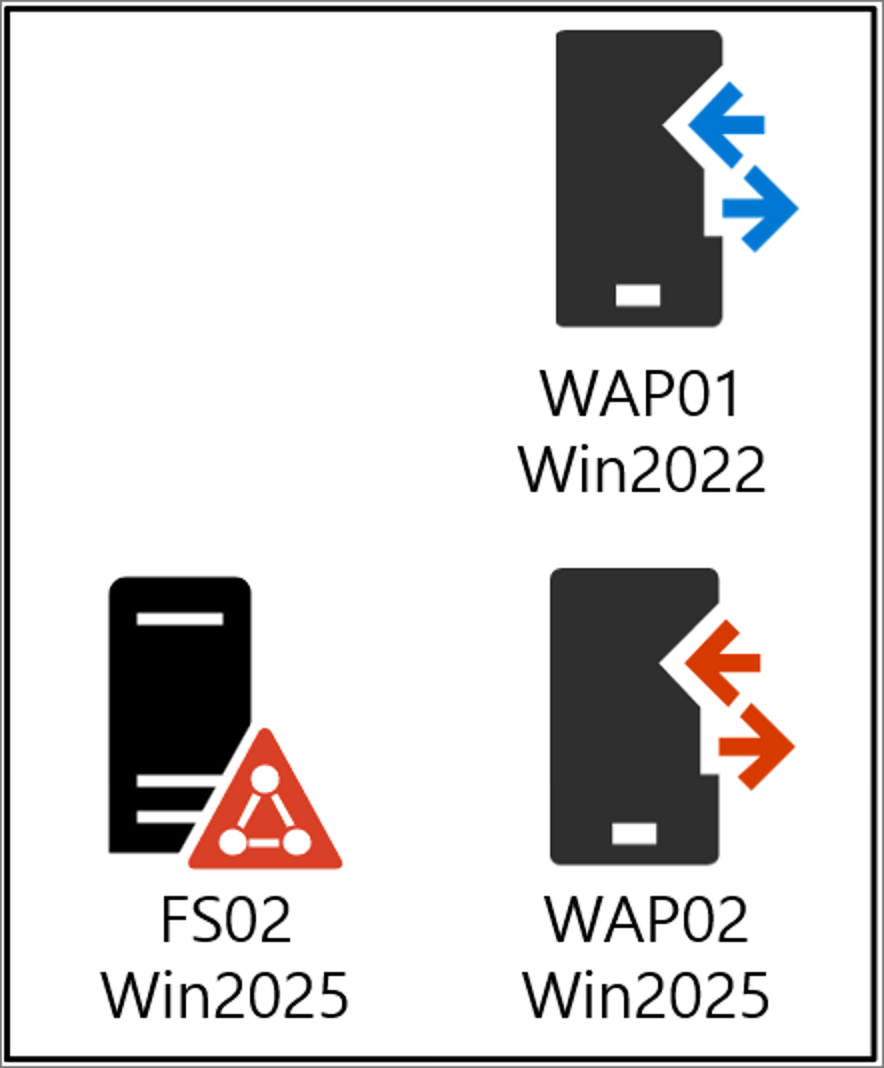
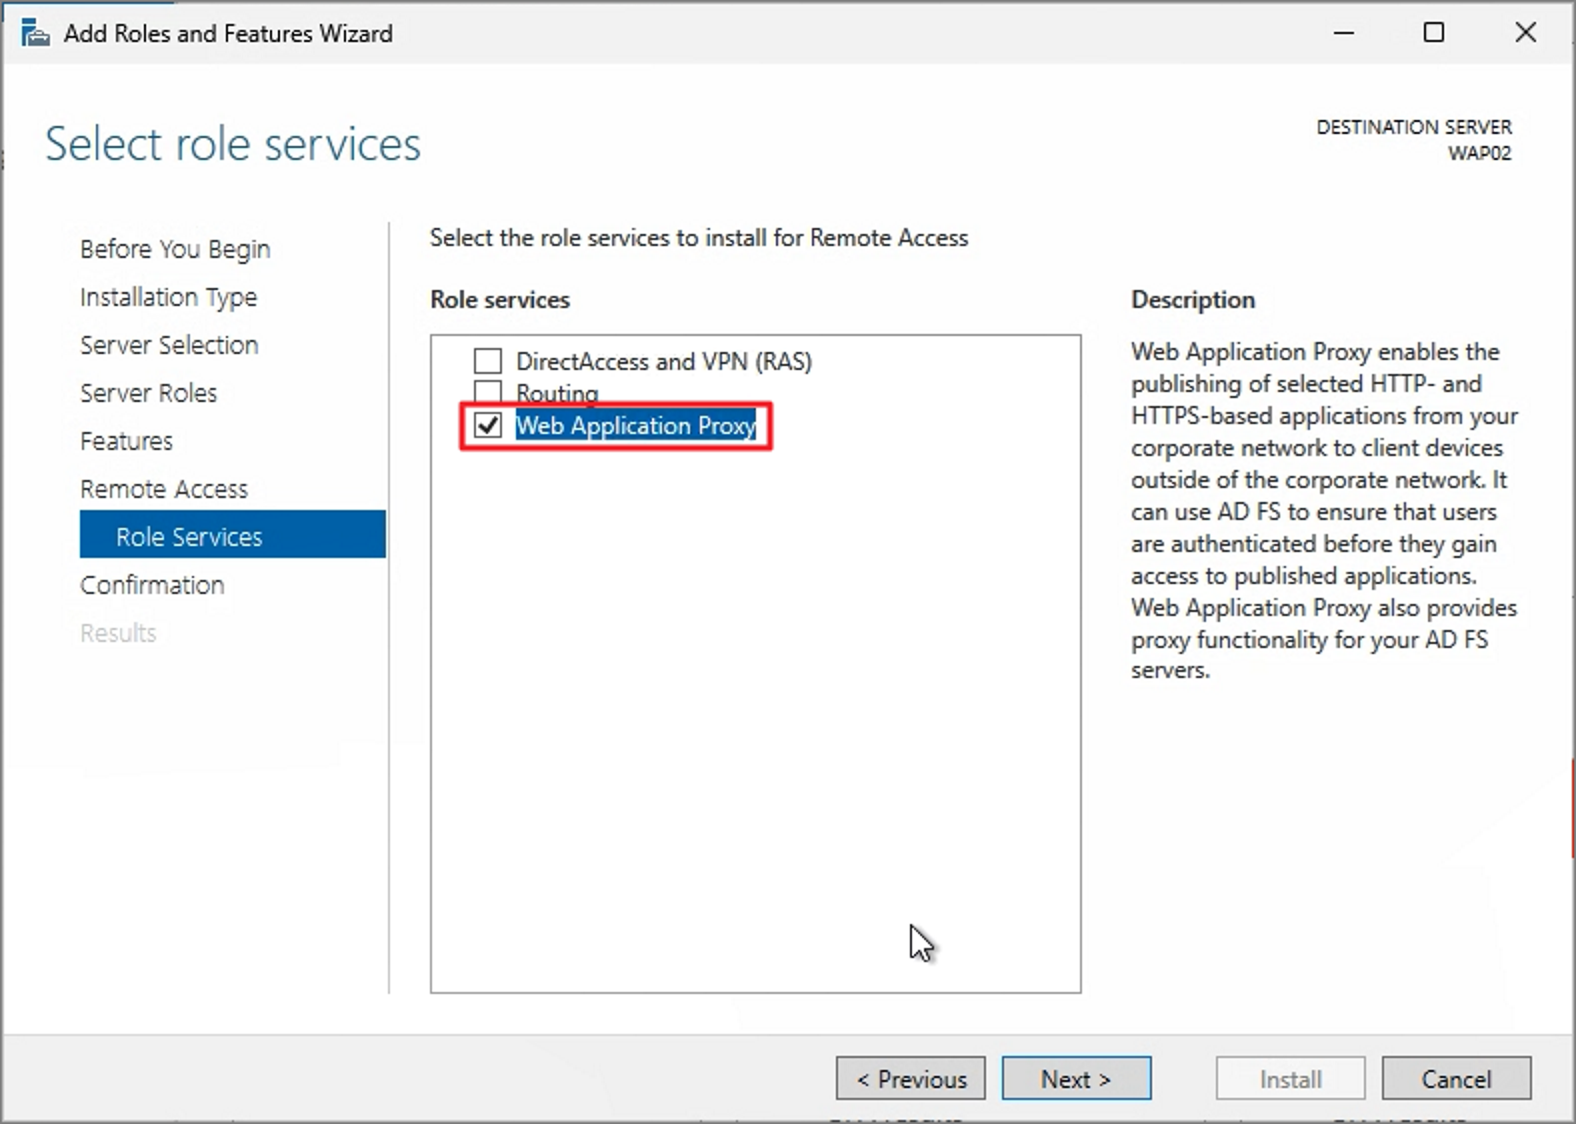
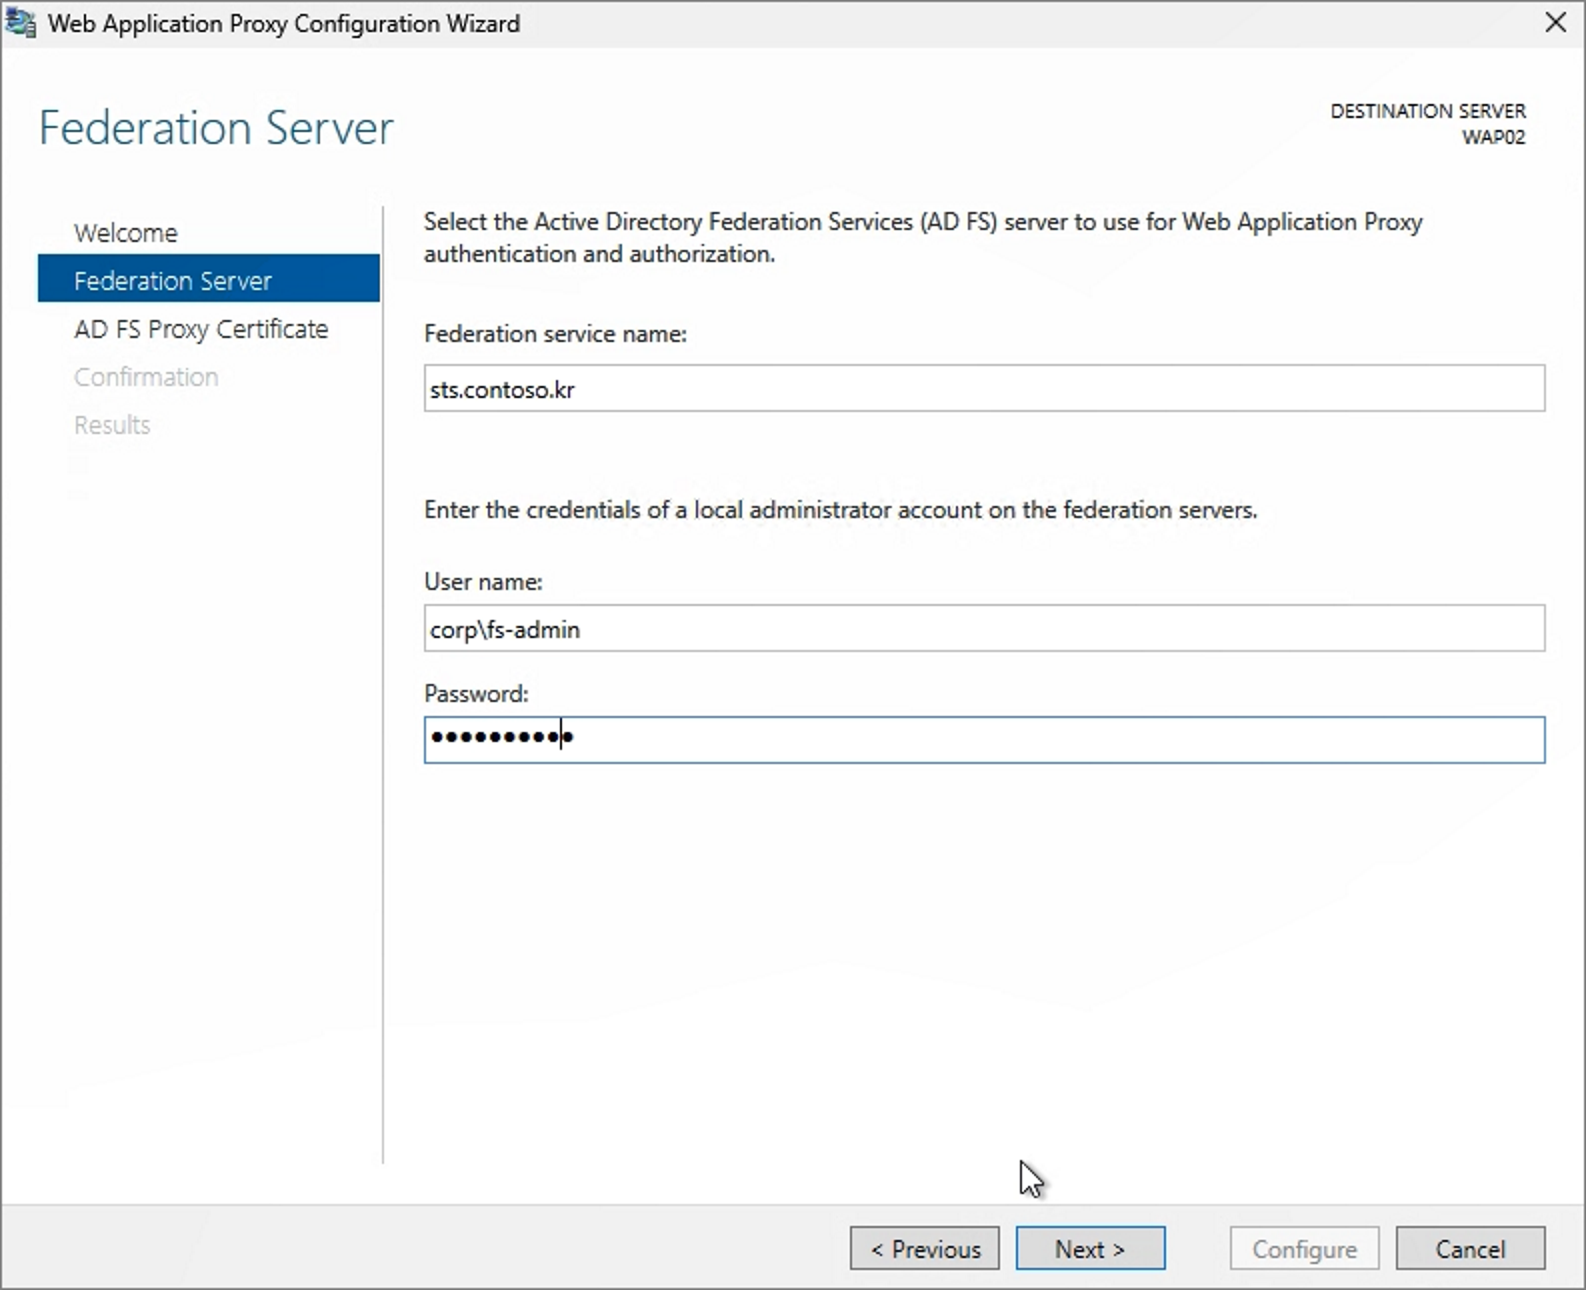
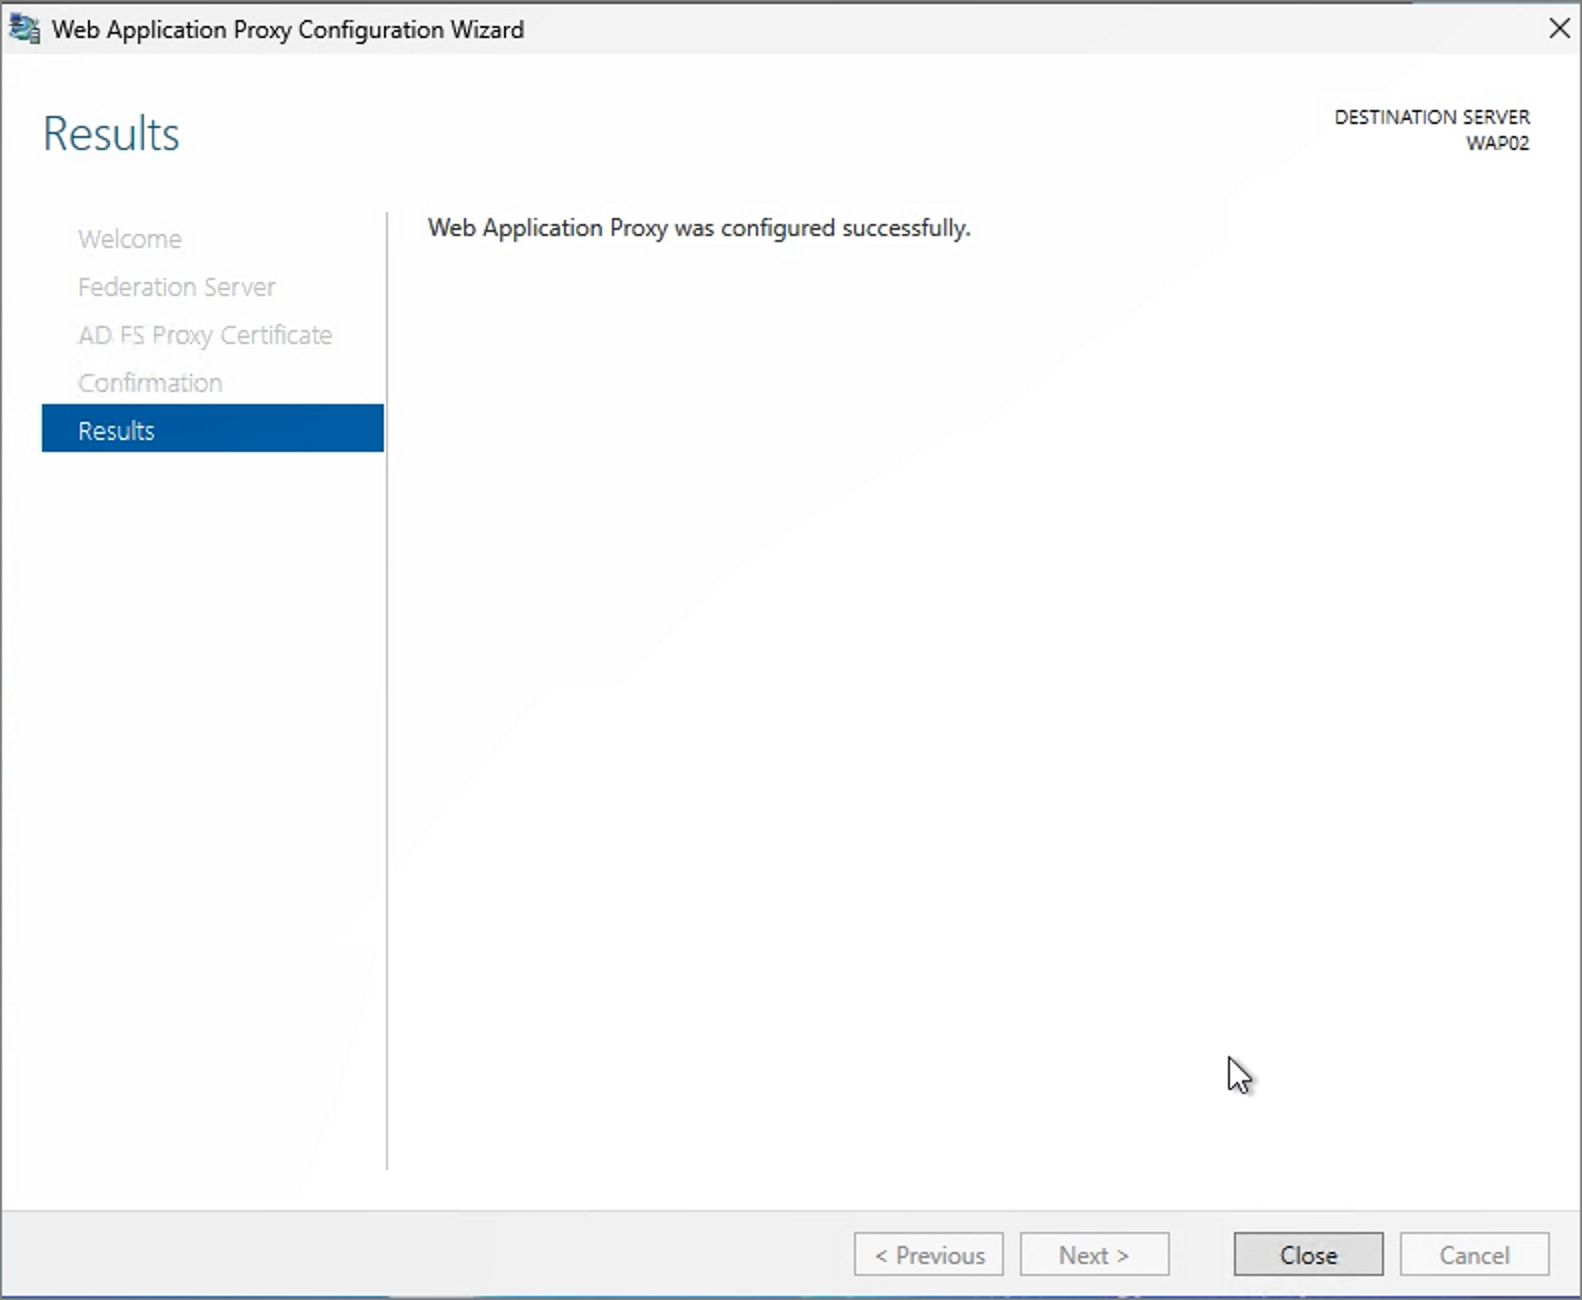
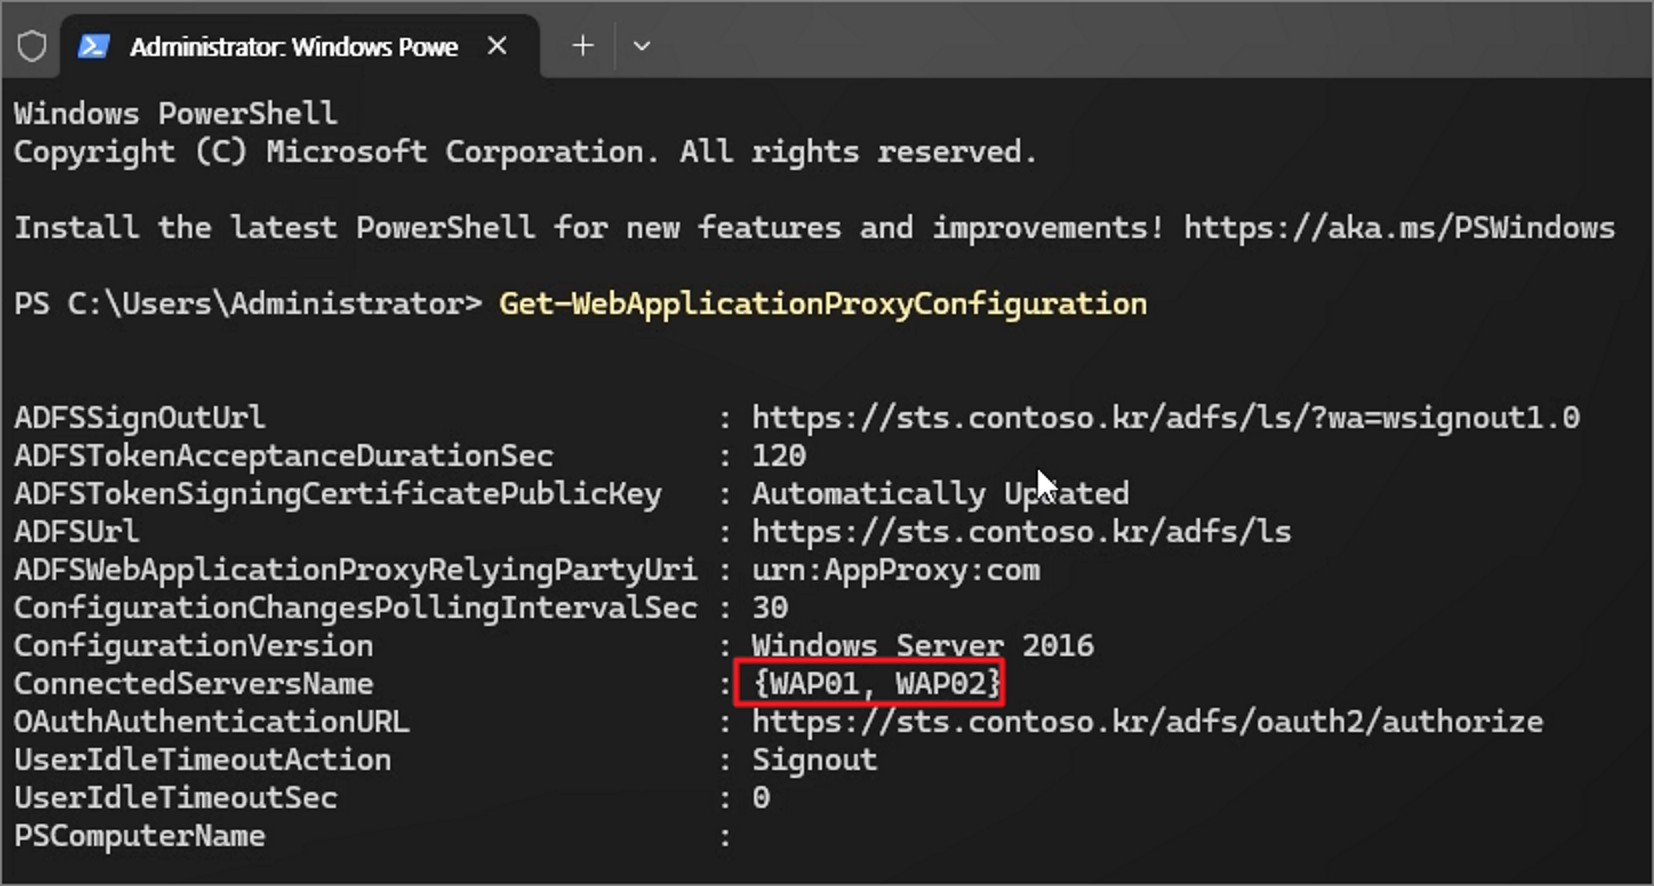
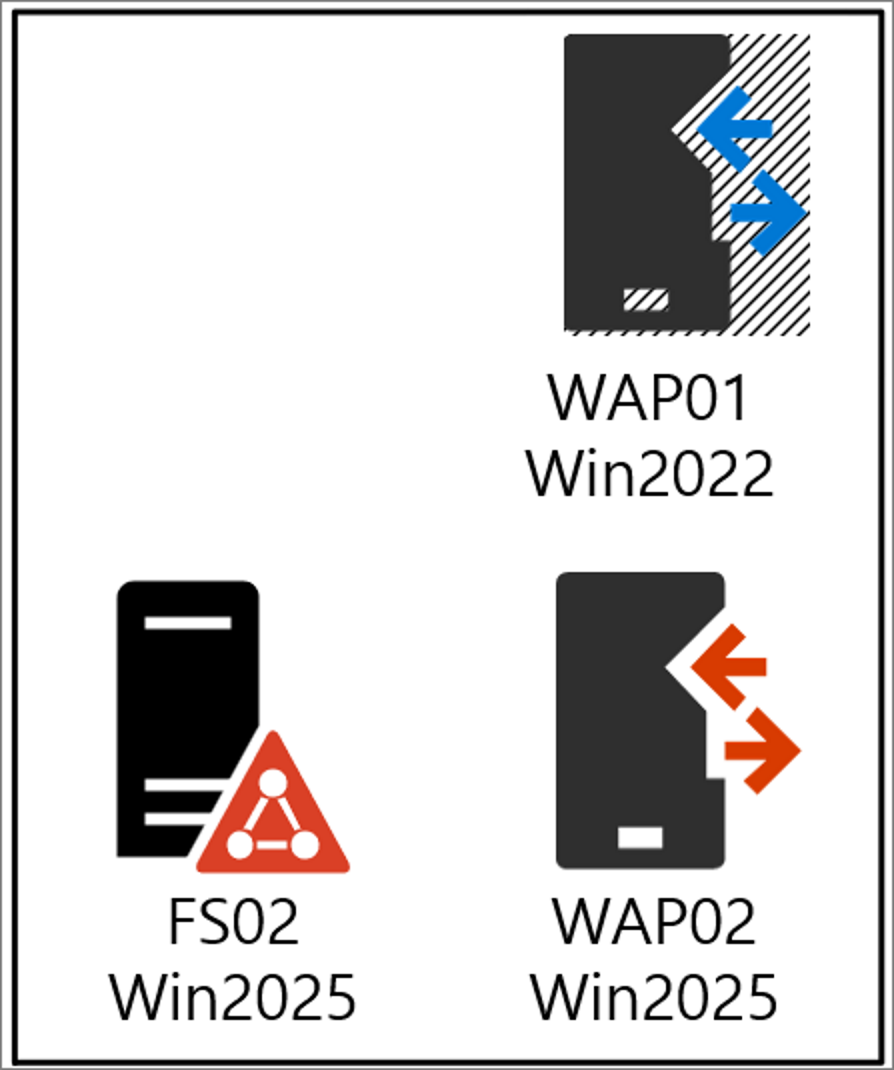
This time, we will cover the topic of ADFS & WAP Upgrade & Migration.
As indicated in the title, the upgrade and migration will be performed from Windows Server 2022 to 2025.
For reference, the ADFS configured on Windows Server 2022 will be referred to as ADFS2022, and the WAP configured on Windows Server 2025 will be called WAP2025.
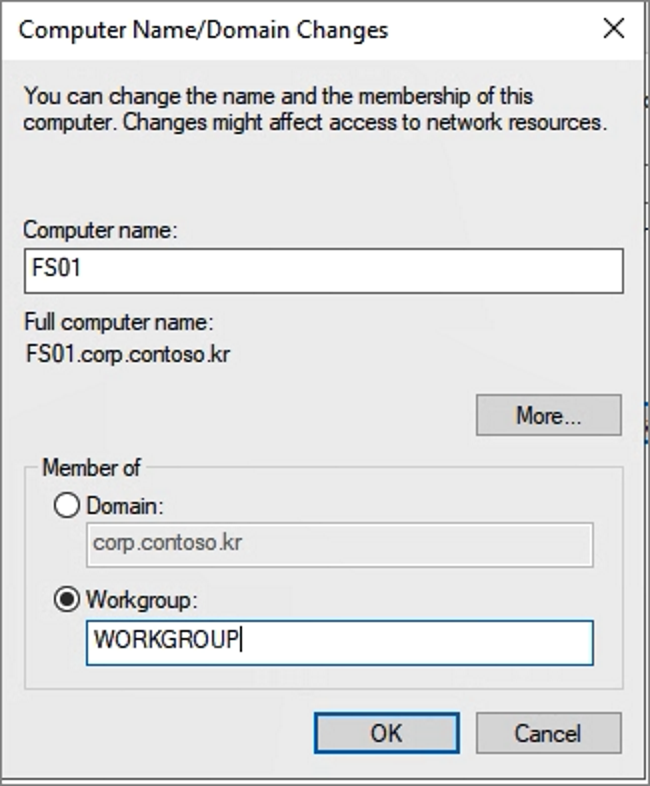
Confirm that the connection information has been updated correctly.
Successful login was also confirmed via Office.com, indicating that no additional action is required in Entra ID Connect and no major issues are expected.
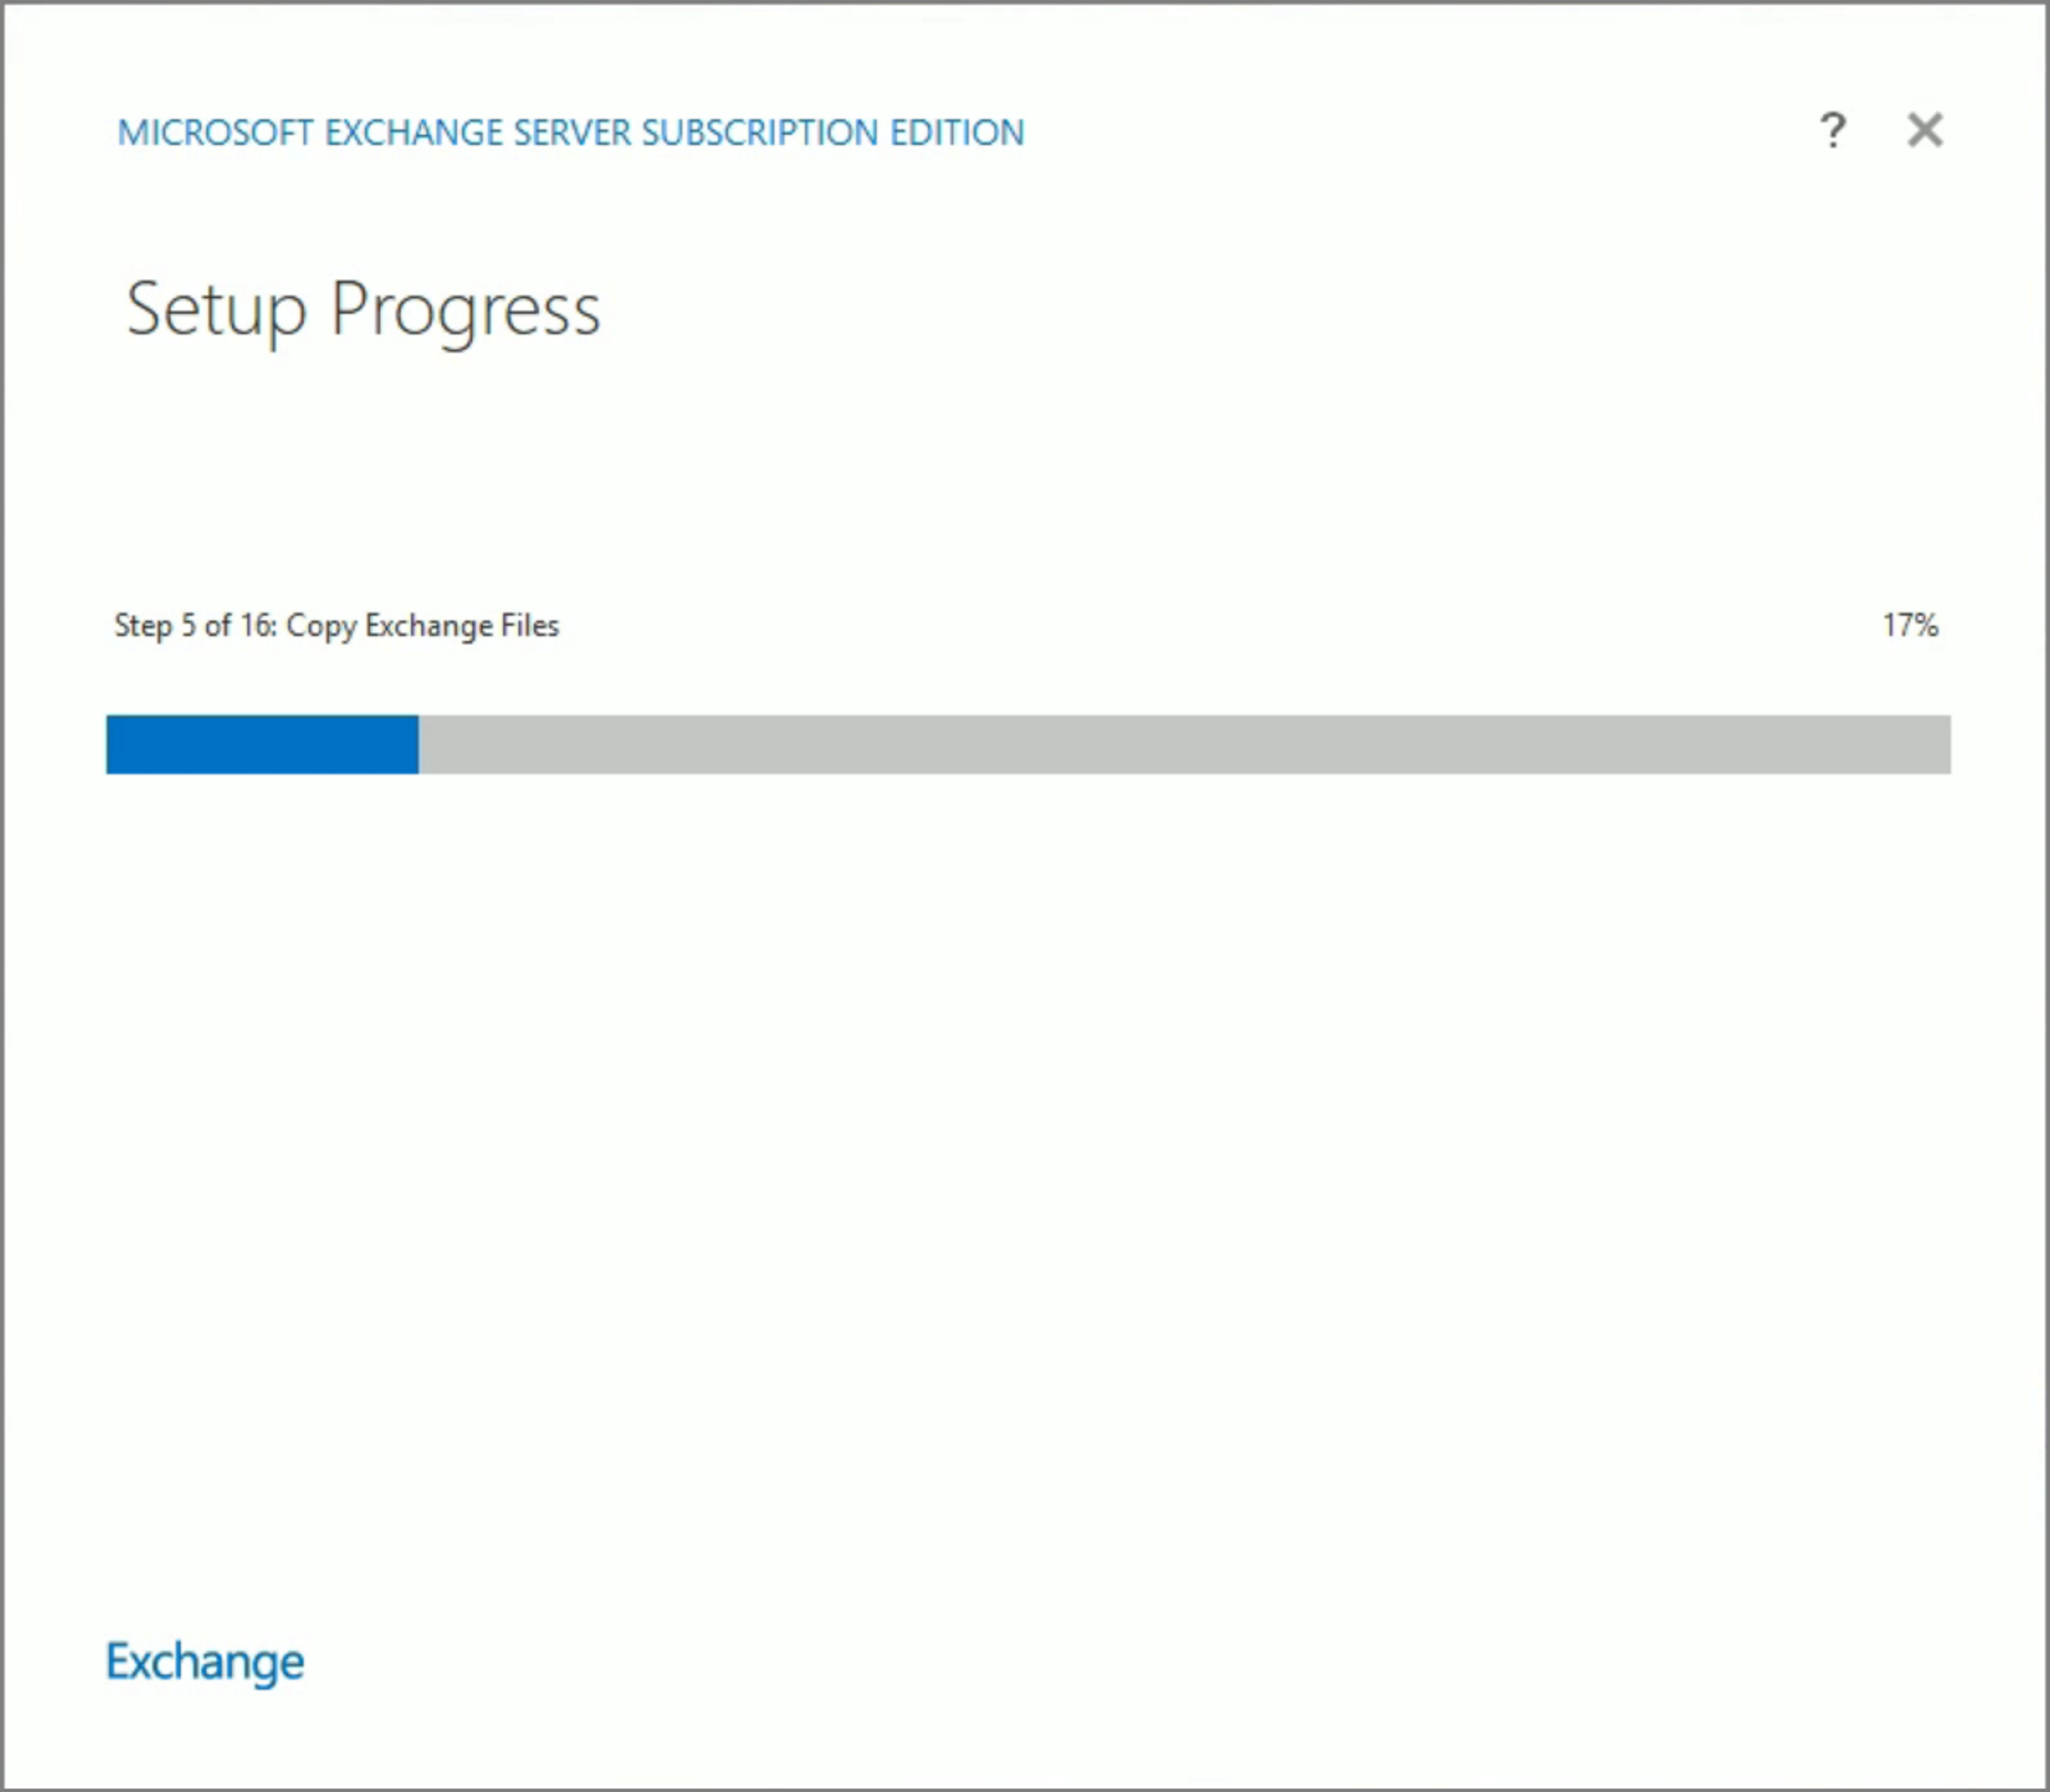
This page announces the general availability of Exchange Server Subscription Edition (SE). The main points are as follows:
Background of the Release: Exchange SE continues Microsoft’s tradition of providing enterprise-grade email services across cloud, on-premises, and hybrid environments.
Service and Licensing Changes: Exchange SE follows the Modern Lifecycle Policy, meaning there is no predefined end-of-support date.
Upgrade Details: In-place upgrades from Exchange Server 2019 CU14 or CU15 to Exchange SE are recommended.
Differences: While Exchange SE RTM is functionally the same as Exchange 2019 CU15, the name and version number have been updated.
Future Plans: After October 2025, Exchange SE will be the only supported on-premises version. New features and installation requirements will be added in the future.
The page also mentions the release of Skype for Business Server Subscription Edition.
It’s really convenient to have Copilot summarize the page like this.
AI makes it easy to understand and concisely presents the key points.
As of now, Subscription Edition is more of a version rename than a functional update.
So if you're upgrading from 2019, there's no need to rebuild your environment — an in-place upgrade is enough.
That’s why it feels more like an update rather than a full upgrade.
You can download the installation file from the link below:
While creating a YouTube video, I also decided to write this blog post. I revisited DAG configuration after a long time, thinking it would be useful when setting up a test environment for the upcoming Subscription Edition upgrade.
In Korea, DAG is often referred to as "redundancy." It is a feature in Exchange Server that provides automatic failover in case of database issues. A more detailed explanation involves multiple scenarios, but for now, I will keep it simple and focus on the basic setup.
The environment and specifications remain the same as in the previous post, with three Exchange Servers making up the DAG. The final architecture is as follows:
IPLess DAG Configuration
This time, I am using the IPLess configuration approach.
The IPLess configuration has the following characteristics:
No IP address is assigned to the cluster/DAG, so there is no IP resource in the cluster core resource group.
No network name is assigned to the cluster, meaning there is no network name resource in the cluster core resource group.
The cluster/DAG name is not registered in DNS and cannot be resolved on the network.
A Cluster Name Object (CNO) is not created in Active Directory.
The cluster cannot be managed using Failover Cluster Manager but must be managed using Windows PowerShell, with cmdlets executed on individual cluster members.
I asked GPT to compare the traditional DAG approach with the IPLess approach, and the results are summarized in the table below:
Active Directory Dependency
Requires CNO and AD objects
No AD objects required
IP Address
Requires static IP
No IP required
DNS Registration
Required
Not required
Failover Speed
Relatively slower
Relatively faster
Management Complexity
Requires AD and network management
Reduced management burden
Security Concerns
Requires AD object management and permissions
No AD objects needed
If there are no compatibility issues with third-party solutions, IPLess DAG is recommended.
Prerequisites
When setting up a DAG, the disk structure must be identical across all servers. If the DB disk is set as drive D: on one server, all other servers must also configure their DB disks as drive D:
Step 1. Creating the Witness Directory
Before proceeding, let's understand what a Witness is.
1. What is a Witness Server?
A Witness Server is a server that provides a quorum vote to maintain the cluster quorum within a Database Availability Group (DAG). A DAG requires an odd number of votes (Quorum) to function properly, and the Witness Server helps achieve this.
DAGs operate as Windows Failover Clusters consisting of multiple Mailbox Servers, maintaining a quorum for high availability. If the number of Mailbox Servers in the DAG is even (e.g., 2, 4, 6...), an additional vote is needed, which is provided by the Witness Server.
You might wonder why a Witness is necessary when there are already three servers in the DAG. GPT provided the following explanation:
Server Count
Total Votes (Including Witness)
Operation Status
Quorum Status
All 3 servers operational
4 (3 servers + 1 Witness)
✅ Running normally
OK (4/2 = 2 or more required)
1 server fails (2 remaining)
3 (2 servers + 1 Witness)
✅ Running normally
OK (3/2 = 1.5 → Rounded to 2)
2 servers fail (1 remaining)
2 (1 server + 1 Witness)
✅ Running normally
OK (2/2 = 1 or more required)
All servers fail (0 remaining)
1 (Witness only)
❌ DAG stops
Failed (1/2 = 0.5 → Less than 1 required)
To ensure stable operation, a Witness is essential.
2. What is a Witness Directory?
A Witness Directory is a shared folder on the Witness Server used for DAG operations. It stores files that record the cluster state and helps determine quorum status during a failover.
Default Witness Folder Settings:
A shared folder must be created on the Witness Server.
Typically located at C:\DAGWitness.
The Witness Server must be able to communicate with all Mailbox Servers in the DAG.
The Exchange Trusted Subsystem group must have Read/Write permissions on the folder.
The Witness Server must be a separate system, and a Witness folder must be created on it. In my setup, I am using the Azure AD Connector server as the Witness Server (recently renamed to Entra ID Connect).
Creating the Witness Folder on the Witness Server
Right-click the folder -> Properties
Navigate to Sharing -> Share
Click Find People
Enter Exchange Trusted Subsystem -> Check Names -> OK
Set Permission Level: Read/Write -> Share
Click Done
Right-click Start Button -> Computer Management
Go to Local Users and Groups -> Groups -> Administrators
Click Add
Enter Exchange Trusted Subsystem -> Check Names -> OK
The Witness folder is now created and configured with the necessary permissions.
Step 2. Configuring the DAG
Next, let's configure the Exchange Servers into a DAG.
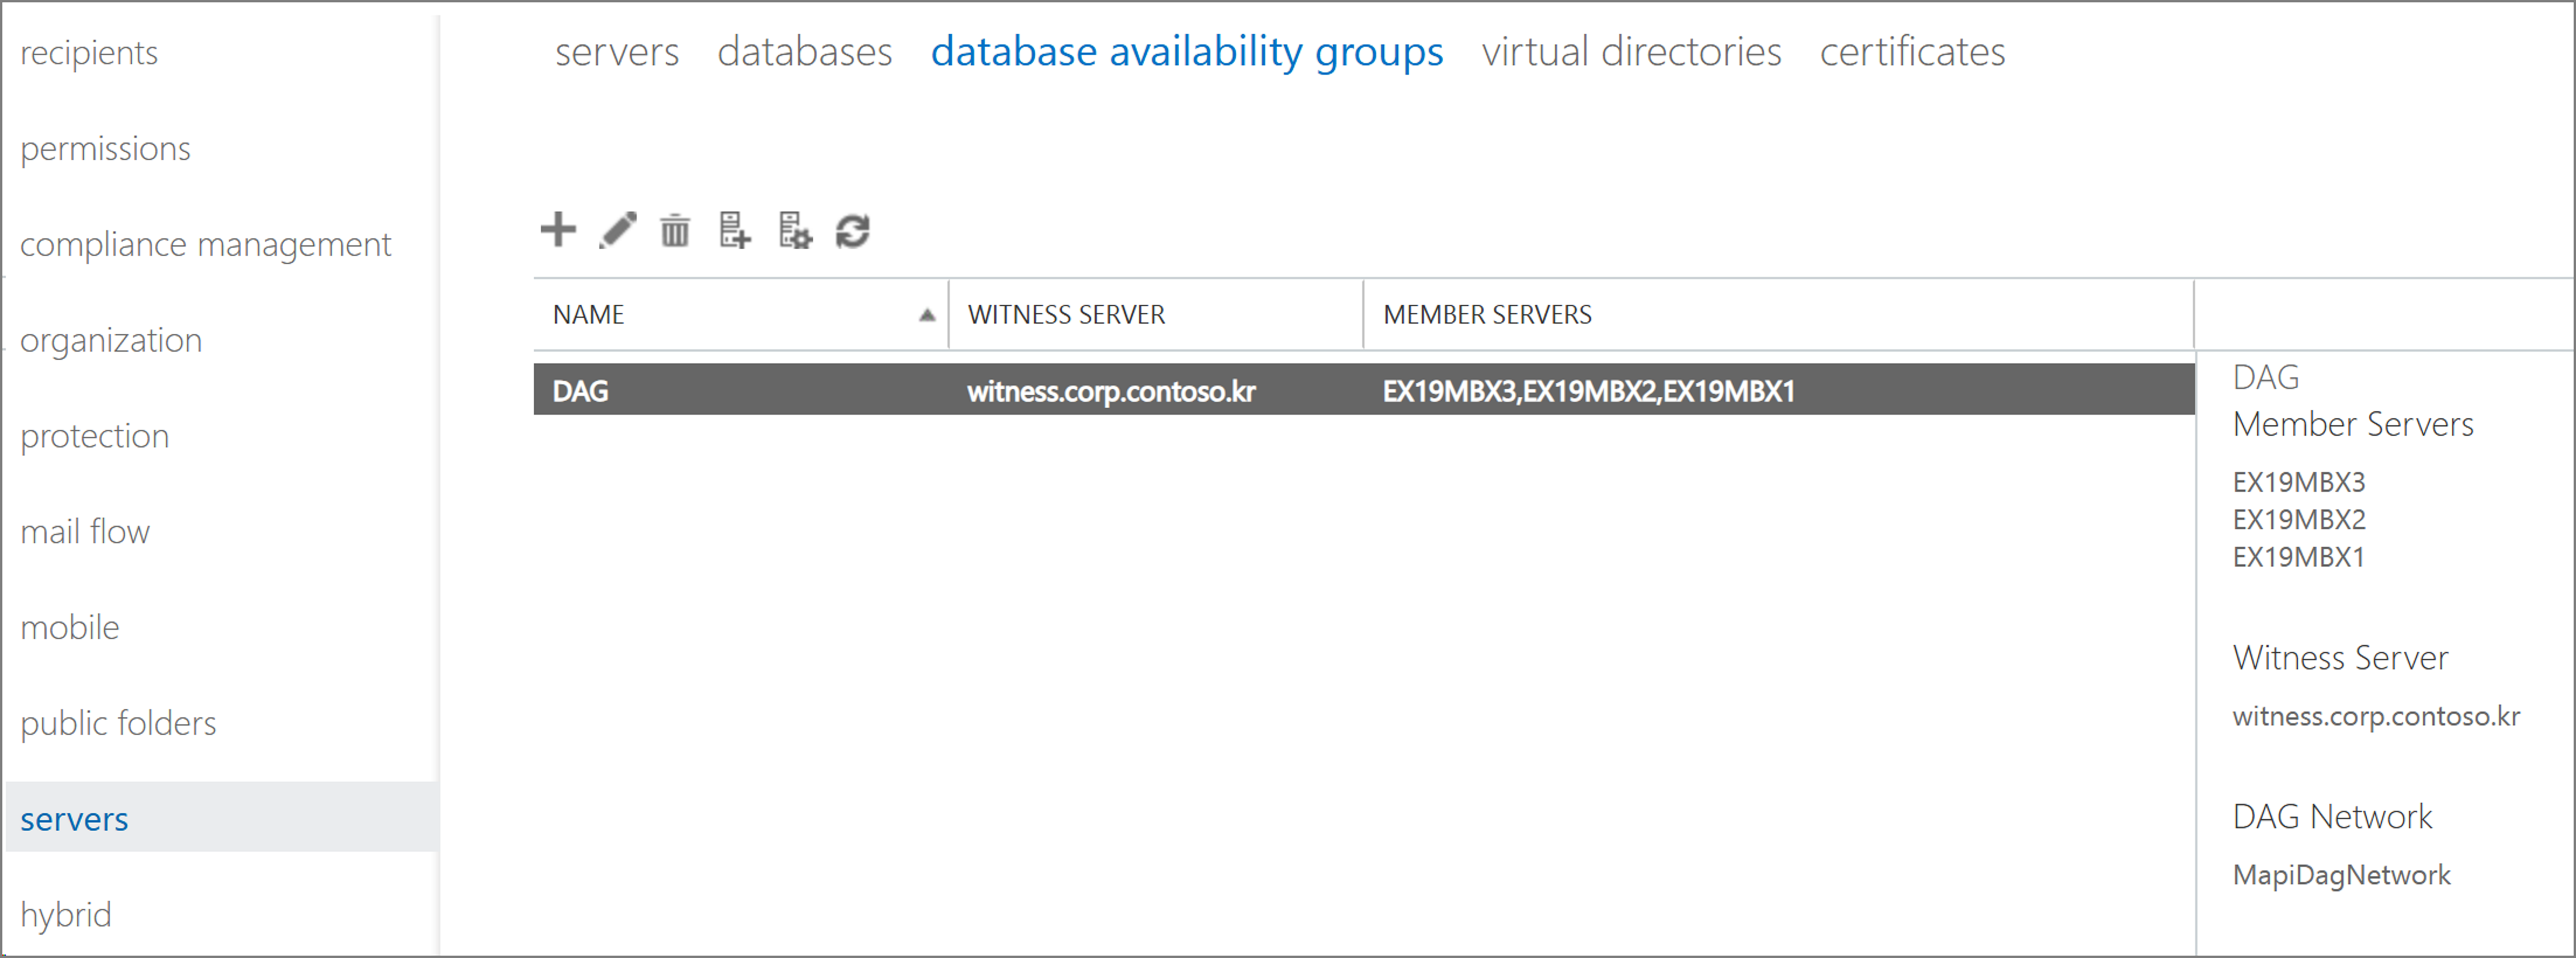
Open Exchange Admin Center (ECP) -> Servers -> Database Availability Groups -> Add
Specify the DAG name -> Enter Witness Server details -> Click Save
The DAG is created as shown below.
Click Manage DAG Membership
Add one Exchange Server first -> Click Save
The configuration process starts.
Add the remaining Exchange Servers using the same steps.
Step 3. Database Replication
After setting up the DAG, replicate the databases as follows:
Navigate to Databases -> Select a DB -> Click Add Database Copy
Add the Exchange Server -> Click Save
If circular logging is enabled, an error will occur. Disable circular logging before proceeding, then re-enable it later.
If an error occurs initially,
wait a moment and clickUpdateto force replication.
Once complete, verify that the replication status is Healthy.
Check the other servers to confirm that replication is functioning correctly.
With this setup, your Exchange Server DAG is now fully configured using the IPLess approach, providing high availability and redundancy.
After reviewing that video, viewers requested a guide on how to configure alerts via Email. In this session, I will demonstrate how to create that flow. Recently, chatbots generated in Copilot Studio have been referred to as Agents. Unless there are changes, I will continue to define them as Agents. The environment is set to USA (Early), the browser language is set to English, and the work is being done using the Preview URL.
To enable connections from various clients like Outlook, proceed with configuring the virtual directories.
Run the Exchange Management Shell.
'
#Enter the URL to be used commonly across the virtual directories.
$url = "https://mail.wingtiptoys.kr"
$autodiscover = "https://autodiscover.wingtiptoys.kr"

#Set the Virtual Directory internal and external URLs to be identical.
#ECP
Get-EcpVirtualDirectory | Set-EcpVirtualDirectory -InternalUrl "$url/ecp"  -ExternalUrl "$url/ecp"
#EWS
Get-WebservicesVirtualDirectory | Set-WebservicesVirtualDirectory -InternalUrl "$url/ews/Exchange.asmx"  -ExternalUrl "$url/ews/Exchange.asmx"
#MAPI
Get-MapiVirtualDirectory | Set-MapiVirtualDirectory -InternalUrl "$url/mapi"  -ExternalUrl "$url/mapi"
#EAS
Get-ActiveSyncVirtualDirectory | Set-ActiveSyncVirtualDirectory -InternalUrl "$url/Microsoft-Server-ActiveSync"  -ExternalUrl "$url/Microsoft-Server-ActiveSync"
#OAB
Get-OabVirtualDirectory | Set-OabVirtualDirectory -InternalUrl "$url/oab"  -ExternalUrl "$url/oab"
#OWA
Get-OwaVirtualDirectory | Set-OwaVirtualDirectory -InternalUrl "$url/owa"  -ExternalUrl "$url/owa"

#Autodiscover
Get-ClientAccessService | Set-ClientAccessService -AutodiscoverServiceInternalUri "$autodiscover/autodiscover/autodiscover.xml"

#Run the following commands on each server.
IISReset
Step 3. Accepted Domain
If you create a domain like Corp. or .local in a test environment, you must add an accepted domain for the actual receiving address.
Go to Mail flow -> Accepted domains -> Click + (Add).
Add the domain.
Step 4. Modify Email Address Policies
To ensure that newly created mailboxes are automatically assigned to the added domain, you need to modify the Email Address Policies.
Mail flow -> email address policies -> Default Policy
Go to Email address format -> Make the necessary modifications.
Modify the Email Address Parameters.
Save
Step 5: DNS Configuration (Must)
Add the values for Autodiscover, OWA, SPF, and MX records to both the internal and external DNS servers. (Refer to the video for detailed instructions.)
Example: Internal DNS
Example: External DNS
Step 6: Install Certificates (Must)
Initially, certificate requests were created through the Exchange Server UI, but recently, I’ve been using the Tool provided by Digicert for its simplicity.
In practice, most of the process is typically handled by the certificate provider.
Create CSR
I purchased a Multi SAN (Subject Alternative Name) certificate and have written this guide based on that.
Copy the CSR
Proceed with the issuance process on the certificate provider’s website where you purchased the certificate.
For domain verification, you can either proceed with the DNS verification process or:
Verify the domain by receiving an email and completing the authentication process.
Import the issued certificate into the server.
Specify the certificate file.
Specify a name -> Click Finish.
Verify that the certificate has been successfully installed.
#View the installed certificate.
Get-ExchangeCertificate
#Certificate Binding
Enable-ExchangeCertificate -Thumbprint <Thumbprint> -Services IIS,SMTP -DoNotRequireSsl
#Restart the IIS service (requires running Exchange Management Shell with administrative privileges).
IISReset
Verify that the certificate has been correctly applied by accessing the Exchange Server from both internal and external networks.
Step 7. Manage Database (Optional)
In a company environment, it is uncommon to keep the database location and the installation path the same. Let's move it to the D drive.
First, navigate to Servers -> Databases to check the default database name.
Perform this process on each server.
#Change Database Name
Get-MailboxDatabase -Identity "old DB name"|Set-Mailboxdatabase -Name "New DB name"
#Change the database path
Move-DatabasePath "New DB name" -EdbFilePath "D:\EDB01\EDB01.edb" -LogFolderPath "D:\EDB01\"
You can verify that the .edb and log files have been moved to the specified path.
Check the updated information in the Admin Center.
Since the log files of the database can grow significantly, it is recommended to enable circular logging if you are not using a backup solution.
Use IIS Manager to remove the Require SSL setting from the Default Web Site.
%windir%\system32\inetsrv\appcmd.exe set config "Default Web Site" -section:access -sslFlags:None -commit:APPHOST
Use IIS Manager to restore the Require SSL setting for other virtual directories under the Default Web Site.
%windir%\system32\inetsrv\appcmd.exe set config "Default Web Site/api" -section:Access -sslFlags:Ssl,Ssl128 -commit:APPHOST
%windir%\system32\inetsrv\appcmd.exe set config "Default Web Site/aspnet_client" -section:Access -sslFlags:Ssl,Ssl128 -commit:APPHOST
%windir%\system32\inetsrv\appcmd.exe set config "Default Web Site/Autodiscover" -section:Access -sslFlags:Ssl,Ssl128 -commit:APPHOST
%windir%\system32\inetsrv\appcmd.exe set config "Default Web Site/ecp" -section:Access -sslFlags:Ssl,Ssl128 -commit:APPHOST
%windir%\system32\inetsrv\appcmd.exe set config "Default Web Site/EWS" -section:Access -sslFlags:Ssl,Ssl128 -commit:APPHOST
%windir%\system32\inetsrv\appcmd.exe set config "Default Web Site/mapi" -section:Access -sslFlags:Ssl,Ssl128 -commit:APPHOST
%windir%\system32\inetsrv\appcmd.exe set config "Default Web Site/OAB" -section:Access -sslFlags:Ssl,Ssl128 -commit:APPHOST
%windir%\system32\inetsrv\appcmd.exe set config "Default Web Site/owa" -section:Access -sslFlags:Ssl,Ssl128 -commit:APPHOST
Use IIS Manager to configure the Default Web Site to redirect to the /owa virtual directory. (Enter the actual URL you configured in this command)
%windir%\system32\inetsrv\appcmd.exe set config "Default Web Site" -section:httpredirect -enabled:true -destination:"https://mail.wingtiptoys.kr/owa" -childOnly:true
Remove HTTP redirection for the sub-virtual directories.
%windir%\system32\inetsrv\appcmd.exe set config "Default Web Site/API" -section:httpredirect -enabled:false -destination:"" -childOnly:false
%windir%\system32\inetsrv\appcmd.exe set config "Default Web Site/aspnet_client" -section:httpredirect -enabled:false -destination:"" -childOnly:false
%windir%\system32\inetsrv\appcmd.exe set config "Default Web Site/ecp" -section:httpredirect -enabled:false -destination:"" -childOnly:false
%windir%\system32\inetsrv\appcmd.exe set config "Default Web Site/ews" -section:httpredirect -enabled:false -destination:"" -childOnly:false
%windir%\system32\inetsrv\appcmd.exe set config "Default Web Site/mapi" -section:httpredirect -enabled:false -destination:"" -childOnly:false
%windir%\system32\inetsrv\appcmd.exe set config "Default Web Site/owa" -section:httpredirect -enabled:false -destination:"" -childOnly:false
%windir%\system32\inetsrv\appcmd.exe set config "Default Web Site/powershell" -section:httpredirect -enabled:false -destination:"" -childOnly:false
%windir%\system32\inetsrv\appcmd.exe set config "Default Web Site/rpc" -section:httpredirect -enabled:false -destination:"" -childOnly:false
Restart IIS
IISRESET
If there are multiple production servers, repeat the same process on all servers.
How to Verify Functionality:
On a client computer, open a web browser and enter the URL: http://<ServerName>
Verify that the request is redirected to Outlook on the Web (HTTPS) and confirm that you can log in.
When emails accumulate in the queue, the Mail.que file increases in size. If it reaches a level where disk space becomes insufficient, the Transport Service will stop. To prevent such service disruptions in advance, the location of the Queue DB is often changed and managed.
Create a new folder for the Queue DB. (In the test environment, it was set to the D drive, but in a production environment, it is recommended to use a location separate from the database.)
Step 13. Specify the Offline Address Book (OAB) (Optional)
Assign the Offline Address Book (OAB) to each database.
This concludes this post. When delving into details, each item has its own prerequisites. If the opportunity arises, I will cover each topic in greater detail.
Following the Domain Controller configuration, this time I will cover configuring Exchange Server 2019 on Windows Server 2022. It appears that Windows Server 2025 will be supported starting with CU15.
The VM environment is as follows:
DC: Windows Server 2025, 4 Core, RAM: 4GB
EX: Windows Server 2022, 8 Core, RAM: 10GB, Exchange Server 2019 CU12
This was written based on the following resources.
Create a service account to be used for Exchange Server.
Assign the Enterprise Admins and Schema Admins permissions to the service account.
Join the server to the Active Directory (AD) using the service account.
Run Netplwiz.
Grant Administrator permissions to the service account.
[Step 2] Virtual Memory Configuration
Since virtual memory can impact performance, it is highly recommended to set it to a fixed size.
System -> Advanced system settings -> Advanced -> Settings
Advanced -> Change
Specify the virtual memory size -> Click Set -> Click OK.
According to the 2019 technical documentation, virtual memory is recommended to be set to 25% of the configured RAM, likely because the minimum recommended RAM is 128GB.
(However, in a test environment, it is recommended to set it to RAM + 10MB.)
OK
Restart Now
[Step 3] Install Required Features and Roles
Install the following prerequisite components.
Visual C++ Redistributable Package for Visual Studio 2012
Taking advantage of the release of Windows Server 2025, I’m planning to rewrite my previously posted test environment configuration. This time, I’ll pay more attention to creating a YouTube video as well.
Since Windows Server 2016, the methods and UI for configuring a Domain Controller (DC) have remained almost the same. However, engineers who are just starting out often prefer to work with the latest version, and there’s a tendency to assume that if the version numbers differ, the configuration steps might differ too. To address this, I’ve written a configuration guide for Windows Server 2025, even though the content is essentially the same.
This time, I’ll focus on Domain Controller (DC) configuration, and if time permits, I’ll proceed with an Exchange setup as well.
For the virtual machine (VM) specifications, I’ve allocated 4 cores for the CPU and 4GB of RAM. In the past, 2GB used to suffice, but it seems insufficient for recent demands.
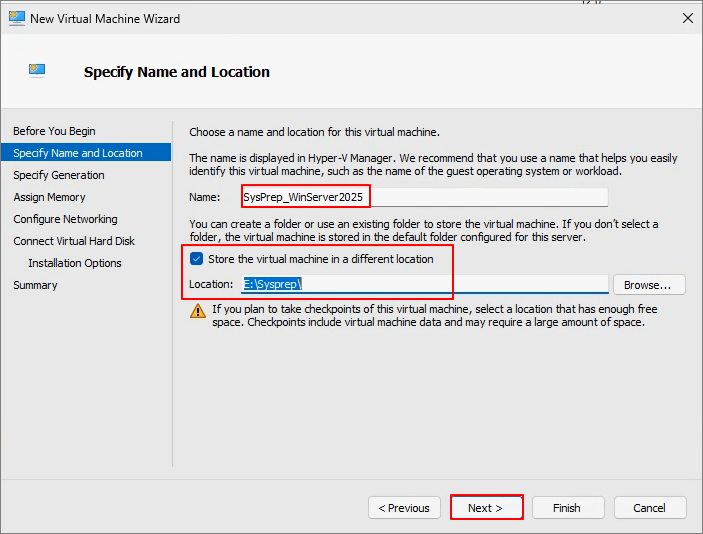
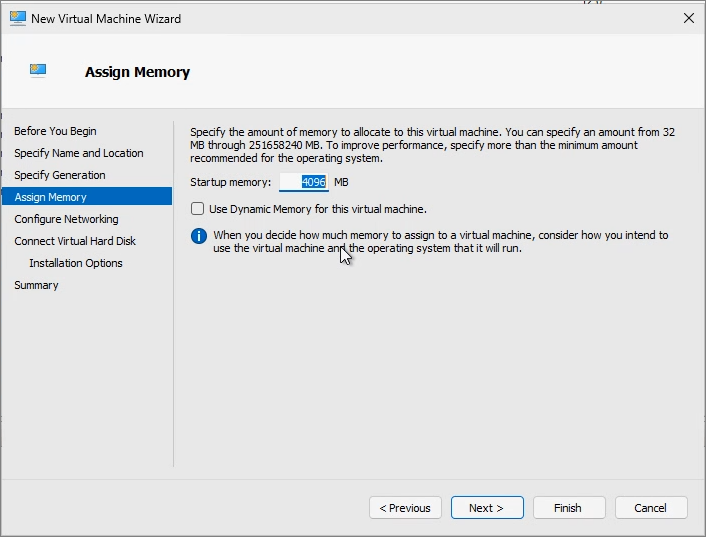
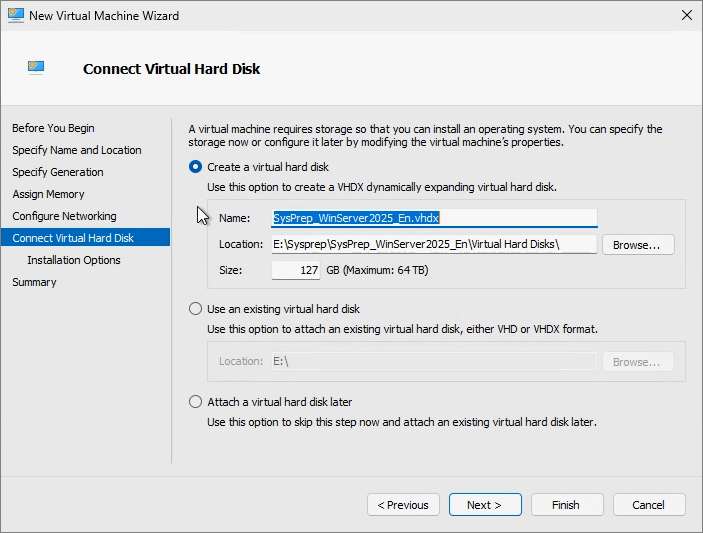
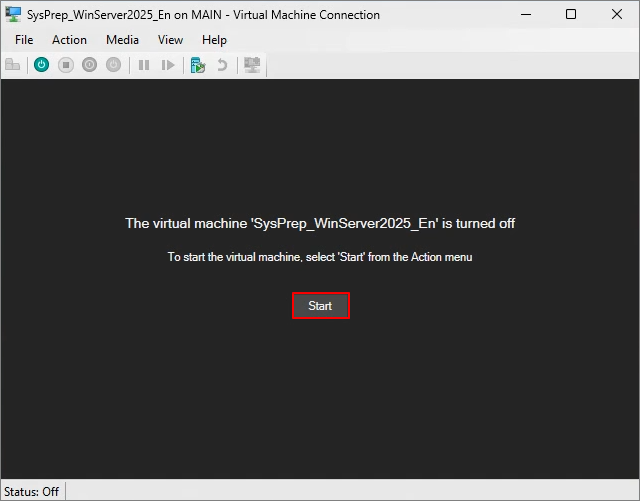
Please refer to my previous posts or videos for instructions on installing Windows Server 2025 and performing Sysprep.
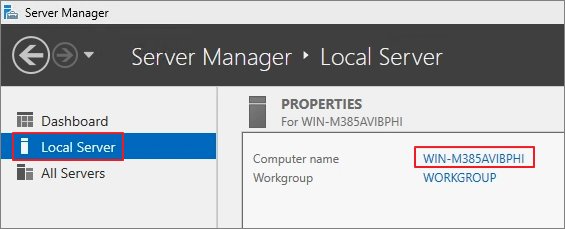
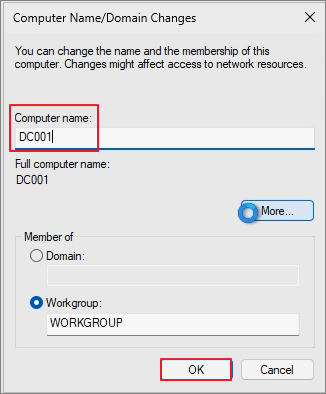
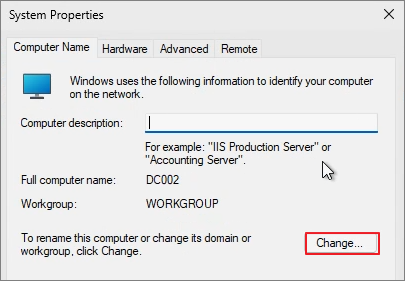
Navigate to Server Manager -> Local Server -> Click on Computer Name.
Change
Change the computer name to something that clearly identifies it as a Domain Controller. -> The system will reboot.
Local Server -> Ethernet
Right-click on Network Adapter -> Select Properties.
Select IPv4.
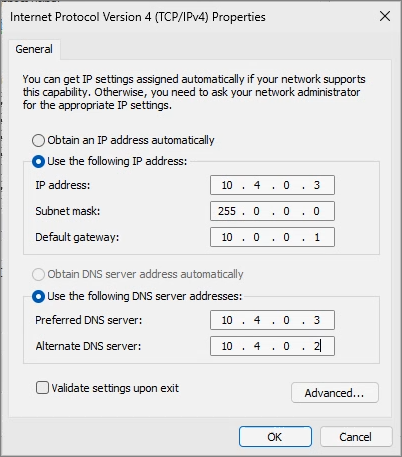
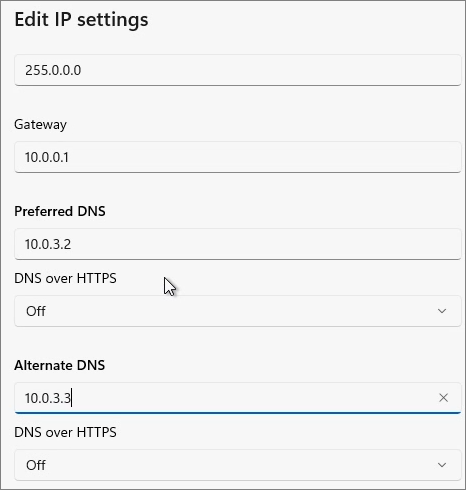
Enter the IP address according to your environment. Set the DNS to point to the IP address of the Domain Controller itself.
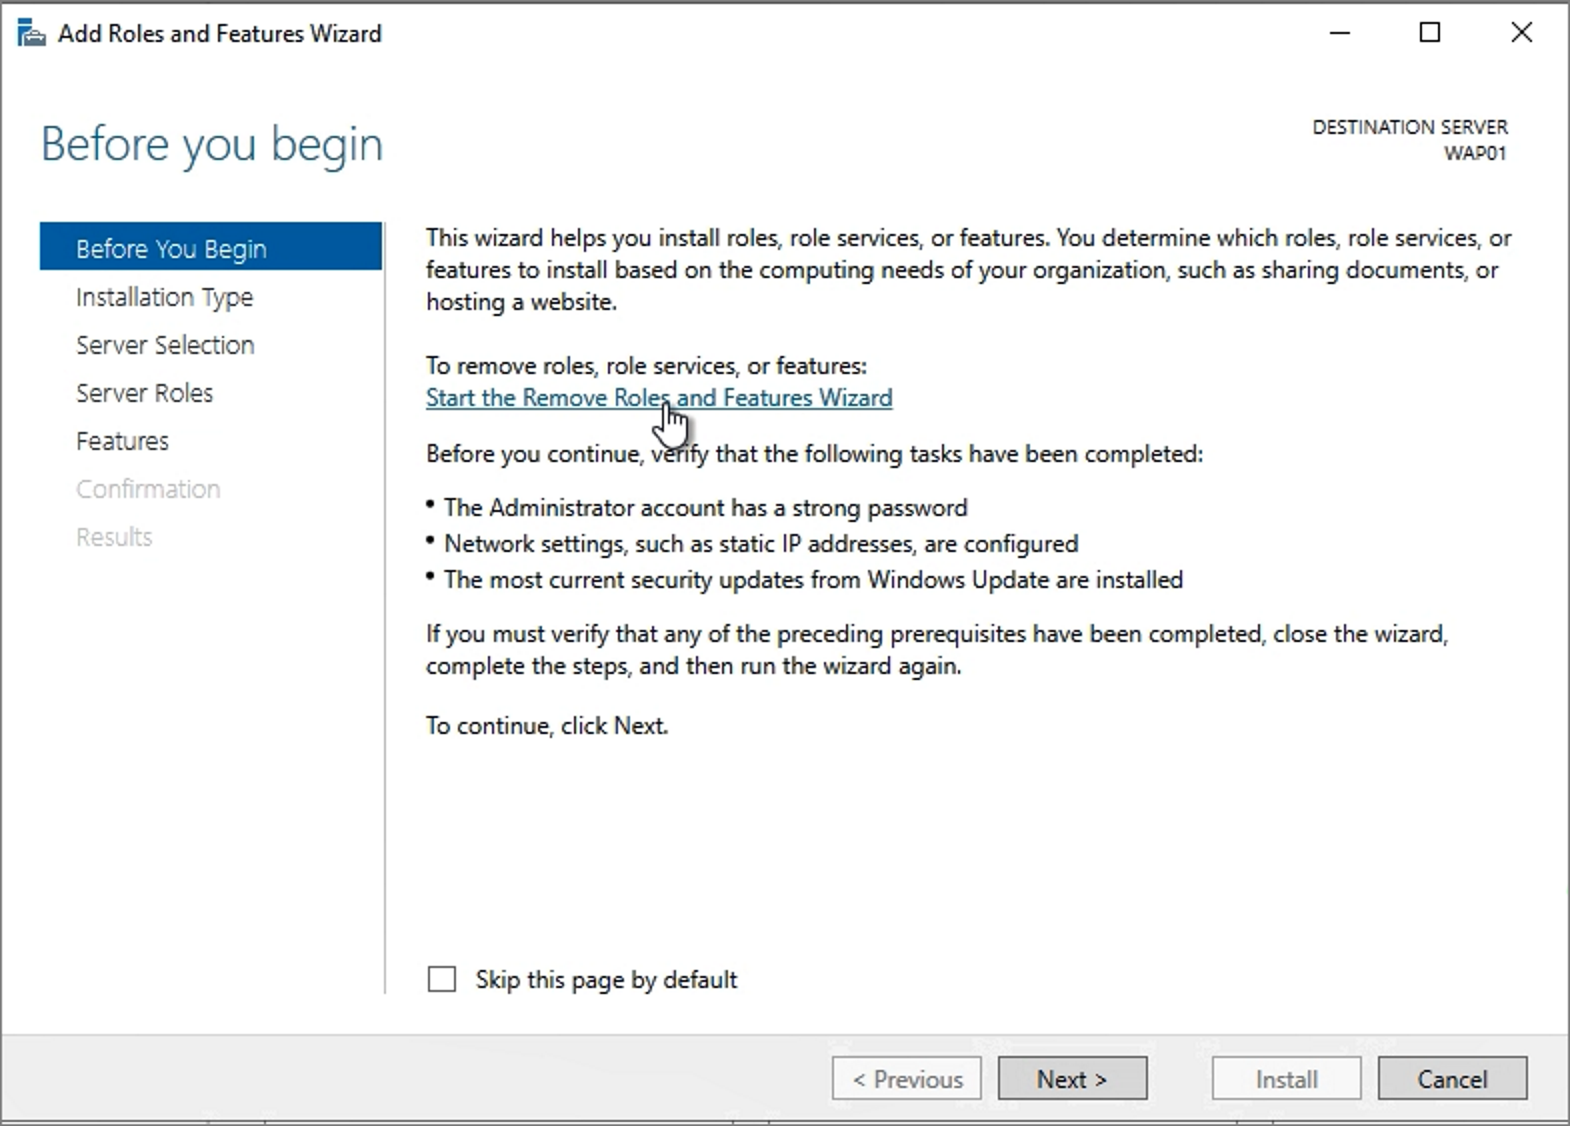
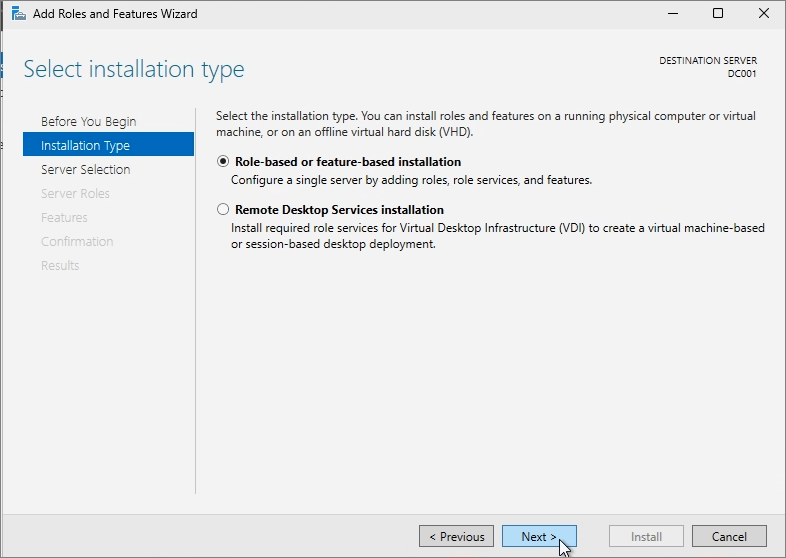
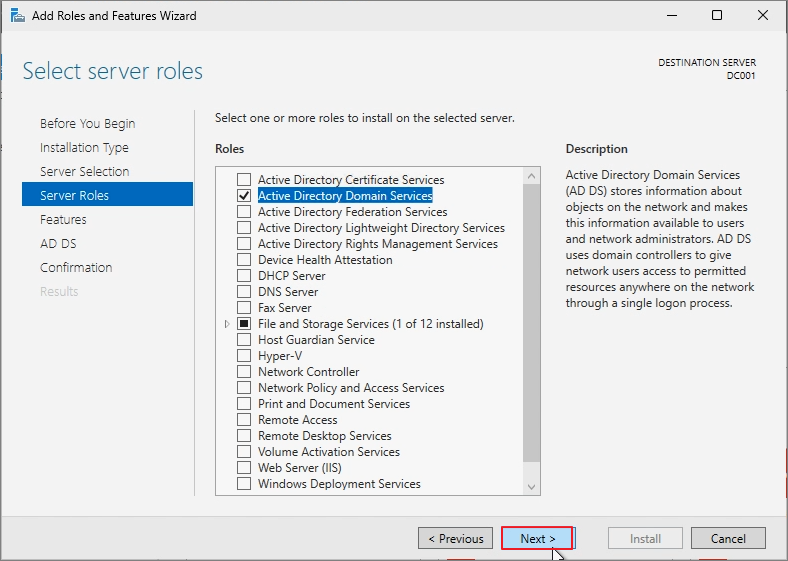
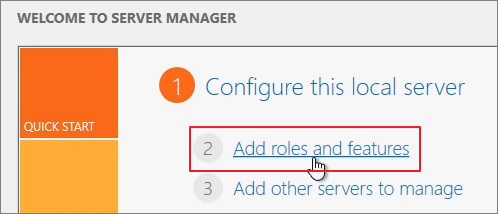
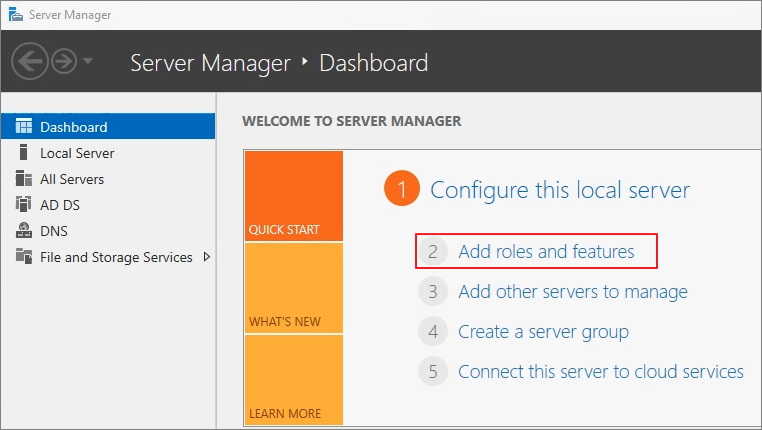
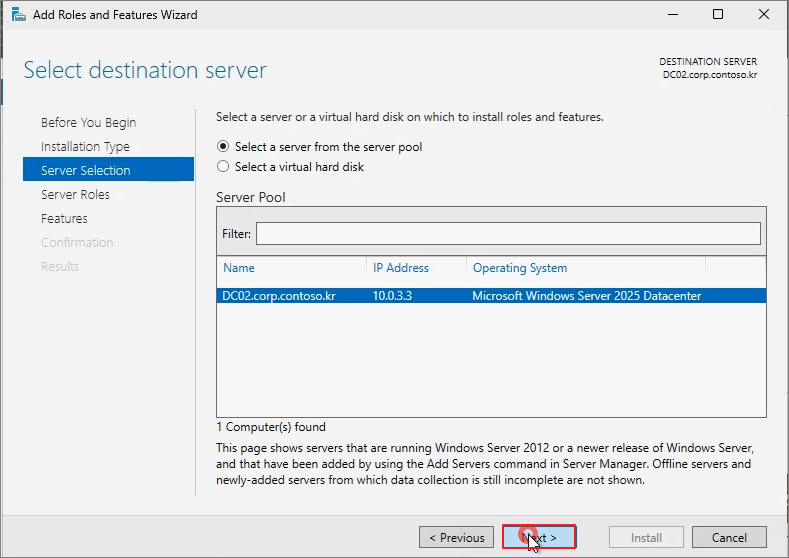
Server Manager -> Dashboard -> Add roles and features
Next
Next
Next
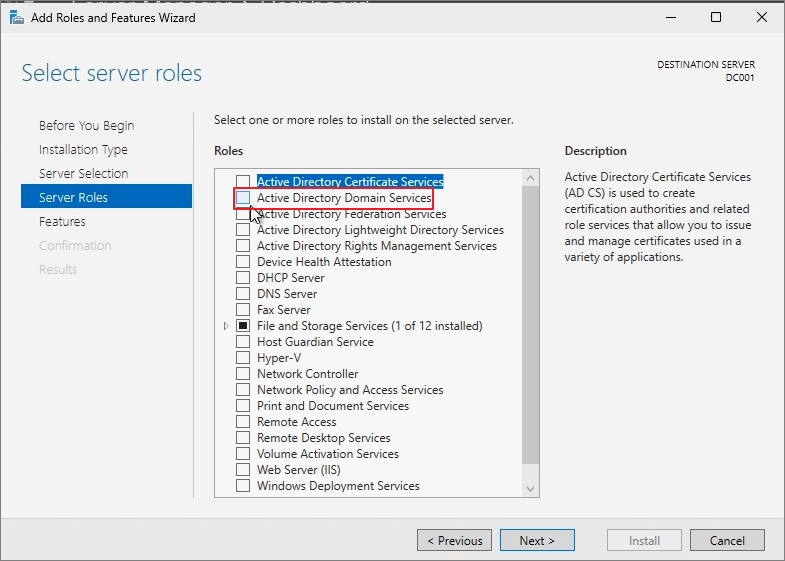
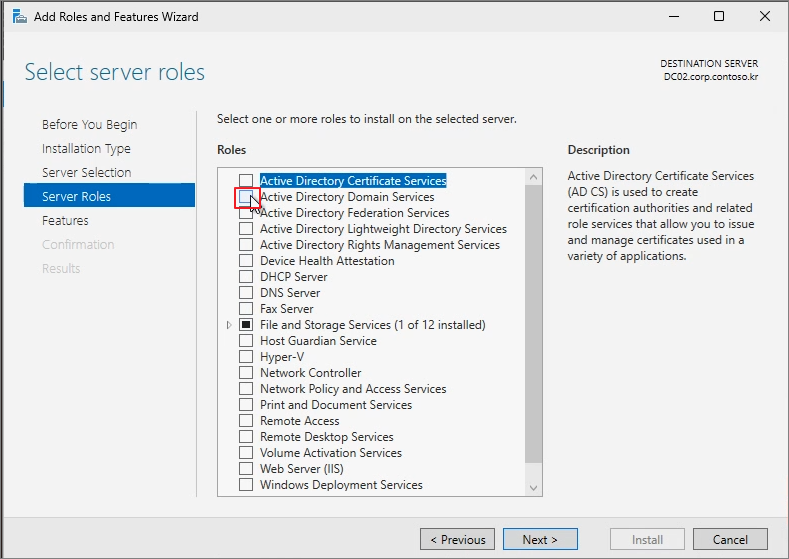
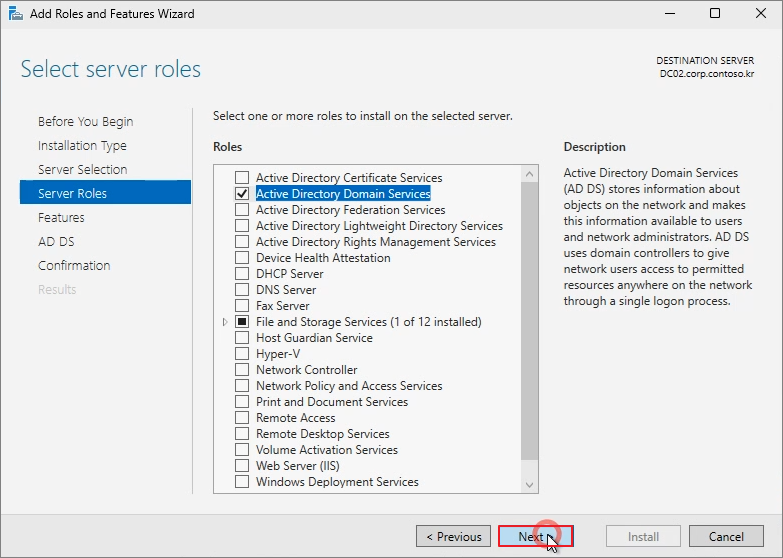
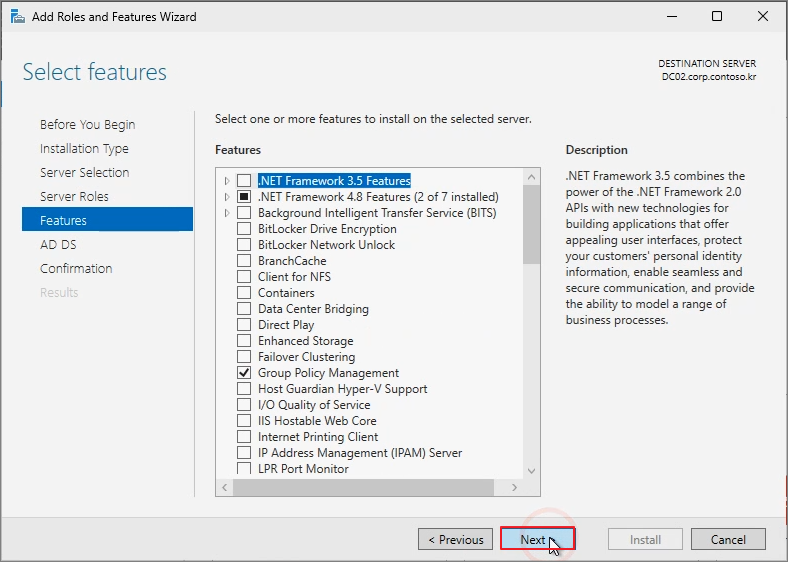
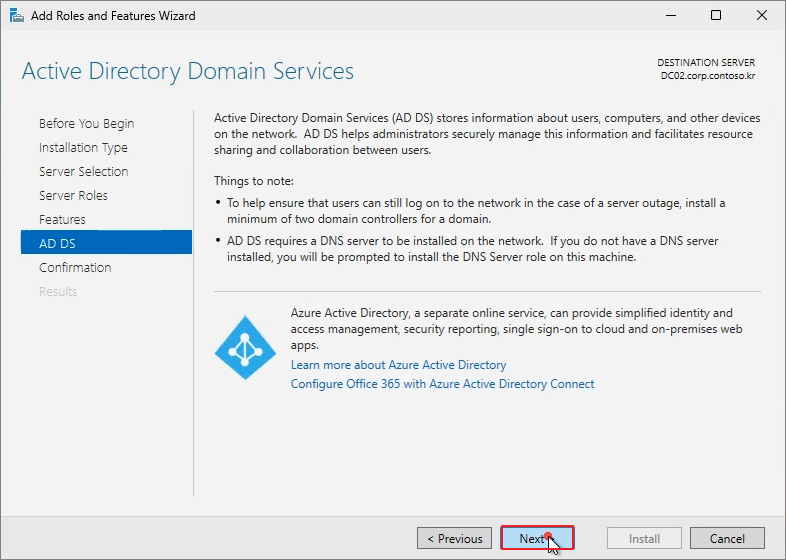
Check Active Directory Domain Services.
Add Features
Next
Next
Next
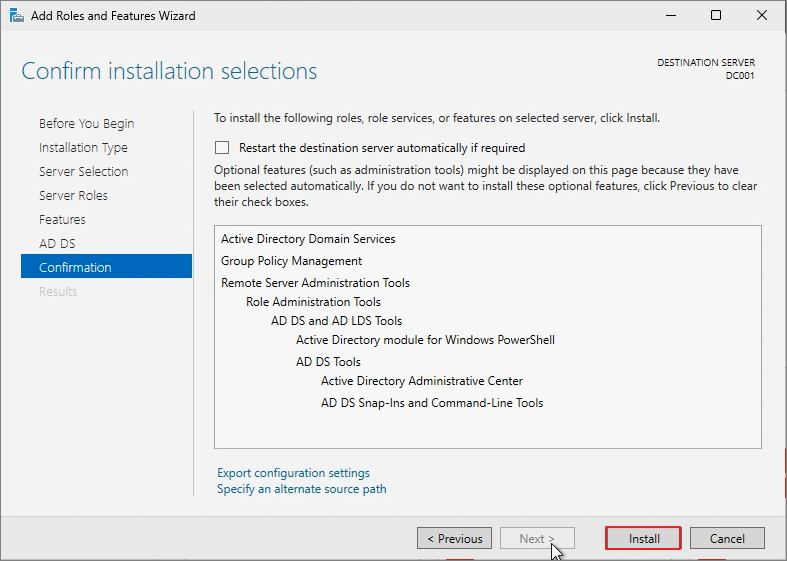
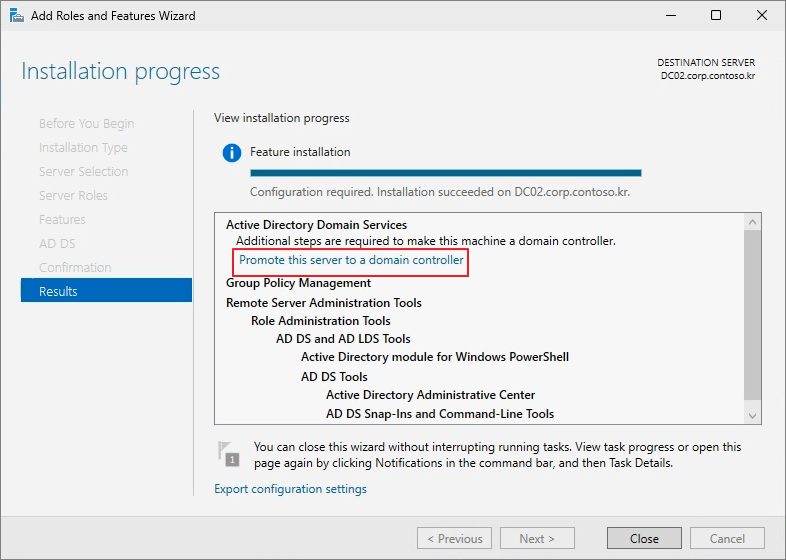
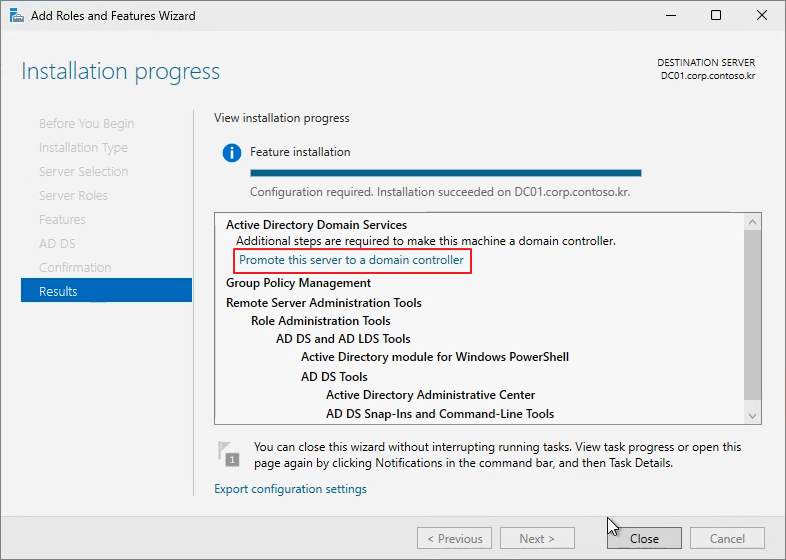
Install
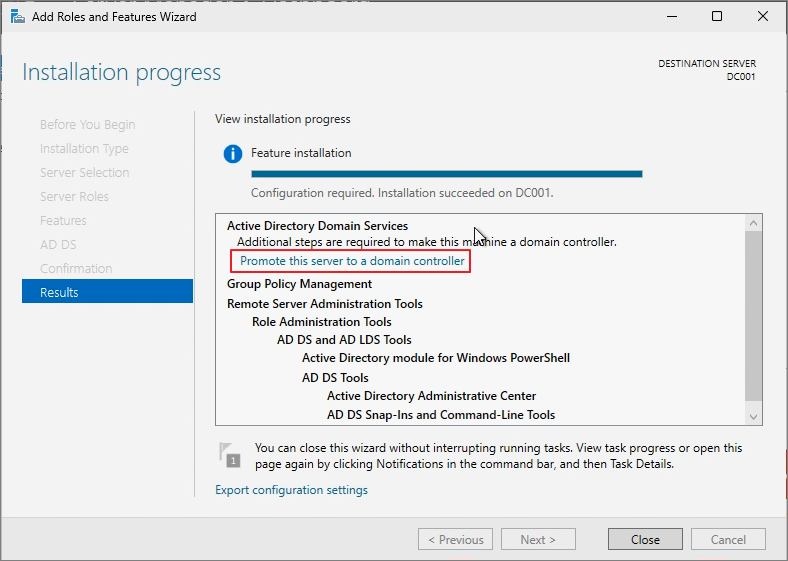
Promote Domain Controller
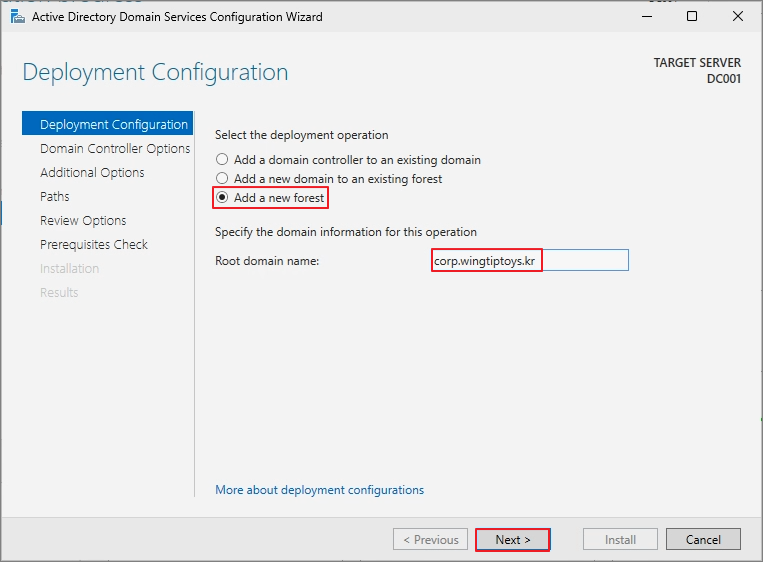
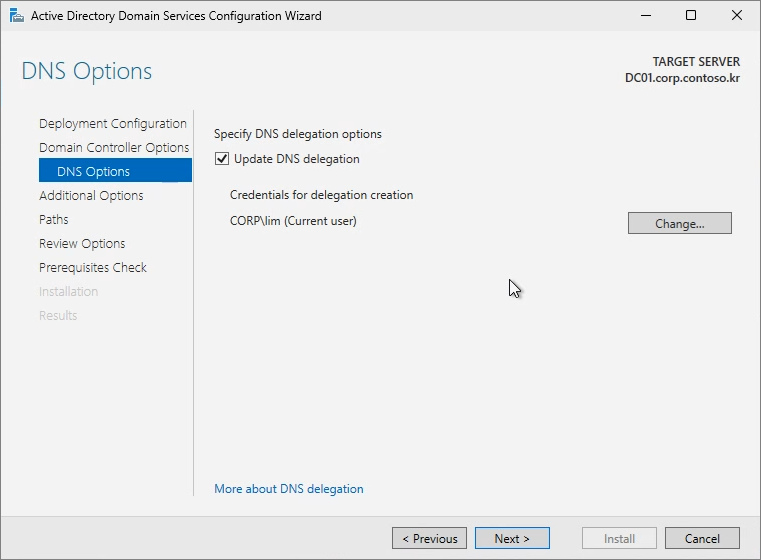
Add a new forest -> Root domain name 입력 -> Next
For reference, the reason for adding "Corp" before the domain name is based on Microsoft's Best Practices. From a personal perspective, adding "corp" has the following advantages:
1. It allows for separation of internal and external DNS, as the root domain might serve as the homepage in browsers.
2. Using ".local" in domains like "contoso.local" prevents the use of public certificates.
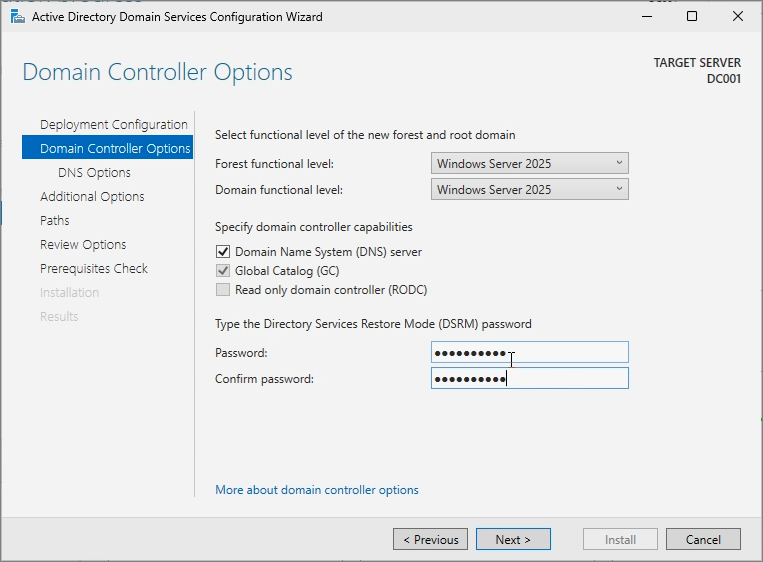
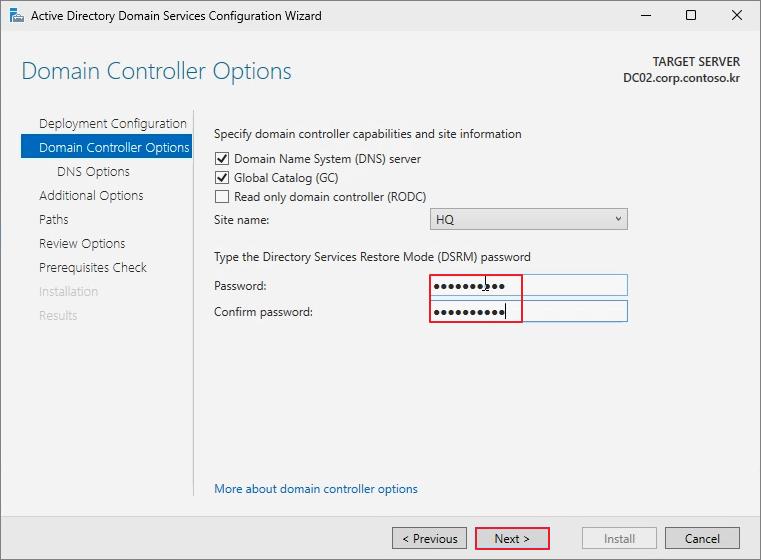
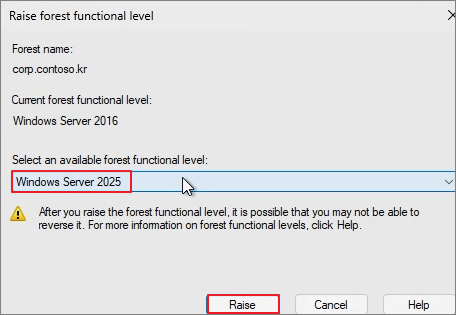
After creating the DSRM Password, proceed to Next. Until Windows Server 2022, the functional level was set to 2016, but it has now been upgraded to 2025 in Windows Server 2025.
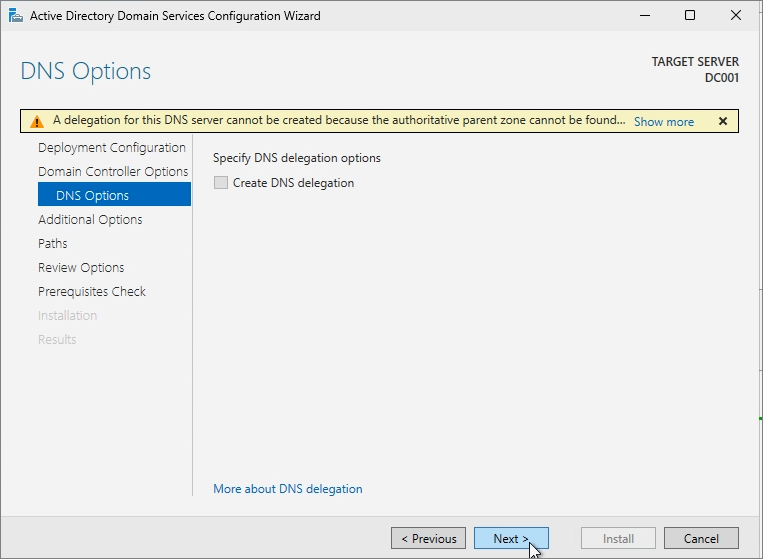
Next
Next
Next
Next
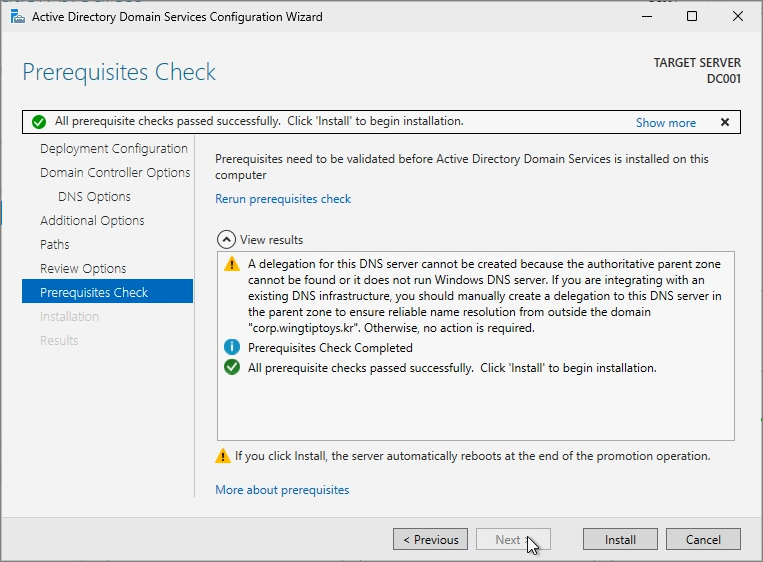
Install
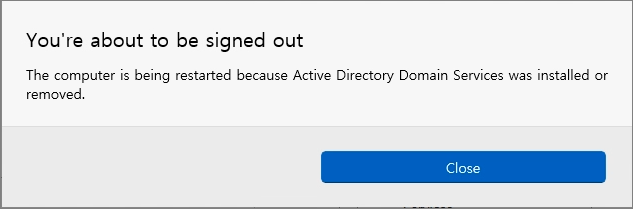
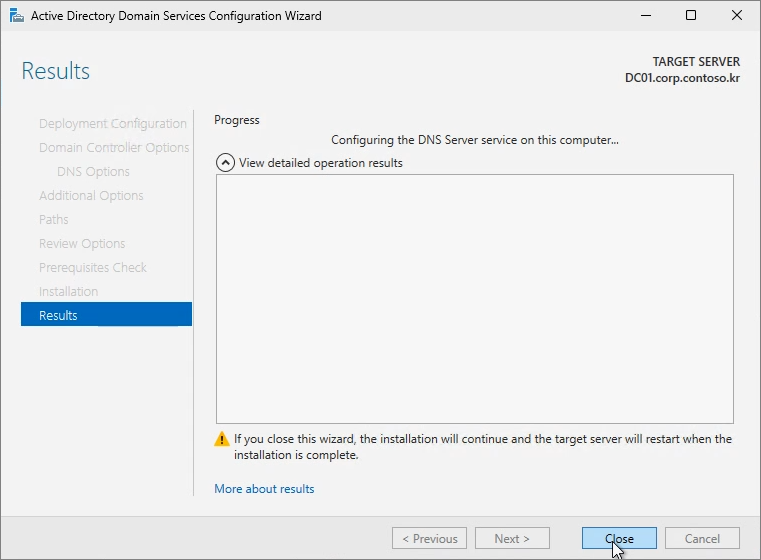
DC configuration is complete.
Click Close, and the system will reboot shortly after.
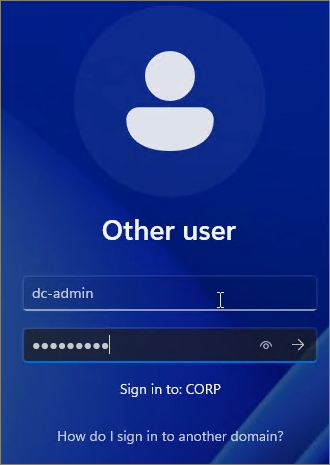
Log in using the Domain account as shown below.
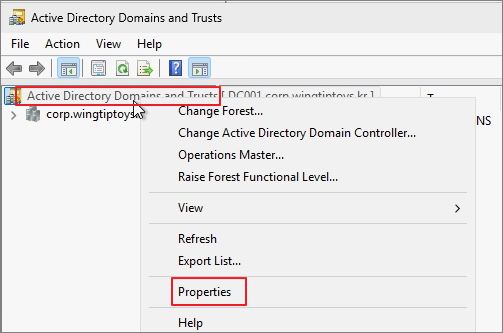
Active Directory Domains and Trusts
Right-click on Active Directory Domains and Trusts -> Select Properties.
Enter the domain to be used for user accounts -> Click Add -> Click OK.
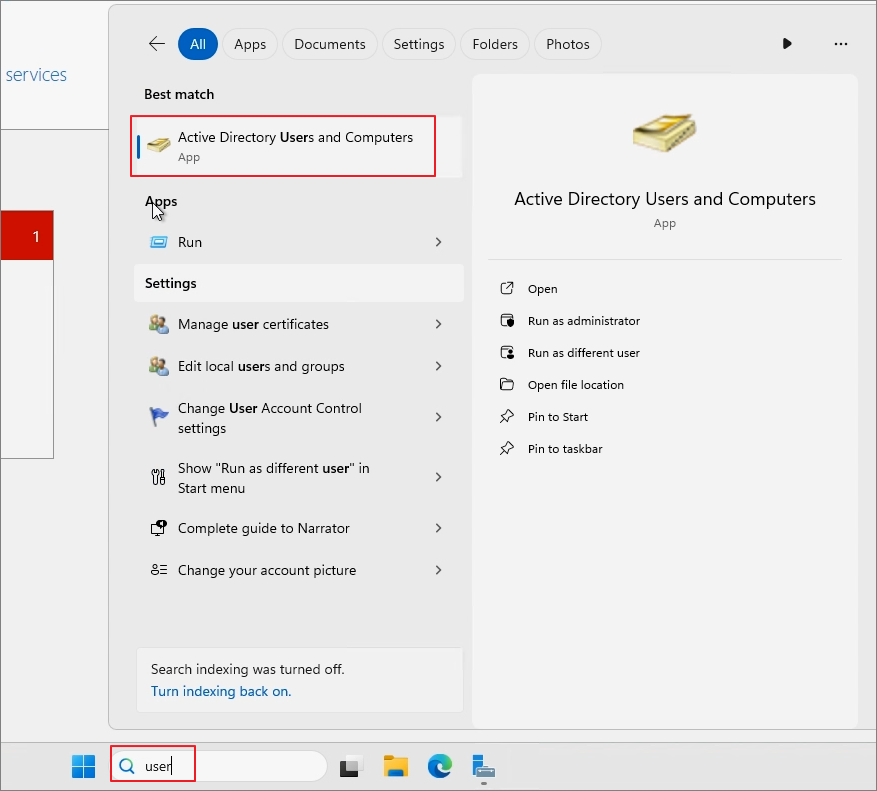
Run Active Directory Users and Computers (ADUC).
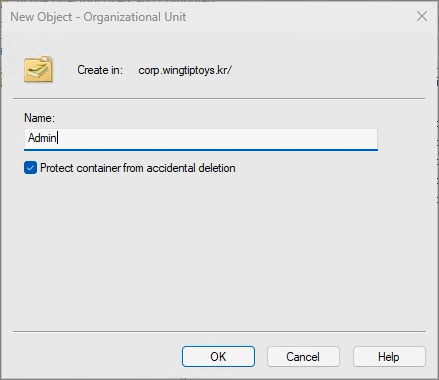
Right-click on the Domain -> Select New -> Choose Organizational Unit (OU).
Create an Organizational Unit (OU) for service accounts.
Right-click on the newly created OU -> Select New -> Choose User.
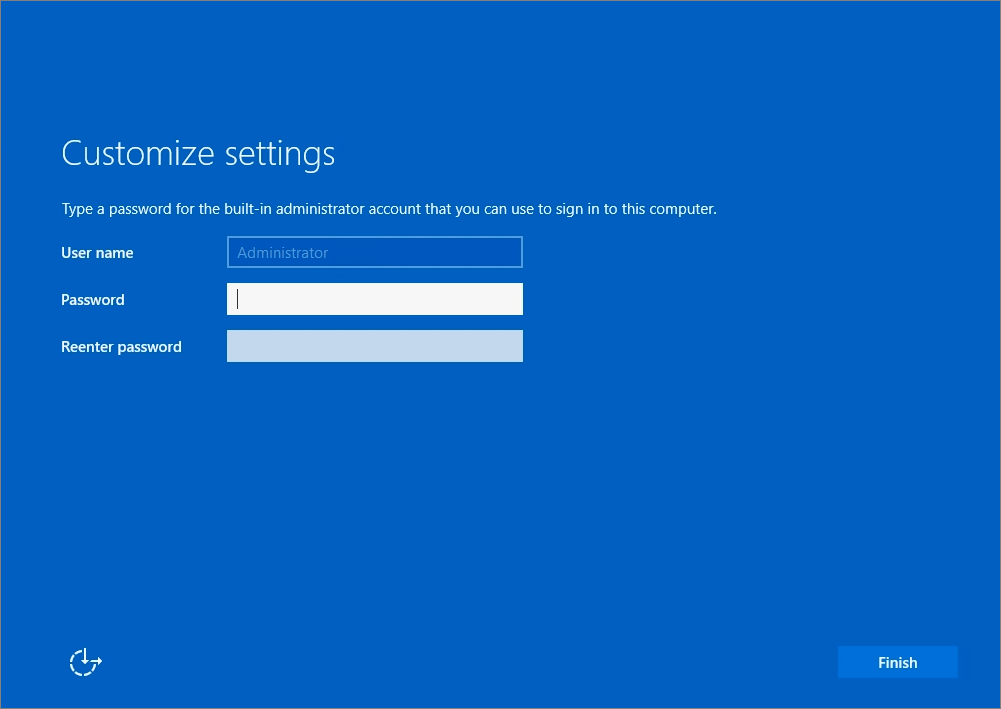
Create an Admin account to be used on the DC as shown below. (It is recommended not to use the default Administrator account for security purposes.)
Enter the password -> Click Next.
Finish
Right-click on the newly created account -> Select Properties.
Go to the Member Of tab -> Click Add -> Search for and add the following groups:
Sign out and verify if you can log in using the newly created account.
Proceed with setting up a Secondary DC. While not mandatory in a test environment, having at least two Domain Controllers is essential in a production environment for redundancy and reliability.
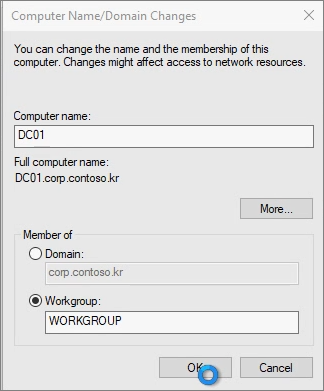
As before, change the Computer Name.
Set the DNS of the Network Adapter to point to the Main DC.
Server Manager -> Local Server -> WORKGROUP
Change
Enter the Domain -> Click OK.
Enter the DC Service Account that was previously created.
Sign in
Add roles and features
Proceed with the installation of Active Directory Domain Services Roles in the same manner as on the Main DC.
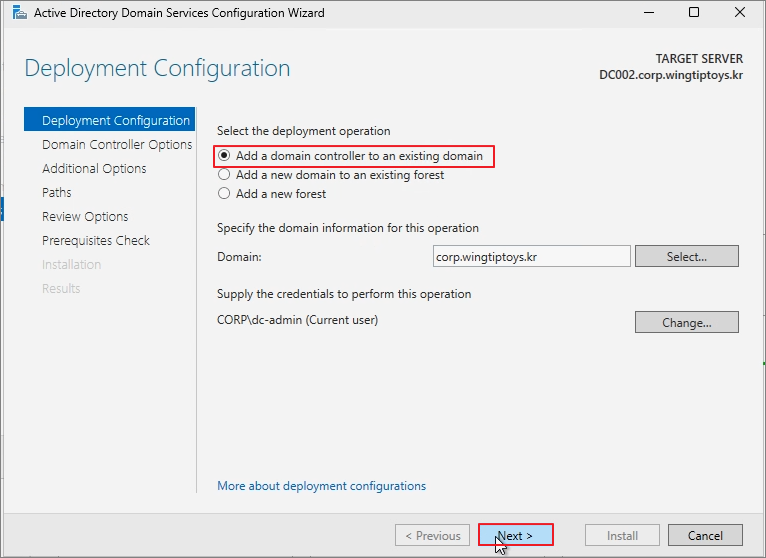
Unlike before, select Add a domain controller to an existing domain and proceed with the configuration.
Enter the DSRM Password -> Click Next.
Next
Next
Next
Next
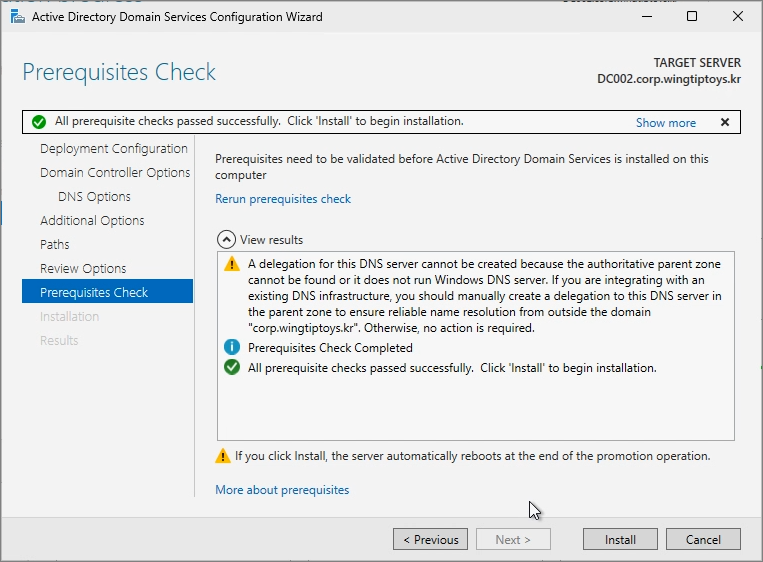
Click Install -> Once the installation is complete, the system will reboot.
For the Secondary DC, update the DNS settings so that the Primary DNS points to itself.
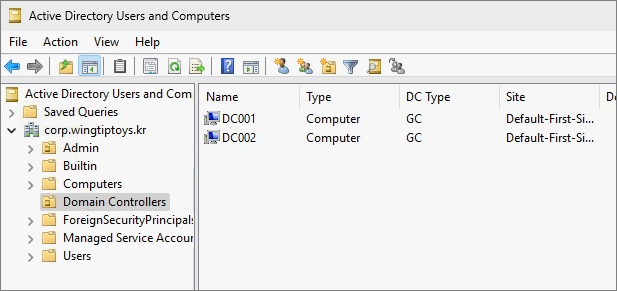
In Active Directory Users and Computers (ADUC), you can verify that both Domain Controllers are listed.
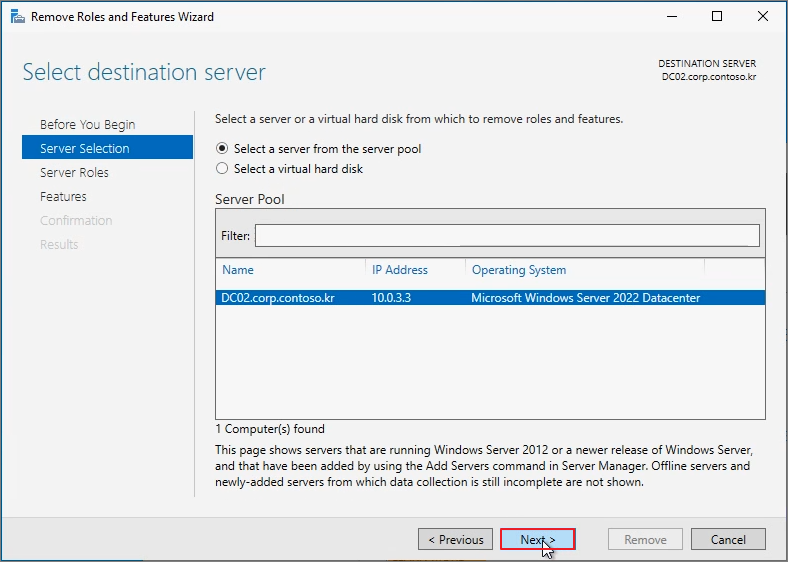
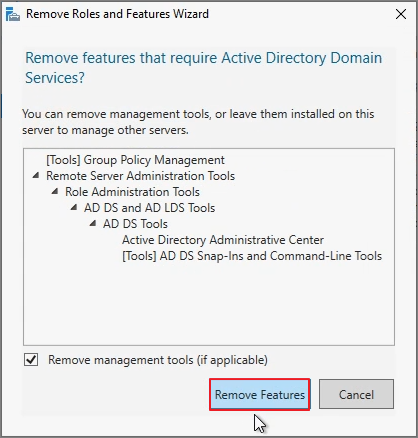
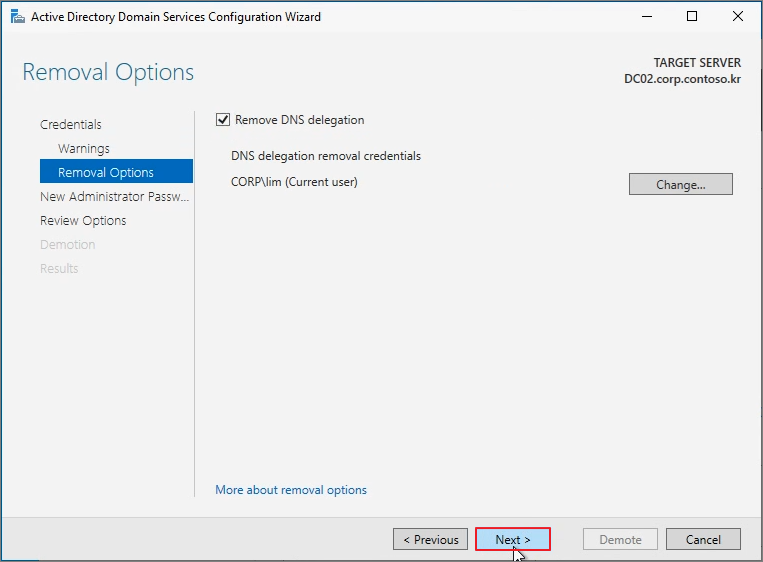
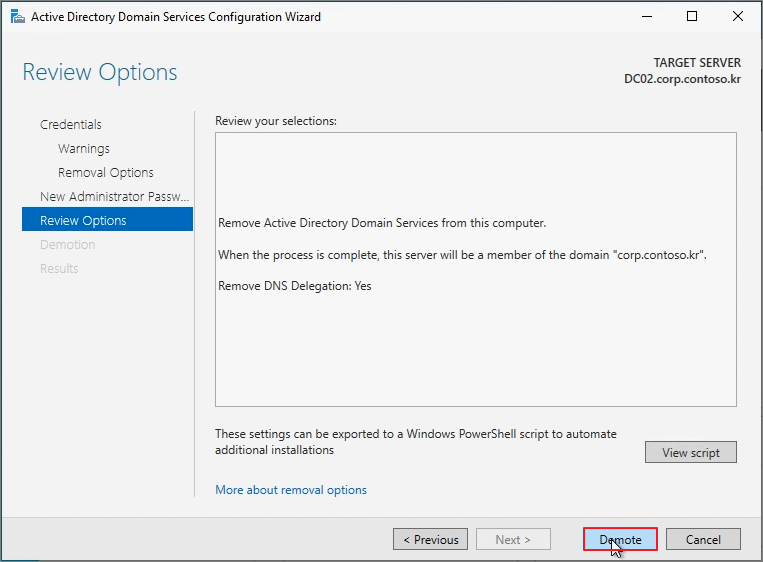
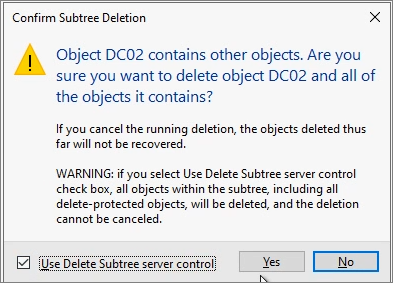
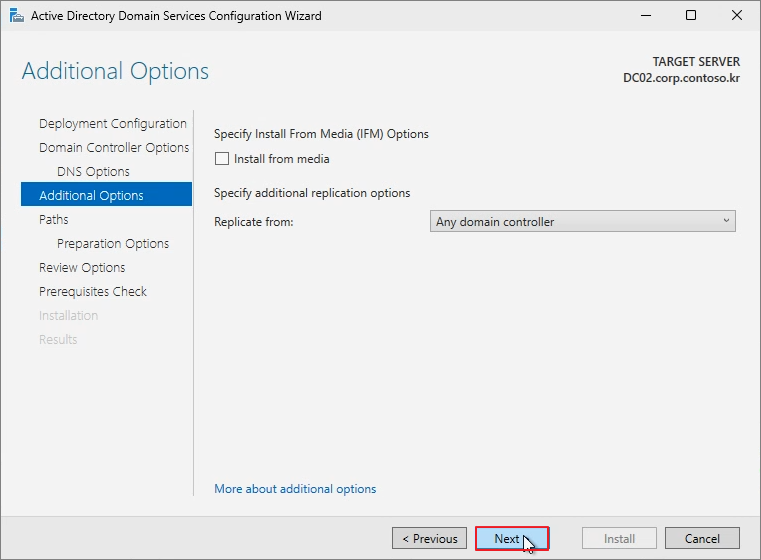
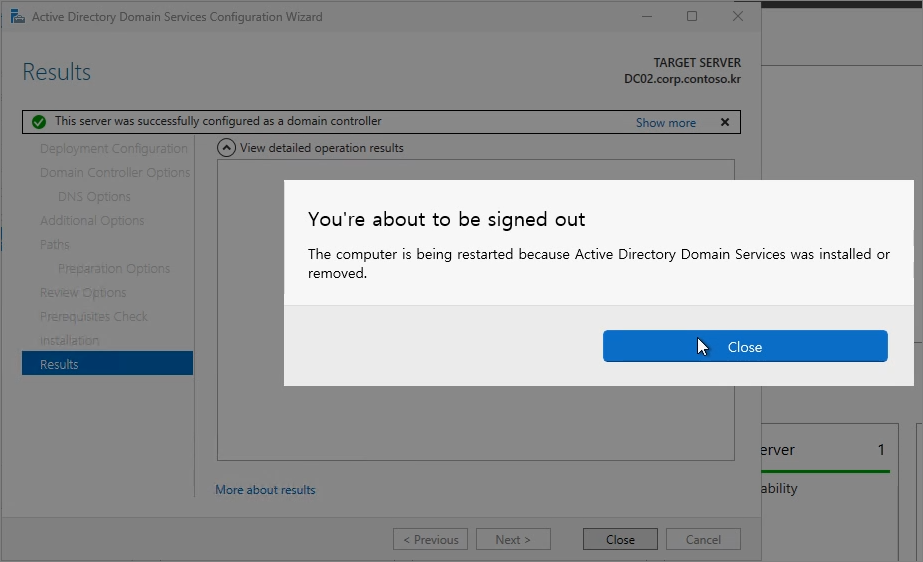
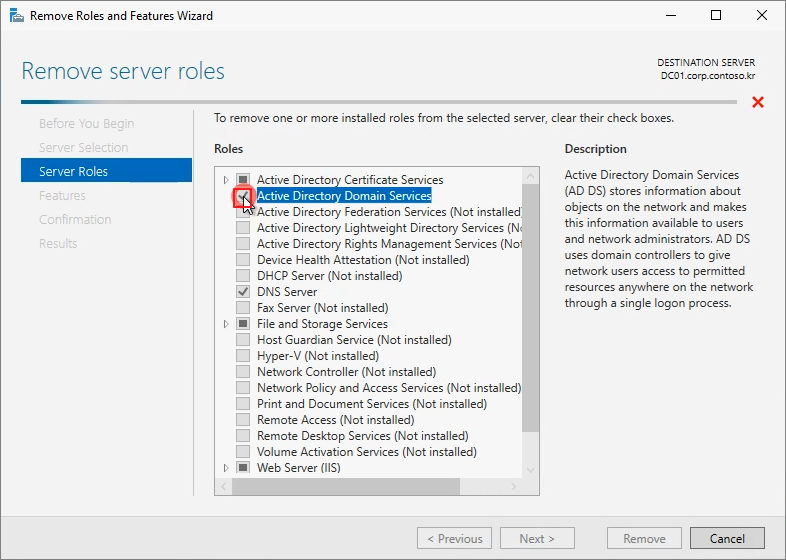
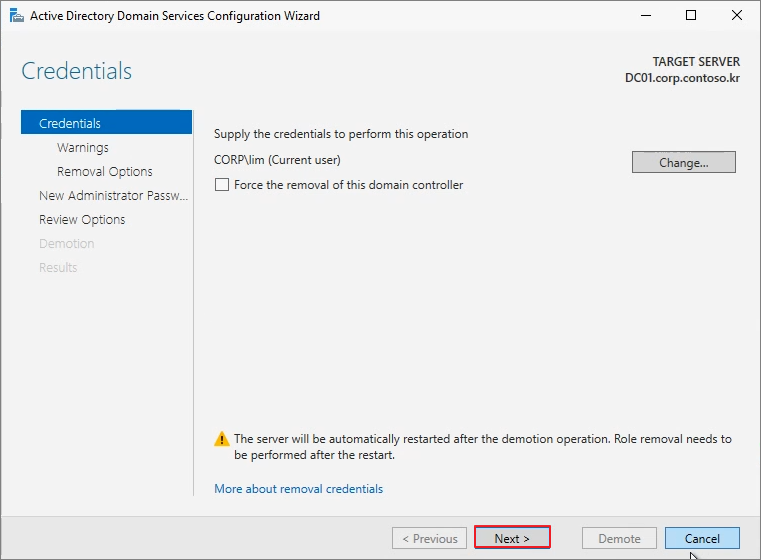
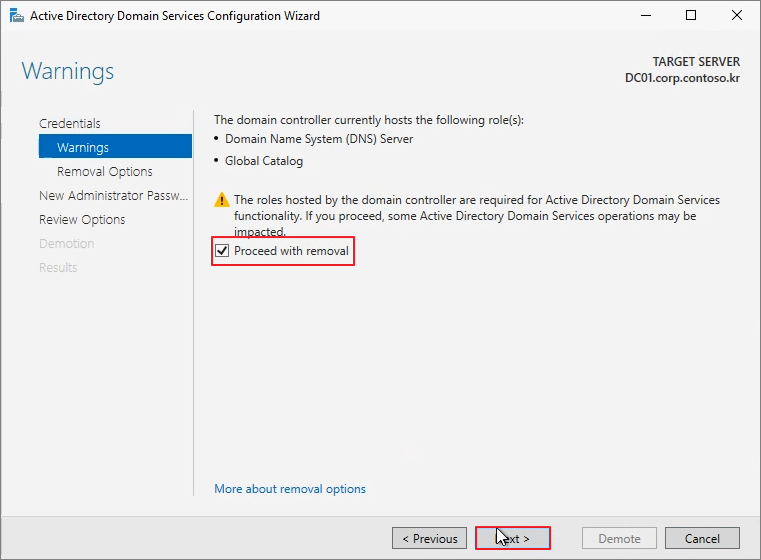
To take advantage of the new OS, I'll upgrade the AD Domain Controllers DC01 and DC02 to Windows Server 2025.
In a real-world environment, many factors would need to be considered, but since this is a test environment, I will only cover the basic upgrade process.
The Windows Server 2025 installation image created earlier using Sysprep was utilized.